


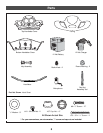
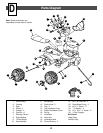

Assembly
Steering
Column
Handlebar
Assembly
Neck
Groove
Bottom
Handlebar
Cover
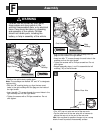
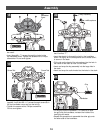
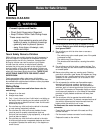
• Fit the bottom handlebar cover onto the end of the
steering column. Make sure the rim on the bottom
handlebar cover fits into the hole in the vehicle body.
• Fit the handlebar assembly, neck side down, onto the
end of the steering column. Make sure the handlebar
arms fit into the grooves in the bottom handlebar cover.
Handlebar
Steering
Column
Bottom
Handlebar
Cover
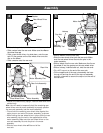
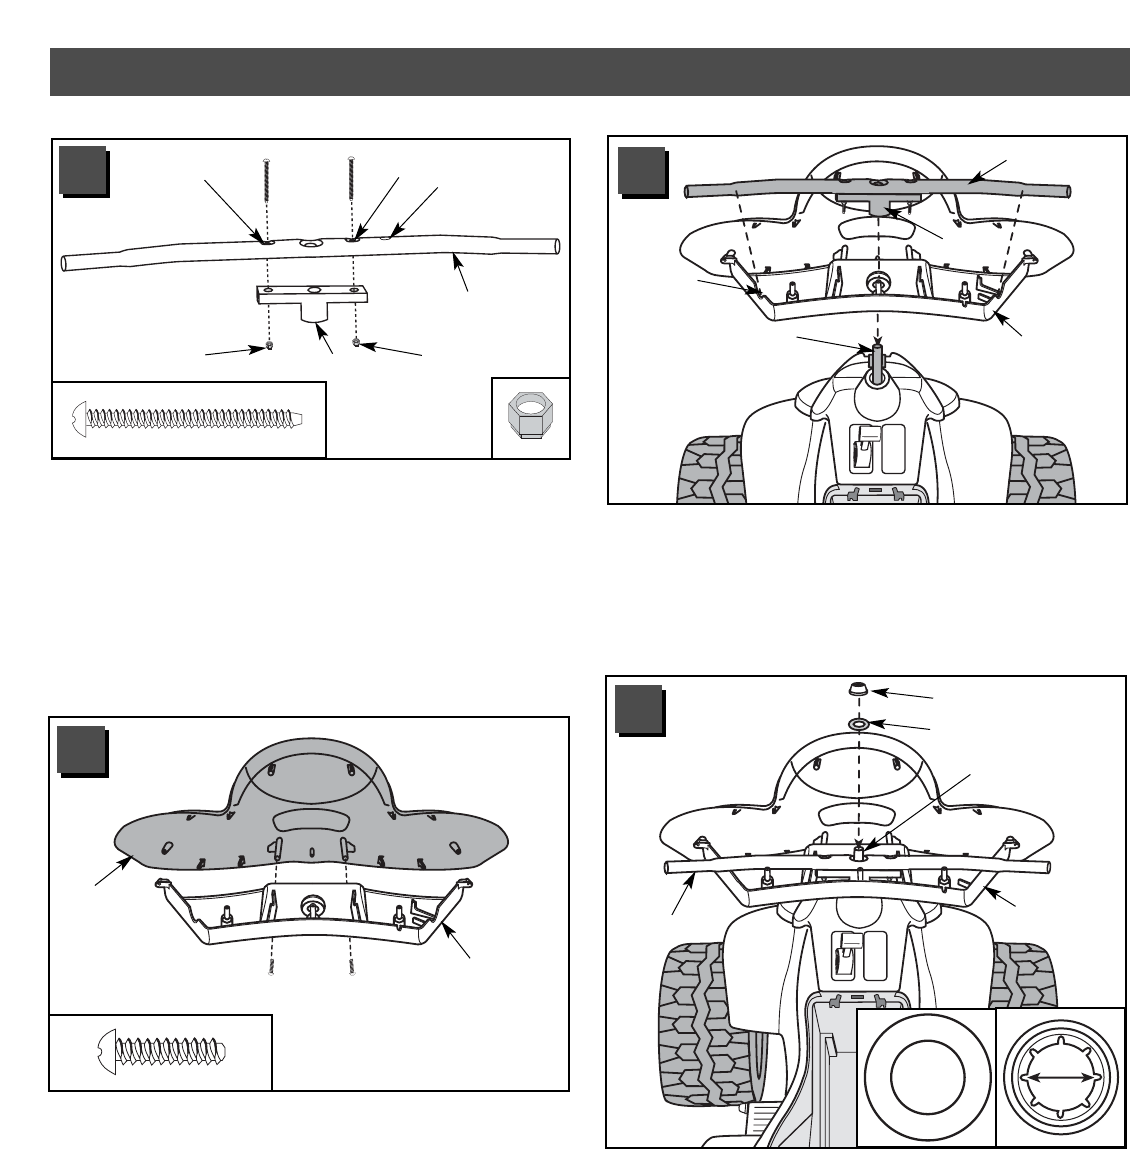
Cap Nut
Hint: You may want the help of another adult to support
the steering column near the steering linkage while
fastening the handlebar to the steering column.
• Push the handlebar firmly to be sure the bottom
handlebar cover and the handlebar are
fully seated.
• Slide a washer onto the steering column.
• Fit a .437 cap nut on the end of the steering column.
Tap the cap nut with a hammer to secure it on the end
of the steering column.
• Pull up on the handlebar to be sure the assembly
is secure.
Washer
13
17
16
15
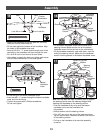
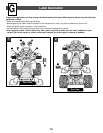
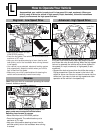
•Fit the fairing to the bottom handlebar cover.
• Insert two #8 x
3
/4" screws through the bottom handlebar
cover and into the fairing.
• Tighten the screws with a Phillips screwdriver.
Do not over-tighten
Bottom
Handlebar
Cover
Fairing
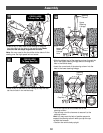
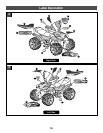
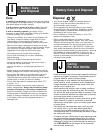
•Position the handlebar so that the side with the three
holes and circular indent face up.
• Fit the neck against the bottom of the handlebar. Align
the holes in the handlebar and neck.
• Insert a #10-32 x 1
1
/2" screw down through each of the
two holes in the handlebar and then through the neck.
• Fit a #10-32 lock nut on the end of each screw.
• Using pliers to steady the lock nuts, tighten each screw
with a Phillips screwdriver. Do not over-tighten.
Hole
Hole
Lock Nut
Lock Nut
Handlebar
Circular
Indentation
Neck
14