


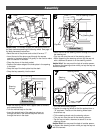

Sport Bar
Light Rack -
Front Half
Light Rack -
Back Half
Tabs
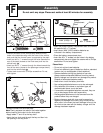
• Position the sport bar upright, as shown.
• Fit and hold the front and back halves of the light rack
against the sport bar. Make sure the two light rack
halves are aligned, and that the screw holes in the light
rack are aligned with the screw holes in the canopy and
the sport bar.
• Snap the tabs on the front half of the light rack into the
slots below the light housings on the rear half of the
light rack.
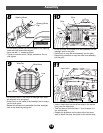
• Insert two #6 x1
1
/
2
" screws through the holes in the back
of the light rack, through the sport bar, and into the front
half of the light rack.
• Tighten the screws with a Phillips screwdriver. Do not
over-tighten.
23
22
20
21
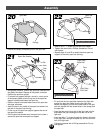
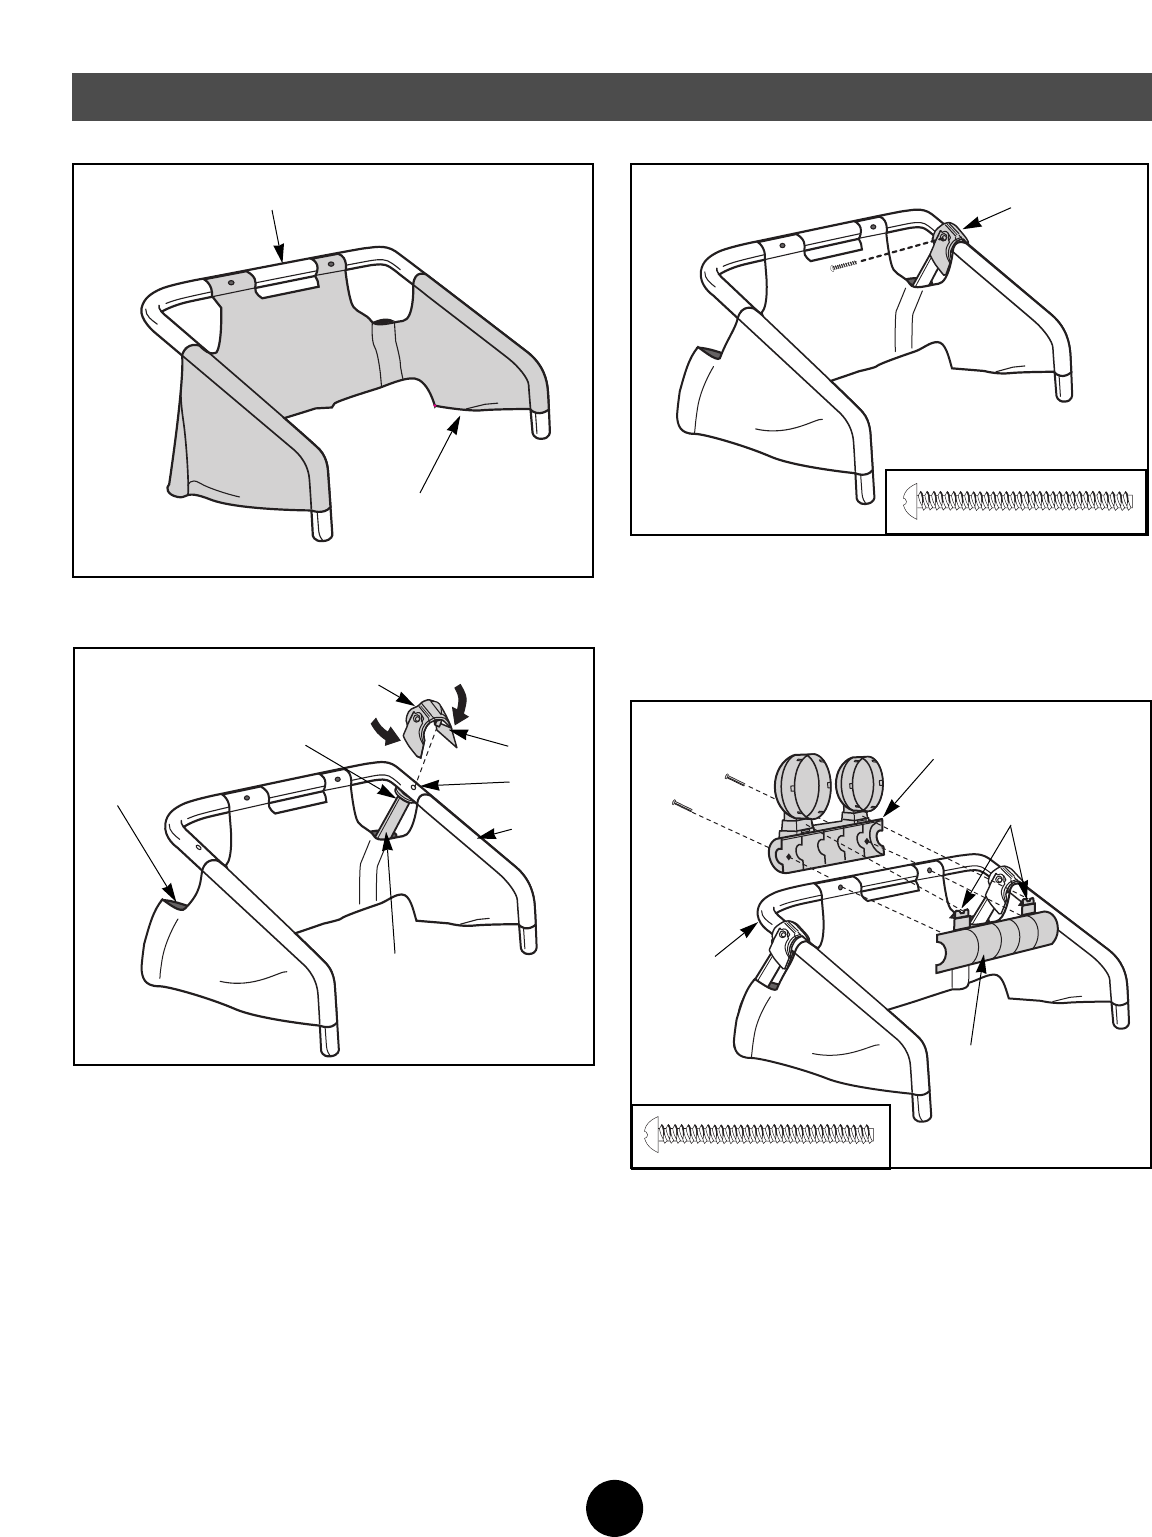
• Extend the canopy completely around the sport bar.
Sport Bar
Canopy
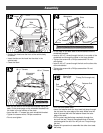
• Using safety scissors, remove the sport bar brackets from
the plastic connector. Dispose of the plastic connector.
• Position the sport bar upright.
• Fit a sport bar support through a tunnel in a rear corner
of the canopy. Make sure the ring end of the sport bar
support is positioned toward the sport bar.
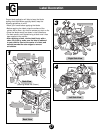
• Position a sport bar bracket above one of the sport bar
side legs, as shown.
• Insert the tab on the inside of the sport bar bracket into
the hole in the sport bar side leg.
• Fit the ring on the sport bar support against the end of
the sport bar bracket.
• Fold the sport bar bracket over the sport bar to close it
around the sport bar and sport bar support.
Sport Bar Bracket
Tunnel
Sport Bar
Support
Tab
Ring
Hole
Side
Leg
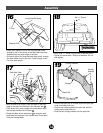
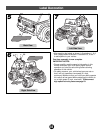
• Insert a #6 x 1
1
/
2
" screw into the sport bar bracket.
• Tighten the screw with a Phillips screwdriver. Do not
over-tighten.
• Repeat steps 21 and 22 to attach the other sport bar
support to the other sport bar side leg.
Sport Bar
Bracket
Assembly
15