


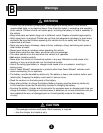


5
6
7
11
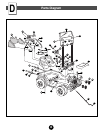
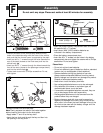
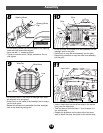
Steering
Column
Hole
Bottom View
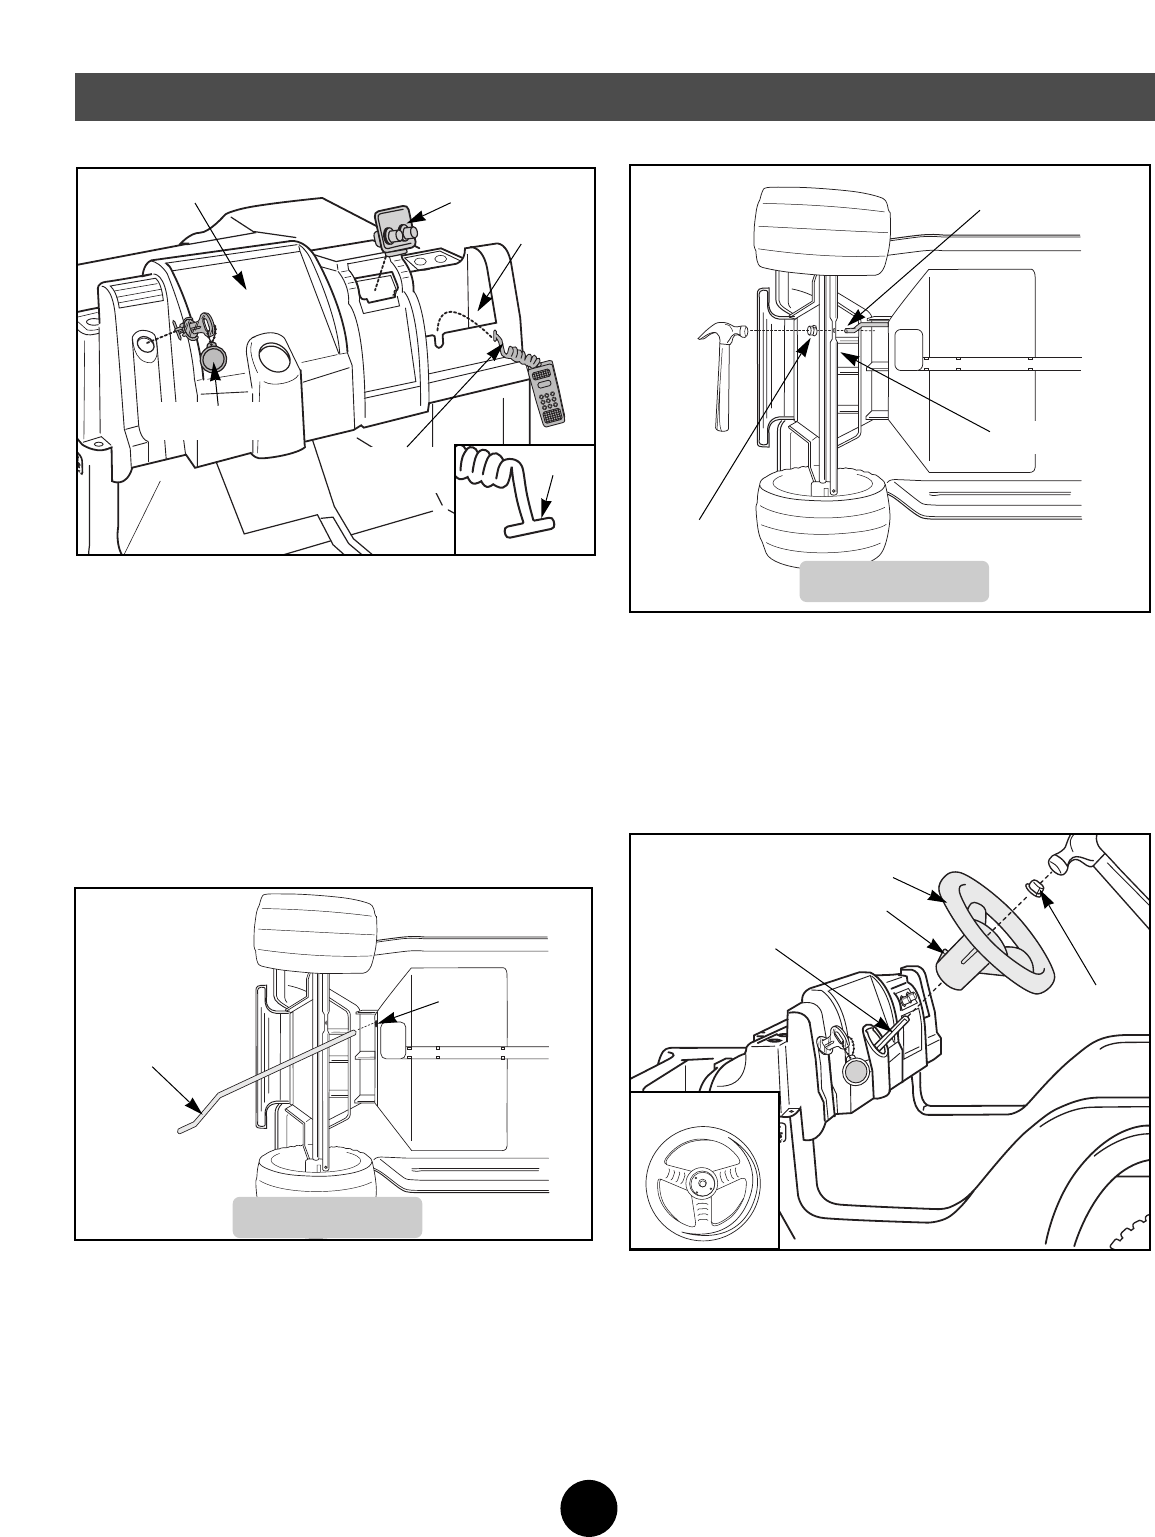
• Wipe the steering column with a paper towel to remove
any excess lubricant.
• Turn the vehicle body on its side.
• Insert the straight end of the steering column up
through the hole in the vehicle body wall and out
through the hole in the dash.
• Insert the end of the steering column through the hole in
the steering rod.
• Fit a cap nut onto the end of the steering column.
• While supporting the steering column, tap the cap nut
with a hammer to secure it on the steering column.
Helpful Hint! You may want the help of another person
to support the steering column while you tap the cap nut
with the hammer.
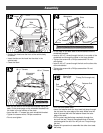
Steering Rod
Cap Nut
End of Steering Column
Bottom View
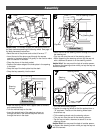
• Turn the vehicle body upright.
• Position the steering wheel so that the spokes form a
“Y” as shown. The tab on the steering wheel stem
should face up.
• Fit the steering wheel onto the steering column.
• Fit a cap nut onto the end of the steering column.
• Tap the cap nut with a hammer to secure it on the
steering column.
Helpful Hint! You may want the help of another person
to support the steering column while you tap the cap nut
with the hammer.
Steering Wheel
Cap Nut
Steering
Column
“UP”
Tab
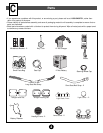
Assembly
4
1
2
3
4
5
6
7
8
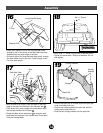
Dash
Knob Plate
Pocket
Key Assembly
Phone
Cord
Helpful Hint! It is easiest to apply the decorative labels to
the dash before assembling the steering wheel. See page 17
for label placement instructions.
• Bend the end of the phone cord so that it forms a “T”.
• Insert the end of the phone cord through the square
opening in the dash pocket. Pull gently on the cord to make
sure it is secure in the dash.
• Place the phone in the dash pocket.
• Position the bottom edge of the knob plate in the opening
in the dash.
• Snap the top of the knob plate into the dash.
• Snap the key assembly into the dash.
T-End