


6
1. If you are installing a DriveRight 600E OBD but not using the digital
inputs, go to Step 10 of this procedure.
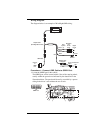
2. Butt splice the red fuse holder to the red wire from the adapter cable.
3. Tap the red fuse holder to an unswitched +12 V source using the in-
line splice provided with your DriveRight or using a fuse tap con-
nector (not included) appropriate for your vehicle.
You can obtain +12V from several places. Usually, you can easily
obtain +12V from the fuse box using a fuse tap connector (not sup-
plied) or using the supplied in-line splice connectors to tap into a
known circuit that does not involve safety related equipment such as
headlights, tail lights, air bag, etc. Possible candidate wires include
those from the cigarette lighter, dome light, glove compartment
light, clock, tail gate light, or other convenience functions.
If you are getting +12V from your fuse box, use a fuse tap connector
appropriate for your vehicle.
4. Butt splice the black ground wire from the adapter cable to black
ground wire included with your DriveRight.
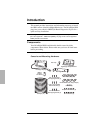
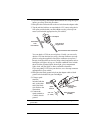
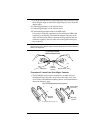
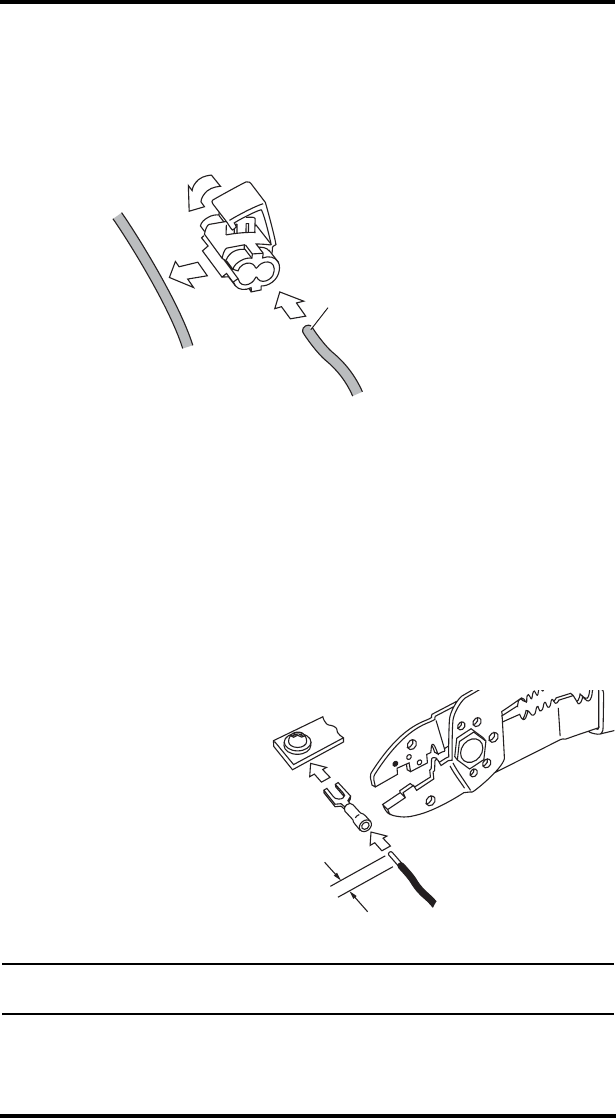
5. Crimp a spade
terminal,
included with the
unit, to the other
end of the black
wire. Refer to the
illustration.
6. Connect the
spade terminal to
a vehicle chassis
ground.
Note: Use a multimeter to test the vehicle chassis ground before connecting to the
ground wire.
In-Line Splice
Unswitched
+12V
from Vehicle
Trim off flush
stripped wire
Red +12V Wire with Fuseholde
r
Crimp Tool,
22-18 AWG Position
(red dot)
Vehicle
Ground
Spade
Terminal
Black Ground Wire
(22 AWG)
3/16 - 1/4"
(5 - 6 mm)