


5
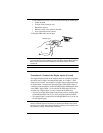
Look in the follow areas if you have trouble finding the OBDII port:
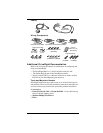
• Under the dash
• In front of the passenger seat
• Behind the ash tray
• Behind a small access panel in the dash
• In or around the center console
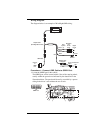
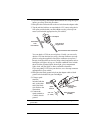
2. Plug the OBD cable into the port.
Note: The indicator light blinks three times when first plugged in, then blinks twice per
second until the connector establishes communications with the OBDII computer.
When communication has been established, the indicator blinks once then
remains off.
Note: The ignition must be ON to establish communication.
Note: When the vehicle is driven, the indicator blinks once for each speed reading.
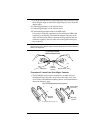
Procedure 2: Connect the Digital Inputs (if used)
Two digital inputs located on the adapter cable are available to monitor
the on/off state of lights, including brake lights, or of other 12 VDC
electrical accessories. An example of a digital input configuration may
be Digital Input 1 connected to the brake lights while Digital Input 2
connected to the headlights. In the DriveRight Fleet Management Soft-
ware (FMS), Digital Input 1 is recorded in the GPS table and in the
accident logs. Digital Input 2 is only recorded in the GPS table.
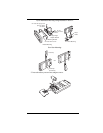
• You can record the digital input status during a trip by enabling GPS
in DriveRight FMS, even if you aren’t using the optional module.
• The adapter cable is required for DriveRight 600
E even if you do not
use the digital inputs.
Note: Connecting the digital inputs can be hazardous to both the installer and your
vehicle’s electrical system if not done by an experienced installer. This manual
assumes you are aware of the inherent dangers of working in and around a vehi-
cle and have a working understanding of electricity.
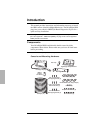
OBD Cable
OBDII Port
Indicator Light