


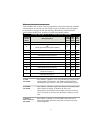

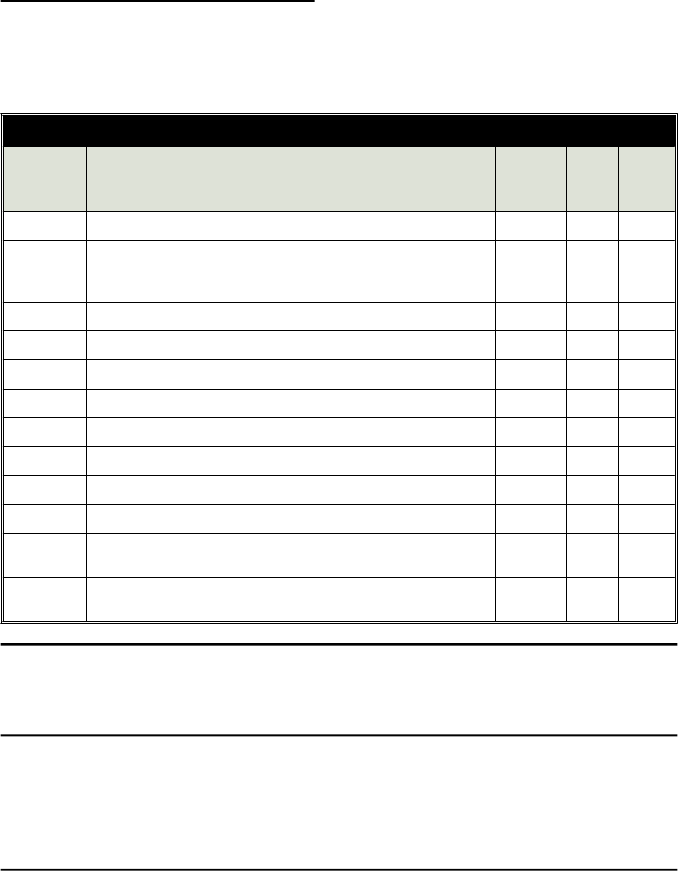
What each button/channel does
Your XL4000 remote controls come pre-programmed so that certain channels command
certain functions. If you wish, you can actually assign any channel except 9 through 12
to any function (see pages 20-24). The following chart indicates what each remote
control channel number does, and how to transmit each channel number.
Factory settings of the 12 remote control channels
Transmitting
channel
number:
Causes the system to:
Press the
LevelShift
button?
How
many
times?
Press
button
number
1
arm or disarm and lock or unlock the doors no — 1
2
optionally turn on the headlights (if the system is armed)
AND
optionally pop the trunk (if the system is disarmed)
no — 2
3
silently arm or disarm no — 3
4
activate optional accessory function #1 no — 4
5
activate optional accessory function #2 yes once 1
6
activate optional accessory function #3 yes once 2
7
activate optional accessory function #4 yes once 3
8
activate optional accessory function #5 yes once 4
9
remotely enter or exit valet mode (see page 15) yes twice 1
10
activate optional accessory function #6 yes twice 2
11
remotely adjust sensitivity of the Piezo Sensor’s
primary zone (see page 17)
yes twice 3
12
remotely adjust sensitivity of the Piezo Sensor’s
warning zone (see page 17)
yes twice 4
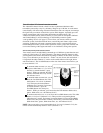
TO ARM
THE SYSTEM . . . . . . .
Press button 1 (channel 1) once. You will hear two chirps and the
parking lights will flash twice. The dashboard LED will flash
repeatedly and your vehicle’s door locks will automatically lock.
TO DISARM
THE SYSTEM . . . . . . .
Press button 1 (channel 1) again. One chirp and one parking light
flash confirms disarming. In addition, the doors will
automatically unlock and the interior lights will turn on and stay
on for 30 seconds or until you start the engine, whichever occurs
first.
TO SILENTLY
ARM OR DISARM
THE SYSTEM . . . . . . .
Press button 3 (channel 3). Your XL4000 system will arm or
disarm with all the indications noted above except for the chirp
acknowledgments.
11