


128-8604
7 of 8
2. Shut off the vehicle using the keychain transmitter by pressing and releasing
the remote start transmitter button a second two times in succession.
3. Within 10 seconds of step 2, activate the RF start command two times. In other
words, press and release the transmitter button 4 times in succession.
The parking lights will flash 4 times indicating the timed start mode is activated.
CANCELING THE AUTOMATIC START UP TIMER
To cancel the automatic start up timer do one of the following;
1. Start the vehicle manually with the use of the ignition key and depress the brake pedal.
2. Remote start the vehicle using your keychain RF transmitter.
And then shut off the vehicle using the keychain RF transmitter.
On Glass Mounted Push-Button SAFETY CONTROL SWITCH
The Push-Button LED safety control switch allows you to temporarily disable the remote
starting function of the system. This recommended whenever the vehicle is being serviced. To
place the system in the service mode:
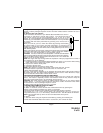
1. With the system disarmed/unlocked, and the ignition switch off Press and Hold the push-
button switch found on the glass mounted receiver assembly.
2. Turn the ignition switch on, off, on, off, on, off.
3. The LED begins to flash two short flashes followed by one long flashes and continues
this pattern until returned to normal mode of operation.
This puts the unit into the R/S Override mode indicating that the remote start is in the service
mode and will not start from RF or any other input Posse or otherwise.
To Exit R/S Override Mode
1. With the system disarmed, Press and Hold the push-button switch on.
2. Turn the ignition switch on, off, on, off, on, off.
3. The LED turns off indicating that the R/S unit is fully functional one again.
BATTERY REPLACEMENT
Your one button transmitter includes a battery #GP27a that will need to be
replaced from time to time. If you notice diminished range, or if the LED on
the transmitter lights dimly, the battery should be replaced. To do so:
1. Remove the 0 point philips head screw found at the lower portion in the rear of the case.
2. Carefully separate the two transmitter case halves.
3. Remove the battery noting the proper orientation/polarity of the battery. Properly dispose of
the discharged battery.
4. Install the new battery being certain to correctly arrange the proper polarity.
5. Carefully close the case halves, finish by re-install the screw removed in step 1.