128-7409
6 of 8
6
current time and when the timer reaches zero, the transmitter will emit a tone or vibrate
dependent on your preferred setting. See chart for setting the count down time for this
feature.
Valet: (alarm and combination alarm remote start systems only)
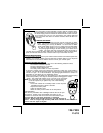
When the System is in the valet mode, the icon shown will show in the display when the
status check buttons are activated.
Parking Meter Counter:
The transmitter has a built in timer that can count down from 10, 20, 30, 60, 90, or 120
minutes. This feature is useful when parking the vehicle in a metered parking lot. If the
time on the parking meter is 30 minutes, you can set the count down timer to 20 minutes.
The transmitter will emit a beep tone when the timer expires to remind you to get back to
your vehicle. To use the parking meter timer, Press the "F" + Option buttons more than one
time. Once activated the Count Down Timer as described above. Activating the "F" +
Option a second time will set the parking meter count down to 10 minutes, a third time will
set it to 20 minutes, a fourth time will set it to 30 minutes, etc... up to 120 minutes, then the
cycle will repeat, countdown activation, 10 minutes, 20 minutes and so on. Once you
stop at a setting, the unit will count down and when it reaches the set time will alert you
with a beep tone as a reminder that you have to get back to the vehicle.
Alarm Clock Mode:
The transmitter has a built in alarm clock that can be set to beep at a certain time each
day. The alarm clock mode must be set, and the feature turned on. To use this feature
please refer to the chart on the following page.
NOTE: Your system is shipped with two transmitters, 1 two way, shown on the left and
the one way transmitter, shown right. The one and two way transmitters are pro-
grammed from the factory with separate lock & unlock buttons, the trunk/key icon button
operates remote start and remote trunk release where applicable. The option button and
any button combination may be programmed to operate various options. Consult your
installation center for button programming and options that may have been added to your
vehicle. Although this is the default programming from the factory, this can be changed
for you to any configuration you prefer. Please refer to the transmitter program guides
included with your kit.
NOTE: A maximum of two of either style transmitter may be programmed to your unit.
Power Save Feature. Press the "F" and Lock buttons simultaneously to toggle this
feature on and off. With this mode on, the battery in the transmitter will go into a power
down mode when the unit is disarmed.
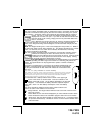
Temperture Start Mode. This icon will appear when the temp start mode is
activated. The vehicle will start one time automatically when the temperture
reaches 0*. Caution, Be certain vehicle is outside before activating this mode. To
toggle this feature on of off, from the Locked/Armed mode, press the Option and
Lock buttons simultaneously. (Available on certain remote start models only).
Throughout this manual you will find screen shots where they apply if using the two way
transmitter. If using the one way transmitter while the two way transmitter is within
range of the vehicle, the two way transmitter will update it's screen.
Toggling Between Vibrate, Chirp, or Both Chirp & Vibrate:
Press the "F" button for 5 seconds to enter the transmitter program mode, press the
trunk/key button 8 times to advance to the vibrate/tone selection, press the "F" button to
select this option, press the trunk/key, or the option button to turn this feature on or off,
press "F" for 5 seconds to exit the transmitter program mode.


