


INSTALL MANUAL REMOTE VEHICLE SECURITY
PAGE 6
Step 3- Test And Adjust The Shock Sensor (see page 3)
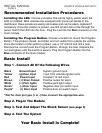
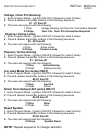
Recommended Installation Procedures
Basic Install
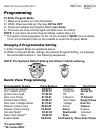
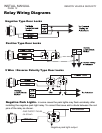
Installing the LED- Choose a location that will be highly visible when the
LED is installed. Most vehicles are equipped with knock out panels in the
dashboard, these panels are easily removable and can be easily replaced if
necessary. Once the location is picked, use drill bit and drill a hole through the
panel. Test fit the LED into the hole. Plug the Led into the Red connector on the
main module.
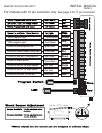
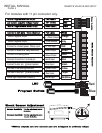
Installing the Program Button- Choose a location to mount the Program
Button. This location should be hidden and not visible from outside the vehicle.
Once the location of the switch is picked, use a 1/4” drill bit and drill a hole.
Remove the nut and push the Program Button through the hole. Replace the
nut and tighten until the switch is secure. Plug the Program Button into the
Blue connector of the main module.
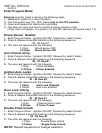
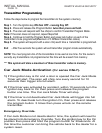
Step 1 - Connect All Of the Following Wires
Black Ground Input System ground input.
Yellow Ignition Input Input from vehicles ignition wire.
Red Power Input Constant 12 Volt input.
Brown (+) Siren Output Positive output for siren.
White (+) Park lights Positive park light output.
Green* (-) Door Input Negative door pin switch input.
Purple* (+) Door Input Positive door pin switch input.
*Test for door pin type (+ or -) then connect the appropriate wire.
Step 2- Plug-In The Module
Step 4- Test The System
Your Basic Install Is Complete!