10 Pin Power Connector
Step 2- Plug-In The Module
Step 3- Test And Adjust The Shock Sensor
Your Basic Install Is Complete!
Step 4- Test The System
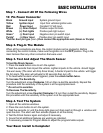
Step 1 - Connect All Of the Following Wires
When all the connections are done, the control module can be plugged in. Before
connecting the control module, make sure the ignition is in the OFF position. Plug in the
main harness then any other connectors that were used.
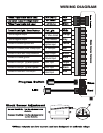
Black Ground Input System ground input.
Yellow Ignition Input Input from vehicles ignition wire.
Red Power Input Constant 12 Volt input.
Brown (+) Siren Output Positive output for siren.
White (+) Park lights Positive park light output.
Green* (-) Door Input Negative door pin switch input.
Purple* (+) Door Input Positive door pin switch input.
*Test for door pin type (+ or -) then connect the appropriate wire (Green or Purple)
To test the Shock Sensor.
1. Press the Lock button once to arm the system.
2. Wait five seconds then impact the vehicle. Lighter impacts to the vehicle should trigger
the warn away (The siren will chirp three times). A harder impact to the vehicle will trigger
the full alarm.(The siren will activate for 60 seconds then turn off).
3. To deactivate the alarm when triggered, press the unlock button twice.
To Increase The Sensitivity.
Turn the adjustment screw Clockwise 1/4 turn then re-test the sensitivity. Repeat this
procedure until the sensitivity of the system is at the appropriate level.
** Do not set to sensitive.
To Decrease The Sensitivity.
Turn the adjustment screw Counter Clockwise 1/4 turn then re-test the sensitivity. Repeat
this procedure until the sensitivity of the system is at the appropriate level.
1. Open all the vehicles windows.
2. Press the Lock button to arm the system.
3. Wait five seconds (or until the dome light goes out) then reach in through a window and
open the door. The alarm will then activate (repeat on all the doors).
4. Test the Shock Sensor again and adjust if necessary.
5. Insure that all additional features are working as intended.
6. If necessary proceed to Program Mode to adjust the programmable outputs.
BASIC INSTALLATION


