43
GB
Making various printing (MONITOR OUT mode)
Digital Photo Printer -DPP-FP50_GB_UC2/CED/CEK/AU_ 2-599-949-11(1)
x Adding a calendar
1
Press g/G/f/F to select
(Calendar) and press ENTER.
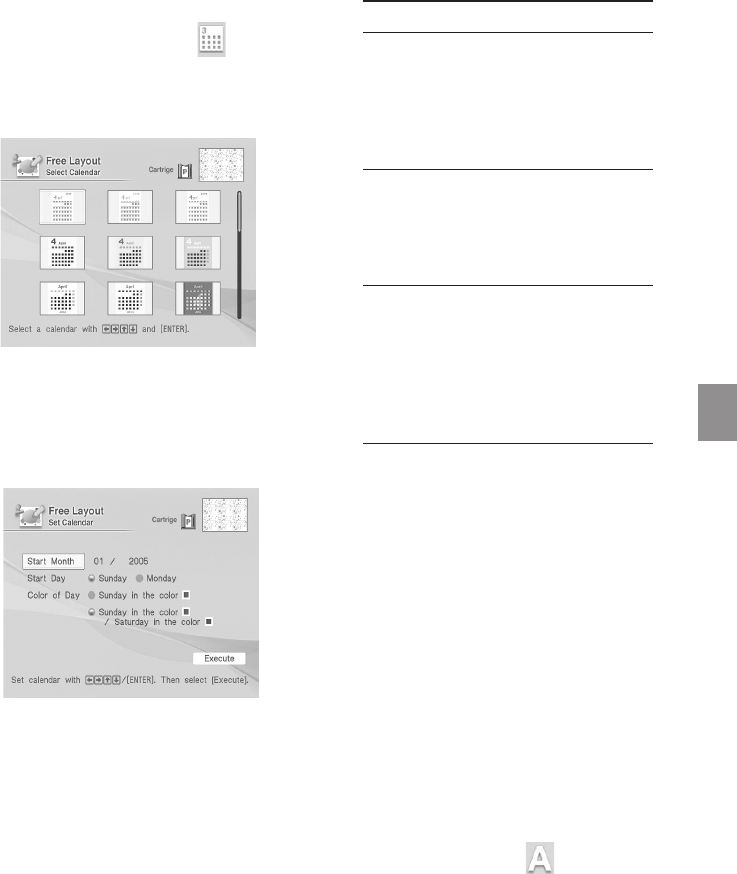
The window used for selecting a
calendar type is displayed.
2
Press g/G/f/F to select the
desired calendar type and press
ENTER.
The calendar setting window is
displayed.
3
Set the calendar.
Press f/F to select the following
items and then press g/G to select an
option.
Item Procedures
Start Month
Set the first month and the year
starting the calendar. Press g/G
to select the month or year and
press f/F to set the number.
Press ENTER.
Start Day
Set the day of the week (placed
furthest left in the calendar).
Press g/G to select “Sunday” or
“Monday”. Then press ENTER.
Color of Day
Set the color of Sunday and
Saturday to be displayed in the
calendar. Press G and then f/F
to select the desired color for
Sunday and Saturday. Then press
ENTER.
4
Press g/G/f/F to select “Execute”
and then press ENTER.
The window used for adjusting the
calendar size and position is
displayed.
5
Adjust the size and position of the
calendar.
For information on adjustment, see
step 8 on page 41.
6
Press g/G/f/F to select “Execute”
and then press ENTER.
The selected calendar is pasted on the
image.
x Superimposing characters
Press g/G/f/F to select
(Text) and
press ENTER.
The keyboard is displayed. For how to
enter characters, see “Superimposing
characters” on pages 35 to 36.
001GBFP5008TV3-UC/CED.p65 3/11/05, 4:22 PM43


