QGE 100 • Software Configuration and Control 29
Configuring a QGE 100
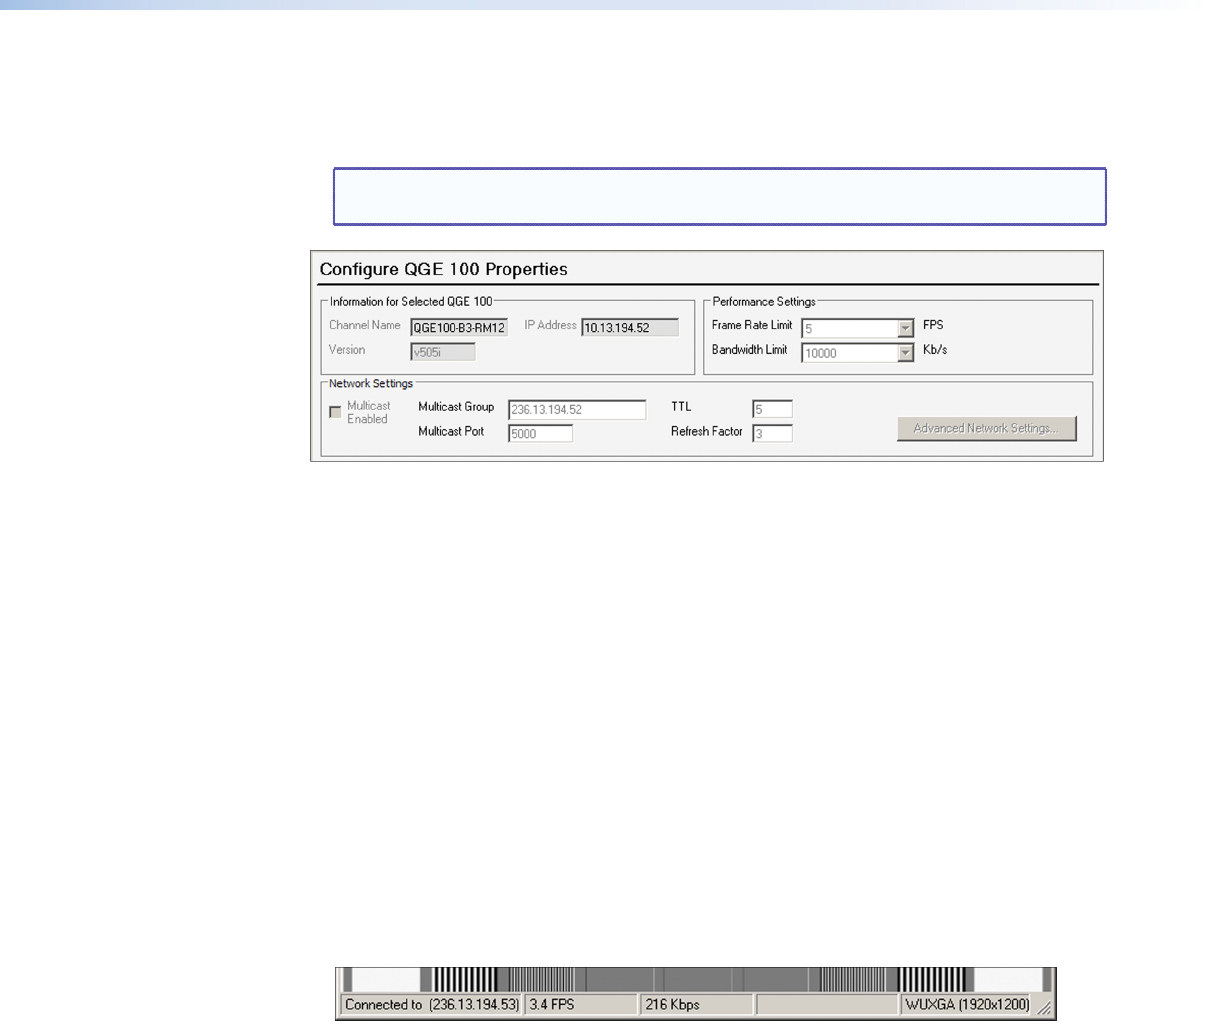
The Configure QGE 100 Properties section of the main window contains fields in which
you can specify or change various properties of a selected QGE 100.
NOTE: You must be logged in as Administrator in order to edit these sections (see
“Logging In and Out (Administrator Level)” on the previous page).
Figure 20. Configure QGE 100 Properties Section of the Administrator Window
To change any of the settings described in the following sections, follow this general
procedure:
1. Log in at the administrator level.
2. From the QGE 100 List, select the name of the device that you want to congure.
3. If required for the setting you want to change, click the Advanced Network Settings
button (located in the Network Settings section of the main window).
4. Enter new settings as desired.
5. When nished, click the Apply button in the lower-right corner of the window to
implement your changes.
Configuring performance settings
In the Performance Settings section, select the desired bandwidth and frame (refresh) rates
of the QGE from the Bandwidth Limit and Frame Rate Limit drop-down menus (see
“Optimizing the Encoder Parameters” in the “Reference Information” section for more
information). Your selections are displayed on the status bar at the bottom of the Viewer
window.
Figure 21. Example of Frame Rate and Bandwidth Information on the Status Bar
You can show or hide this information by selecting Frame Rate and Bandwidth from the
View menu on either the Administrator window or the QGE 100 Viewer window (see
“Administrator Viewer menu options” on page 25).
Configuring network settings
The settings displayed in the Information for Selected QGE 100 subsection are for viewing
only; they cannot be changed directly from the main window. To access these and
additional network settings for the selected QGE 100:
1. Click Advanced Network Settings. The Network Settings window opens (see the
illustration on the next page).
2. Configure the settings on this window as desired.
3. When nished, click OK to save your settings.


