


WHISTLER FEATURES FEATURE DESCRIPTIONS
Battery Installation
P
P
l
l
e
e
a
a
s
s
e
e
c
c
h
h
a
a
r
r
g
g
e
e
b
b
a
a
t
t
t
t
e
e
r
r
i
i
e
e
s
s
o
o
v
v
e
e
r
r
n
n
i
i
g
g
h
h
t
t
b
b
e
e
f
f
o
o
r
r
e
e
f
f
i
i
r
r
s
s
t
t
u
u
s
s
e
e
!
!
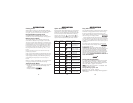
Remove the battery compartment cover by
sliding the cover to the edge of the unit and lift
up. Observing corr
ect polarity (+) and (-), insert
batteries as shown. Reinstall battery
compartment cover. Alkaline batteries are not
recommended.
When replacing the Ni-MH rechargeable batter-
ies we recommended batteries that have a
power rating of 2100 mA or higher.
N
N
o
o
t
t
e
e
:
:
DO NOT mix battery types as this can
damage the batteries. Lithium batteries ar
e
recommended for use in cold temperatures.
I
I
m
m
p
p
o
o
r
r
t
t
a
a
n
n
t
t
:
:
Ni-Cd batteries are not recommend-
ed. These batteries will not pr
ovide enough
capacity to be useful. Replace the Ni-Cd’s with
Ni-MH type rechargeable batteries.
C
C
a
a
u
u
t
t
i
i
o
o
n
n
:
:
Only use rechargeable batteries in the
optional home battery char
ger. Charging
non-rechargeable batteries can damage the
charger or possibly cause the batteries to
explode. See battery charging section (page 7)
to either charge batteries with the power cord
or home battery charger.
INSTALLATION
1
9
11
10
2
6
4
5
3
7
13
• Battery Operated
With Built-in Battery Charger
• Replaceable Trim Rings
• Total Band Protection
™
• POP
™
Mode Detection
• Blue LCD Text Display
• High Gain Optical Lens
• Stay Alert
™
• 360°Total Perimeter Protection
™
• VG-2 Cloaking
™
Technology
• 3 City Modes
• Quiet/Auto Quiet Modes
• Battery Saver
• Setting Saver
• Alert Priority
• Safety Warning System
™
Accessories:
Windshield Bracket Kit, Rechargeable Batteries,
Straight Power Cord, Home Battery Charger &
2 Additional Color Trim Rings
12
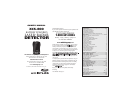
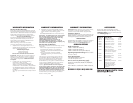
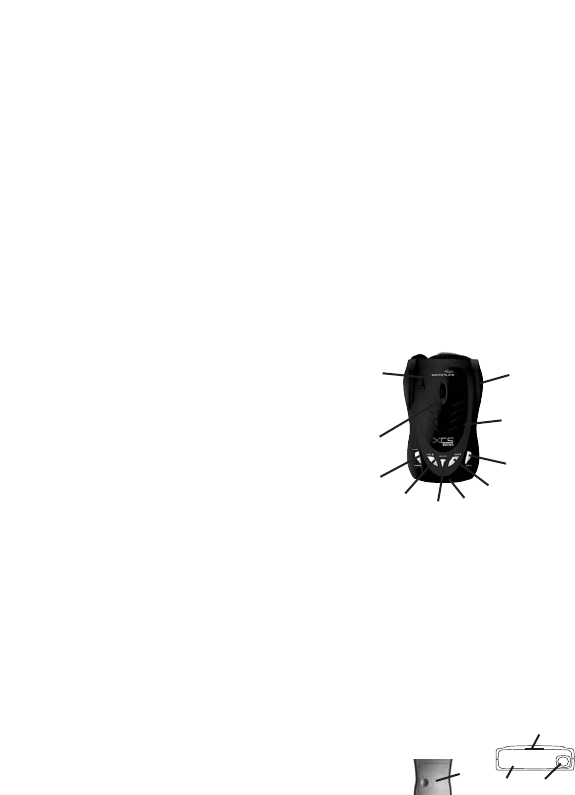
XCS-800
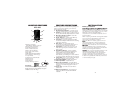
Whistler’s ergonomic and user-friendly design pro-
vides a new level of operating convenience.
Special features include:
1. Bracket Release Button – provides quick
and easy r
elease of the mounting bracket.
2. Speaker – provides distinct audio warnings
for X, K, Ka band radar, safety radar, laser and VG-2.
3. Mounting Bracket Location – slot holds
mounting bracket firmly.
4. Radar Antenna – compact, high-efficiency
antenna receives radar signals.
5. Front Laser – high gain optical lens provides
increased sensitivity and field of view for leading-
edge laser detection
6. Rear Laser – an integrated optical
waveguide provides superior detection of
laser signals transmitted from behind.
7. City Button - reduces the annoyance of
false alerts typically encountered in urban
driving areas.
8. Quiet/Menu Button - pressing QUIET
before a signal is detected engages Auto
Quiet Mode. Pressing QUIET during a
radar/laser encounter silences audio
alerts.(Pressing and holding for 2 seconds allows
you to enter Option Select Mode—see page 12)
9. Power/Dim
-
-
turns unit on/off and engages
Backlight settings (press and hold).
10. Volume Down Button – adjust volume down.
11. Volume Up Button – adjust volume up.
12. Blue LCD Text Display – provides distinct
visualconfirmation of signals detected, signal
strength, and indicates engaged modes of
operation.
13. Power Jack – provides connection for the
power cord.
14. Battery Compartment – compartment for
which you place the included 4 AA Ni-MH
batteries.
14
8
34
2