


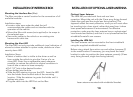
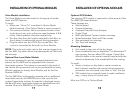

Installing the Control Panel
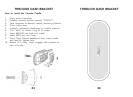
The control panel may be mounted using the through Dash
Bracket or supplied double sided tape. When choosing a
mounting location, consider the ease of viewing the display,
accessibility of controls (remember Mute Mode may be used
frequently), and concealment.
The Pro-3600 Control panel can also be mounted sideways
and even upside down!
Control Panel Mounted with Double Sided Tape.
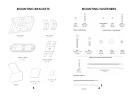
Fasteners can be used to mount the control panel to your
vehicle. Before adhering the adhesive side of the fastener to a
surface, clean that surface with isopropyl alcohol. Use of
double sided tape simplifies control panel installation.
Control Panel Mounted with Through Dash Bracket
Installation instructions are provided on the last page of this
manual. We recommend using a professional installer if you
are not familiar with customized dashboard installations.
Control Panel Cable Connection
Conceal the cable and plug the phone connector into the
DISP port on the iBox.
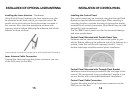
INSTALLATION OF OPTIONAL LASER ANTENNA
15
INSTALLATION OF CONTROL PANEL
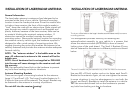
Installing the Laser Antenna - Continued
Using Hook & Loop Fasteners, the laser antenna may also
be mounted to the back side of your rearview mirror. Be
careful not to block the rear facing lens when mounted in
this manner. Also, clean the appropriate surfaces with
isopropyl alcohol before adhering the adhesive side of the
fastener to those surfaces.
Laser antenna mounted to rearview mirror with Hook & Loop Fasteners.
Laser Antenna Cable Connection
Conceal the cable and plug the phone connector into one
of the AUX ports on the iBox.
16