


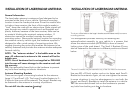
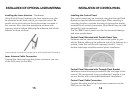

Antenna Cable to the Interface Box (iBox)
Once the antenna is installed, connect the antenna cable to
the quick disconnect interface cable. The antenna cable and
the interface cable have an arrow embossed in each plug.
These arrows must line up to properly to connect the cables
together.
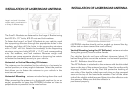
Run the cable along the edge of the engine compartment to
the firewall. Find a location in the firewall where other wires
(or the speedometer cable) enter the passenger compartment
and feed the phone jack connection through. Be careful not
to interfere with or disconnect other wires, cables, or
mechanical systems of your vehicle while routing the antenna
cable. If there is no easy way to route the cable through the
firewall, you can drill a 15/32” hole.
IMPORTANT: Check with the vehicle’s manufacturer to see if
there are any issues with drilling through the firewall.
Caution: When drilling or working around the vehicle’s
firewall, check the other side for any obstructions that might
be damaged.
The interface cable includes a rubber grommet to keep the
weather out of the vehicle. Also, keep the antenna cable away
from any areas in the engine compartment that may become
hot. Cable ties are provided to secure cables at various
points in the engine compartment and under the dash.
11
12
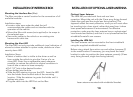
INSTALLATION OF LASER/RADAR ANTENNA
INSTALLATION OF LASER/RADAR ANTENNA
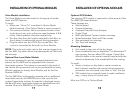
Mount the antenna to the vehicle such that the ANTENNA
window is facing the road surface, sky, right or left of the
vehicle, and the reflector has an unobstructed view of the
road ahead.
Mounted in this position, laser/radar signals are reflected into
the ANTENNA window.
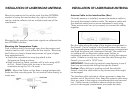
Mounting the Temperature Probe
Find a location that is far enough away from the engine and
radiator heat but still in the airflow for the vehicle. Mounting
the Probe too close to these heat sources will give a higher
than expected result.
• Attach the mountable tie wrap (supplied) to the
Temperature Probe as shown.
• Mark location for Probe, and then drill a hole using a #32
drill bit. Attach Probe with tie wrap in the correct
orientation using the 3.5 x 16 screw.
NOTE: Mount the Probe so that there is space between the
Probe and the mounting area. Do not mount Probe directly to
metal area.