Below the Digital Display are series of six LEDS that light on the following conditions:
WET - Lights when battery type selector is on WET battery type
GEL - Lights when battery type selector is on GEL battery type
AGM - Lights when battery type selector is on AGM battery type.
Float Charge - Lights when automatic charge monitoring is active. This feature allows a battery to maintain its’s charge over
long periods of non use. If there is any loss of power to the charger once power is restored charger will automatically return to
the default settings. Battery selector type would be “gel”
Battery Voltage- Lights when battery voltage is displayed
Alternator Good - Lights when load or not load checks show the alternator is keeping up with the electrical load.
Equalize - A recessed button used to start the equalize process.
CHARGE RATE SELECTION
After charger clamps are correctly connected, plug in the charger to an AC outlet and the charger will show a circulating pat-
tern on the Digital Display. This pattern indicates power is applied. Select proper charge current rate based on battery size.
Press the 2/10/25 AMP push button and the charger will begin charging at 2 amps. Pressing the 2/10/25 AMP push button
again will advance the charge rate to 10A, then 25A. Pressing the switch again will turn OFF the charger output and the dis-
play will show “000”
NOTE: The only time the selected charge rate does not display at the full selected rate is when the battery is
nearly full and charging at either step two or three.The display will be showing a slowing charge rate. To return
to 2A, press the 2/10/25 AMP button. When the battery is fully charged, the charging Complete LED is lit and
“FUL” is displayed on the Digital Display.
It can indicate alternator service may be required.
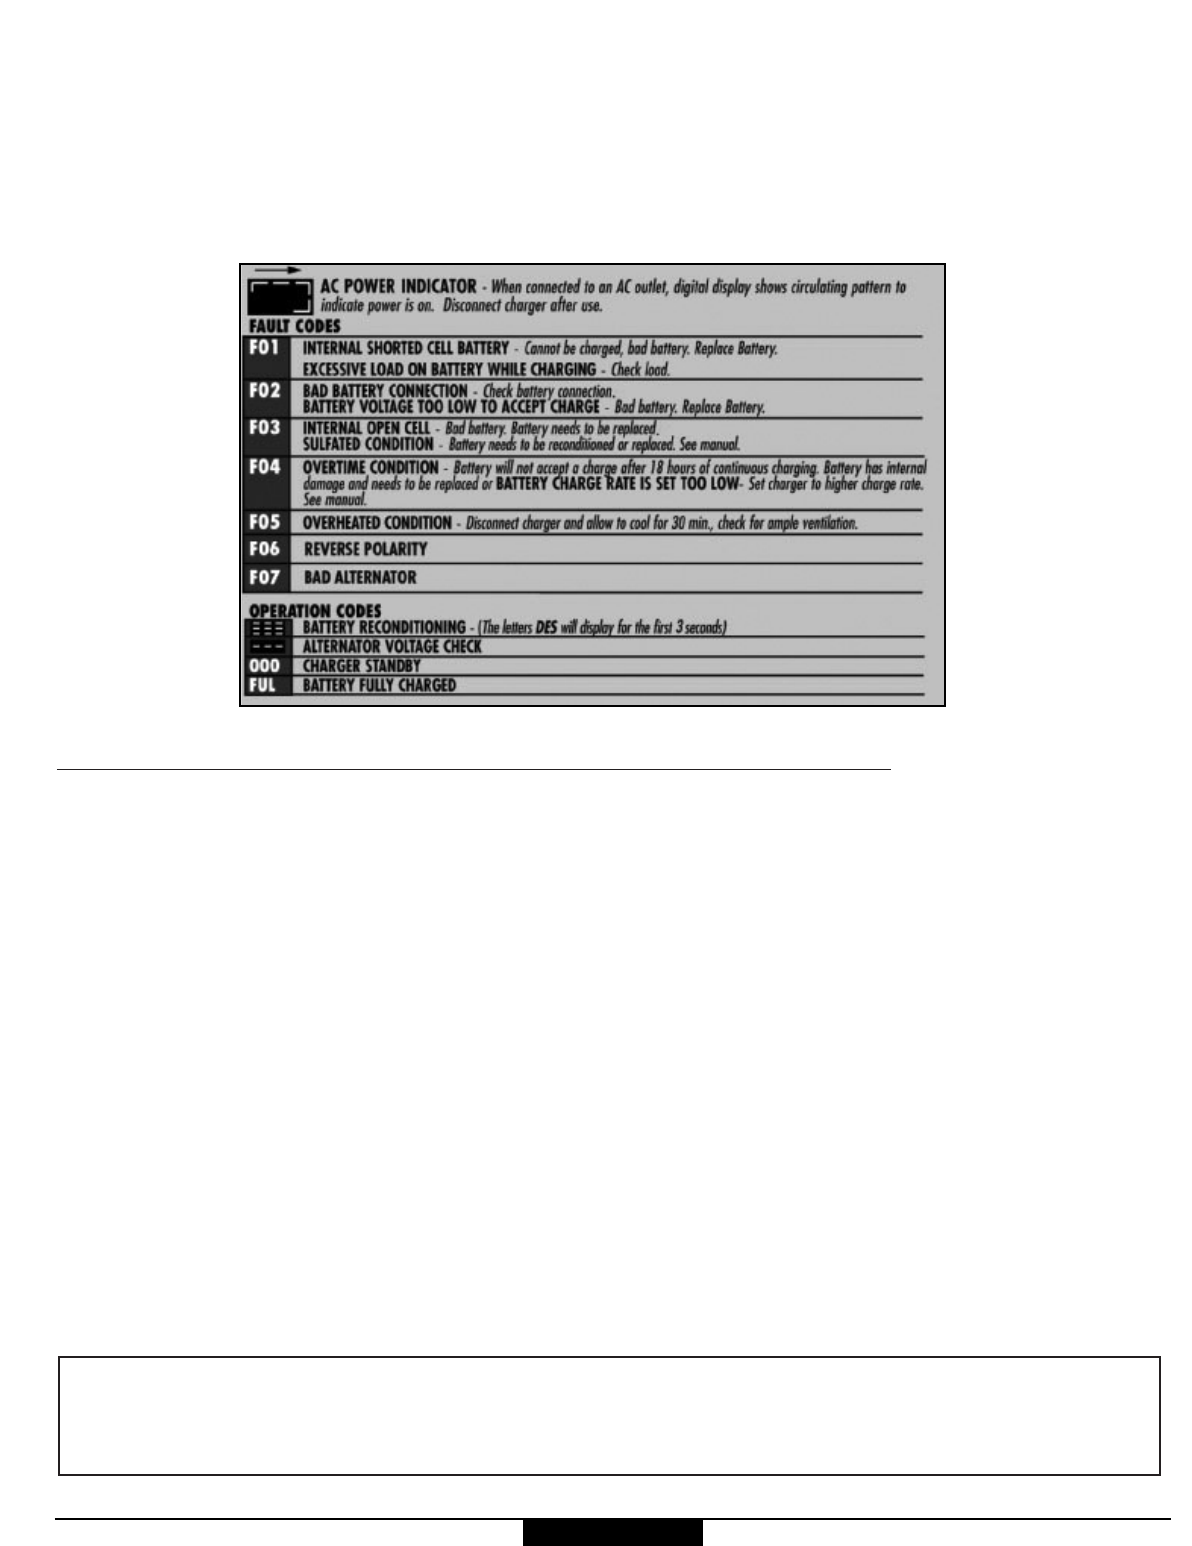
INDICATORS
Large (.375”) 3-character Digital Display in the upper left of the control panel indicates many conditions and/or status codes:
When AC power is applied to the charger, actual charge rate in amps, when the battery is fully charged , battery voltage, fault
codes, operating modes and when the charger is ready for the next mode selection. “Status Codes” are described below
(FIGURE 5) and on the back of charger.
7