


2
b
a
1.3
1.2
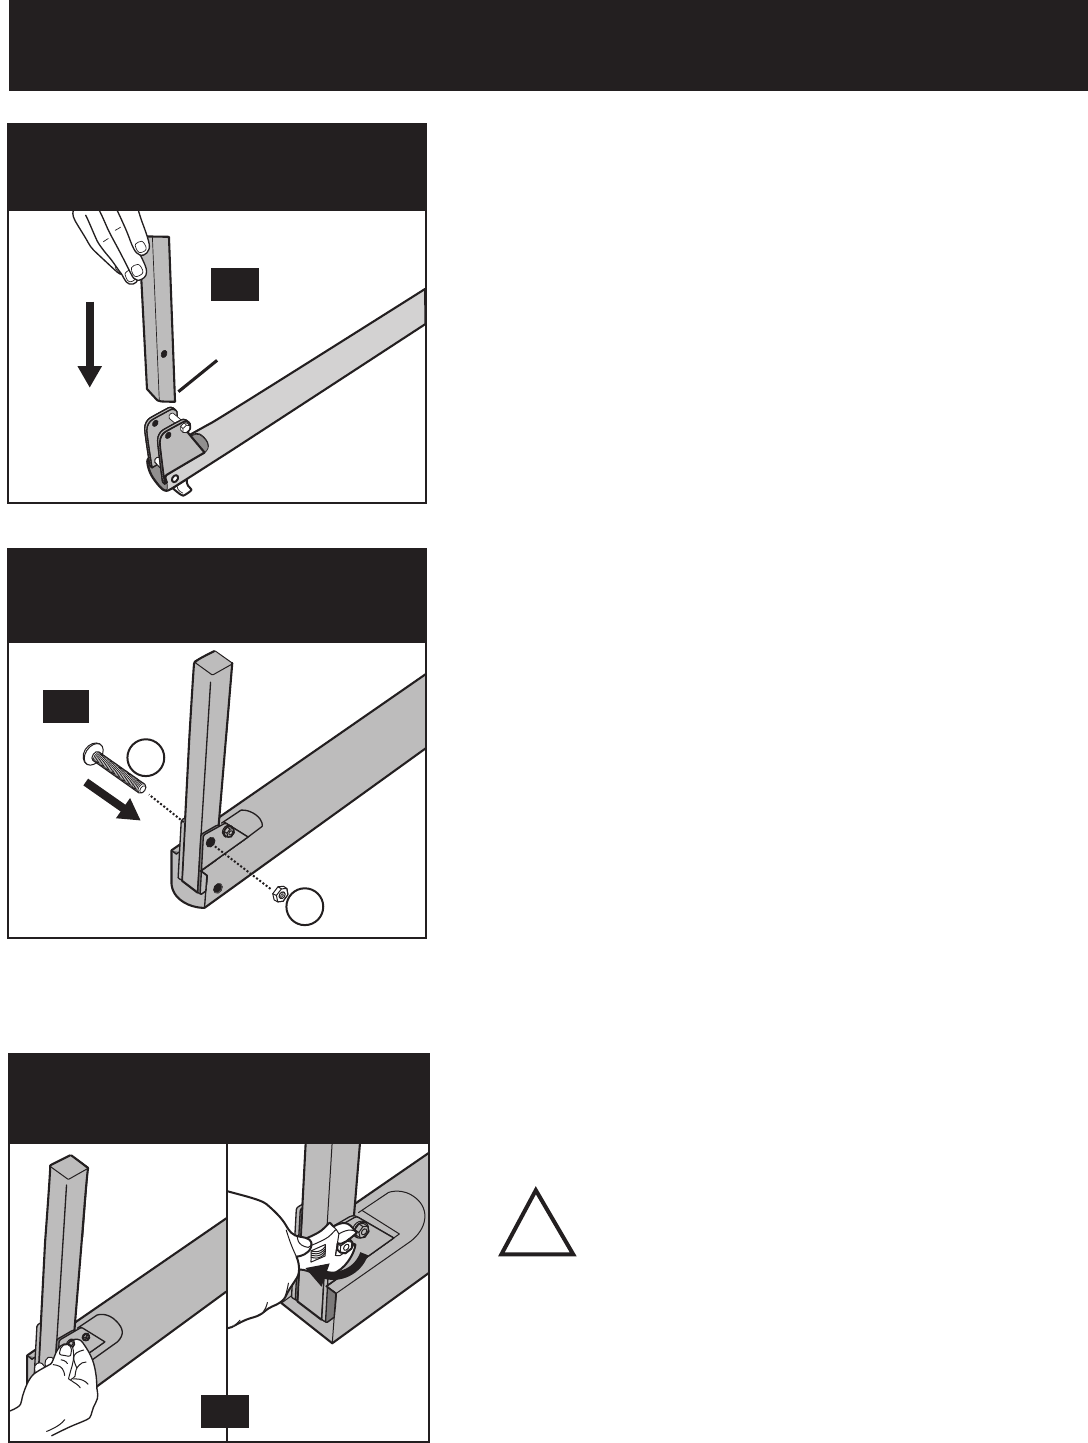
1
1.1
1.3: FIXEZ LE MONTANT HORIZONTAL
FIXEZ LE MONTANT HORIZONTAL
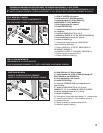
1.2: FIXEZ LE BOULON, LA RONDELLE ET L'ÉCROU
FIJE LA BARRA DEL CODO DE SUJECIÓN
1.2: INSTALE EL PERNO, LA ARANDELA Y LA TUERCA
1.3: FIJE LA BARRA DEL CODO DE SUJECIÓN
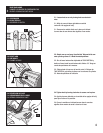
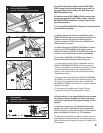
SECURE RECEIVER BAR
1.2: ATTACH BOLT, WASHER & NUT
1.3: SECURE RECEIVER BAR
1.3: Serrez complètement l'ECROU à l'aide d'une clé et
d’une clé 6mm hexagonale.
1.3: Fije la TUERCA con una llave 6mm hexagonal y una llave
para bicicletas hasta que quede apretada.
1.3: Secure NUT with a wrench and 6mm hex key until tight.
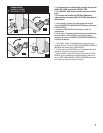
IMPORTANT! ¡IMPORTANTE!
TIGHTEN ALL NUTS! ¡APRIETE TODAS LAS TUERCAS!
SERREZ TOUS LES ECROUS
Other nuts on lower tilt area will be on, but should
be tightened after receiver bar is installed with 5mm hex key!
Las demás tuercas de la zona de inclinación inferior
estarán montadas, pero se deben apretar después
de montar la barra del codo de sujeción una llave 6mm hexagonal.
N’oubliez pas de resserrer les autres écrous de la zone
de basculement inférieure après avoir installé
le montant horizontal d’une clé 6mm hexagonale.
!
IMPORTANT!
Important!
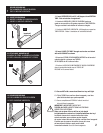
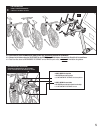
Angled end
1.1: Insérez le MONTANT HORIZONTAL à 90 degrés par rapport au
TUBE VERTICAL. *Notez l’orientation de l’extrémité saillante.
1.2: Insérez le BOULON DU MECANISME DE BASCULE INFERIEUR
dans le montant horizontal avec et l'ECROU DE
BLOCAGE m10 comme illustré.
1.1: Inserte la BARRA DEL CODO DE SUJECIÓN hasta que
quede en una posición a 90 grados respecto al TUBO VERTICAL.
*Tenga en cuenta la orientación del extremo en ángulo.
1.2: Inserte el PERNO DE INCLINACIÓN INFERIOR en la barra del
codo de sujeción y coloque una
TUERCA
DE BLOQUEO de m10 como se indica.
1.2: Insert LOWER TILT BOLT through receiver bar and attach
with m10 LOCK NUT as shown .
1.1: Insert RECEIVER BAR until it is 90 degrees from VERTICAL
TUBE. *Note orientation of angled end!
1.1: INSEREZ LE MONTANT HORIZONTAL
1.1: INSERTE LA BARRA DEL CODO DE SUJECIÓN
1.1: INSERT RECEIVER BAR