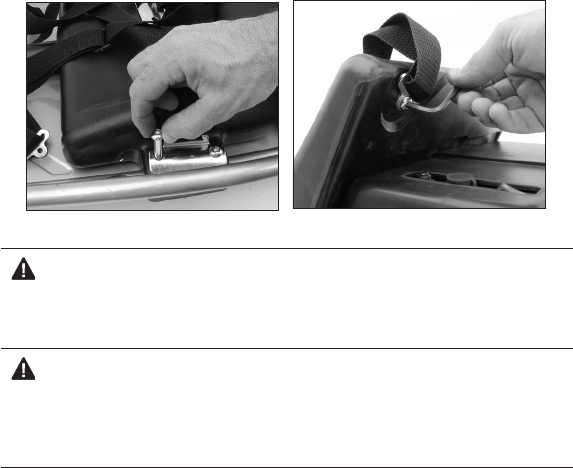
❏ 2D. Optional attaching the seat with seat belt assembly.
Locate the four (4) long seat attachment screw and seat-belt assembly in
the parts bag. Position the seat over the frame and align it with the holes
in the frame. Position the seat-belt anchors with the lap/shoulder assem-
bly on the left side and the receiver latch on right side. Insert the screws
as shown in Figure 5a and tighten. Install the shoulder belt anchor to the
back of the seat as shown in Figure 5b using the supplied screw, tighten
securely.
WARNING: The seat belt arrangement suppled with the Ground Force is
for “play” use only. It
is not an ASTM-approved safety belt system and is not
intended to function as an approved lap/shoulder/seat restraining device. The seat
belt system is not required for normal use. Install and use at your own risk.
NOTE: Although we make every effort to keep our manual up-to-date, if your
Ground Force does not look exactly as shown here, then we may have made
improvements since this document was printed. Check out the Razor website:
www.razor.com for technical updates on the latest service a
nd adjustment
procedures.
❏ 2E. The brake. The Ground Force is fitted with a hand-operated
brake. To use the brake, squeeze the lever to increase the pressure on
the brake until so you come to a smooth and controlled stop. The brake
lever is fitted with cable adjuster to compensate for cable stretch and/or
to fine tune the lever movement to brake engagement. To adjust the
play, thread the adjuster in o
r out (arrows, Figure 6a) 1/4 to 1/2 turn until
the desired brake adjustment is attained.
Figure 5a Figure 5b


