Normal Usage Guidelines
12 PS4661T and PS5561T User Guide
Normal Usage Guidelines
Normal use of the LCD is defined as operating in the open air to prevent heat
buildup, and without direct or indirect heat sources such as lighting fixtures, heating
ducts, or direct sunlight that can cause the modules to experience high operating
temperatures. For all modules, do not block fans or ventilation openings. If the LCD
module will be installed in a recessed area with an LCD surround or enclosure, ensure
adequate openings are applied for proper air flow and ventilation.
At 2000 meters or below, the maximum ambient operating temperature for the LCD
module cannot be above 40º C nor below the minimum ambient operating
temperature of 5º C. If one of these conditions exists, it is up to the installer to ensure
that module placement is changed, thermal shielding is provided and/or additional
ventilation is provided to keep the display within its nominal operating parameters.
Cooling Requirements
For optimal performance, active cooling by the installer should be planned for when
the ambient temperature at the top of the wall is predicted to be above the specified
ambient temperature for the panel. Cooling may be done behind the displays and
depending on the wall configuration, it may be helpful to place air ducts (AC) at
every third display tall.
VESA Mounts, General Description
VESA mounts are used to secure the PS4661T/PS5561T for display. The
PS4661T/PS5561T can be installed using a variety of VESA mounts available through
Planar. If you do not have a VESA mount and would like to purchase one, contact
Planar.
If you purchased a VESA mount, you should have a received a separate box with
mounting supplies and an Installation manual. Follow these instructions carefully.
Keep in mind the following general installation guidelines:
• Screw length is crucial and will vary depending on the type of mount you use.
Total screw length will include the penetration length plus the length required
by the type of VESA mount in use.
Caution: Shorter screws will result in insufficient mounting strength and longer screws
could puncture parts inside the display.
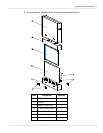
• Prior to installation, make sure you know where all of the mounting points are
located.
• Follow all safety precautions outlined in the VESA Installation manual.
• Verify the parts received with the list shown in the VESA Installation manual.


