


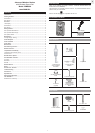

7
EN
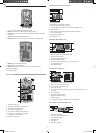
TROUBLESHOOTING
PROBLEM SYMPTOM REMEDY
Barometer Strange readings Set unit
Calendar Strange date / month Change language
Clock Cannot adjust clock Disable radio-controlled clock
Cannot auto-synch 1. Adjust batteries
2. Press RESET
3. Manually activate radio
controlled clock
Temp Shows “LLL” or “HHH” Temperature is out-of-range
Remote
sensor
Cannot locate remote
sensor
1. Check batteries
2. Check if sensors are
within range
PRECAUTIONS
• Do not subject the unit to excessive force, shock, dust, temperature or humidity.
• Do not cover the ventilation hole with any items such as newspapers, curtains etc.
• Do not immerse the unit in water. If you spill liquid over it, dry it immediately with a
soft, lint-free cloth.
• Do not clean the unit with abrasive or corrosive materials.
• Do not tamper with the unit’s internal components. This invalidates the warranty.
• Only use fresh batteries. Do not mix new and old batteries.
• Images shown in this manual may differ from the actual display.
• When disposing of this product, ensure it is collected separately for special treatment.
• Placement of this product on certain types of wood may result in damage to its
finish for which Oregon Scientific will not be responsible. Consult the furniture
manufacturer's care instructions for information.
• The contents of this manual may not be reproduced without the permission of the
manufacturer.
• Do not dispose old batteries as unsorted municipal waste. Collection of such waste
separately for special treatment is necessary.
• Please note that some units are equipped with a battery safety strip. Remove the
strip from the battery compartment before first use.
NOTE The technical specifications for this product and the contents of the user
manual are subject to change without notice.
SPECIFICATIONS
BASE STATION
Dimensions 140 x 16 x 177 mm
(L x W x H) (5.5 x 0.6 x 6.9 in)
Weight 250g (8.82 oz) without battery
INDOOR BAROMETER
Barometer unit mb/hPa, inHg and mmHg
Measuring range 700 – 1050mb/hPa
Accuracy +/- 10 mb/hPa
Resolution 1mb (0.0 inHg)
Altitude setting Sea level User setting for compensation
Weather display Sunny, Partly Cloudy, Cloudy, Rainy and Snowy
Memory Historical data and bar chart for last 24hrs
INDOOR TEMPERATURE
Temp. unit °C / °F
Displayed range 0°C to 50°C (32°F to 122°F)
Operating range -30°C to 60°C (-4°F to 140°F)
Accuracy 0°C - 40°C: +/- 1°C (+/- 2.0°F)
40°C - 50°C: +/- 2°C (+/- 4.0°F)
Comfort 20°C to 25°C (68°F to 77°F)
Memory Current, min and max temp.
Dew Point w/ min and max
Alarm Hi / Lo
INDOOR RELATIVE HUMIDITY
Displayed range 2% to 98%
Operating range 25% to 90%
Resolution 1%
Accuracy 25% - 40%: +/- 7%
40% - 80%: +/- 5%
80% - 90%: +/- 7%
Comfort 40% to 70%
BAROMETER
To change the barometer alarm:
1. In the UV / Barometer / Rainfall Area and Barometer reading display, press and
hold ALARM to enter the Barometer alarm setting.
2. Press + or - to set the desired values.
3. Press
ALARM to confirm the settings.
To activate / deactivate the barometer alarm:
1. In the UV / Barometer / Rainfall Area and Barometer reading display, press
ALARM repeatedly to select the desired alarm.
2. Press
MIN/MAX to activate or deactivate the alarm.
To set the altitude level compensation for the Barometer readings:
1. In the UV / Barometer / Rainfall Area and Barometer reading display
, press and
hold
MODE to enter the altitude setting.
2. Press + or - to set the desired values.
3. Press
MODE to confirm the setting.
RAINFALL
To view the current hour, accumulated or last 24 hours rainfall history:
In the UV / Barometer / Rainfall Area and Rainfall reading display, press
MIN/MAX
repeatedly to toggle between current, past 24 hours or accumulated rainfall. The clock
line will change to display the start time when the accumulated rainfall is displayed.
The icon appears and the start date is showing.
To toggle between rainfall & rain rate display:
In the UV / Barometer / Rainfall Area and Rainfall reading display, press and hold
MODE.
To reset the accumulated rainfall and timestamp:
In the UV / Barometer / Rainfall Area and Rainfall reading display,
press and hold
MIN/MAX to reset the accumulated rainfall to ‘0’ and to set the timestamp to current
date and time.
To change the HI rainfall rate alarm:
1. In the UV / Barometer / Rainfall Area and Rainfall reading display, press and hold
ALARM to enter the Rainfall alarm setting.
2. Press + or - to set the desired values.
3. Press
ALARM to confirm the settings.
To activate / deactivate the HI rainfall rate alarm:
1. In the UV / Barometer / Rainfall Area and Rainfall reading display, press
ALARM
repeatedly to select the desired alarm.
2. Press
MIN/MAX to activate or deactivate the alarm.
WEATHER ALARMS
Weather alarms are used to alert you of certain weather conditions. Once activated,
the alarm will go off when a certain criterion is met.
Alarms can be set for:
• Indoor and outdoor high/low temperatures, dew point and high/low humidity
• High Heat Index
• High Gust Wind
• Low wind chill
• High UV
• Pressure drop
• High rain rate
See the relevant section for how to set the alarm.
To silence any alarm: Press any button.
RESET
Press RESET to return to the default settings.
ACCESSORIES – SENSORS
This product can work with up to 10 sensors at any one time to capture outdoor
temperature, relative humidity or UV readings in various locations. Optional wireless
remote sensors such as those listed below can be purchased separately. For more
information, please contact your local retailer.
• Thermo-hygro THGR800 (3-Ch)
• Thermo-hygro THGR810 (10-Ch)
• UV UVN800