


MQD2H/3H DIAPHRAGM PUMPS — OPERATION AND PARTS MANUAL — REV. #7 (05/24/13) — PAGE 23
Seized Plunger
If the plunger arm has seized, perform the following:
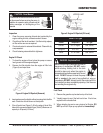
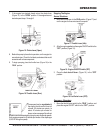
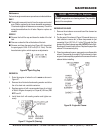
1. Remove plunger guard (Figure 24) by removing slotted
screw (2).
2. Disassemble pump and clean as described in steps 1
thru 4 in the "Stalled Pump" section.
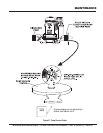
3. Using a torque wrench, torque lock screw (Figure 24) to
70 ft.-lbs. (9.6 kg-m).
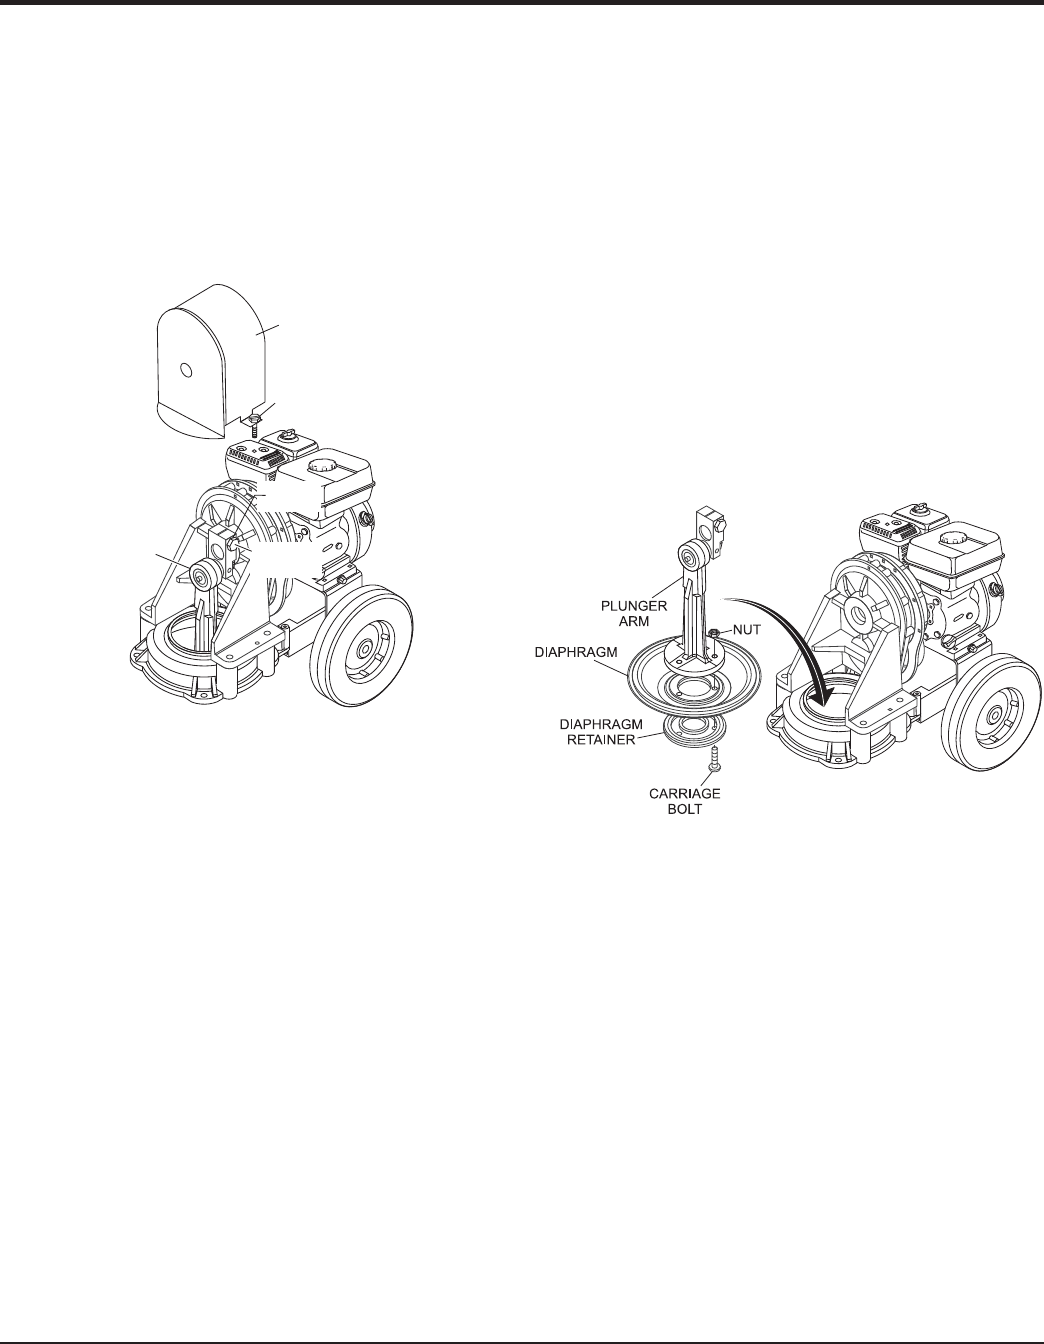
Diaphragm Replacement
1. Remove plunger cover as shown in step 1 of the "Seized
Plunger" section.
2. Remove handle as shown in Figure 6 of the "Handle
Installation" section.
3. Rotate pump output shaft until plunger arm is in the
down position.
4. Remove the four hex head cap screws, hex nuts, flat
washers and lock washers from the pump base.
5. Push pump well downwards to separate from pump
base.
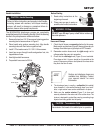
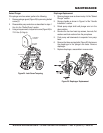
6. Remove the three carriage bolts (Figure 25) that secure
the diaphragm to the plunger arm base. Remove
diaphragm.
7. Replace diaphragm, reassemble in reverse order.
Figure 24. Lock Screw Torqueing
Figure 25. Diaphragm Replacement
MAINTENANCE
PLUNGER
GUARD
SLOTTED
SCREW
70 FT-LBS
(9.6 KG-M)
PLUNGER
ARM
LOCK
SCREW