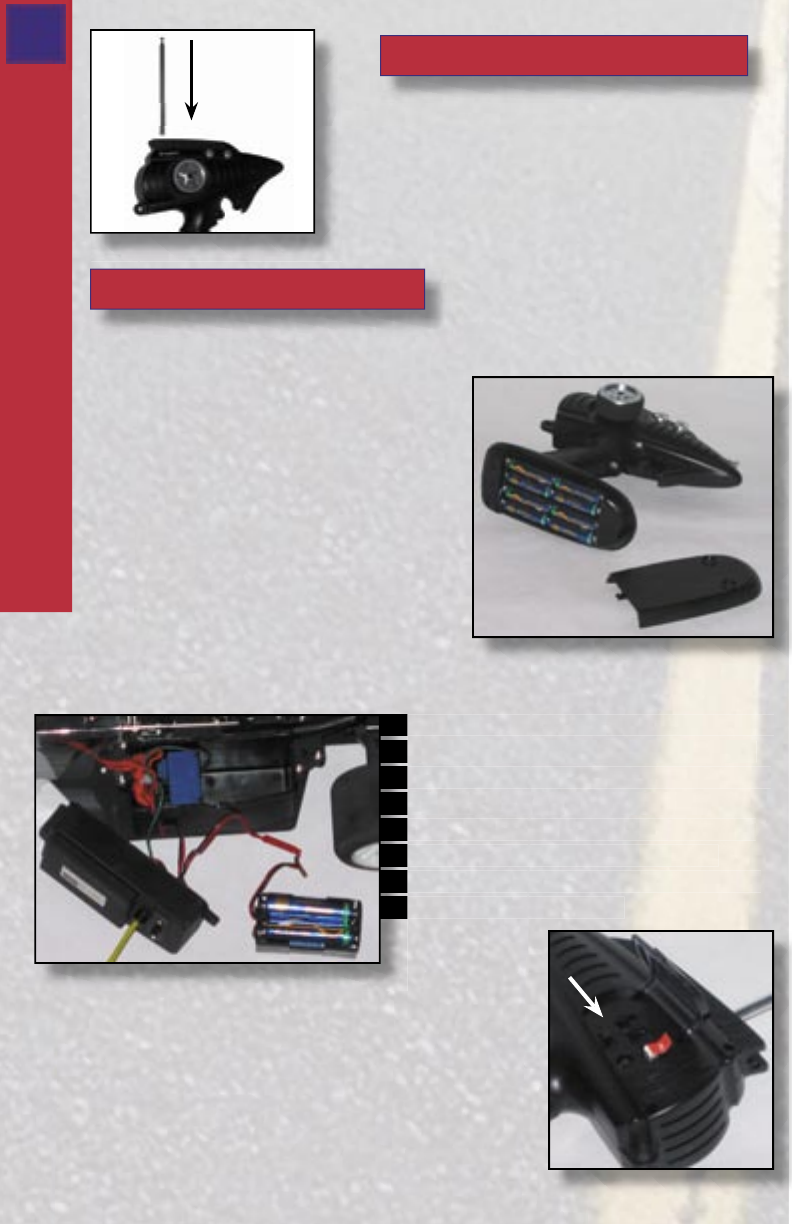
Remove the antenna from the slot on top
of the transmitter. Slide it into the hole
on top of the transmitter and turn clock
wise until snug. Do not over-tighten.
A. Be sure that both the transmitter and receiver switches are in the
“off” position.
B. Install 8 fresh “AA” alkaline dry
cell batteries in the transmitter
(see Figure 5) paying careful
attention to proper “+” and “-”
polarity. Turn the transmitter on to
make sure the LED light glows
green. Fresh batteries will provide
2 hours of power to the
transmitter. When the red LED
light glows, immediately install
Figure 5 - Transmitter Batteries
fresh batteries. Failure to do so will result
in loss of control and (most likely) a crash.
C. To install the receiver batteries, lift
up on the clasp and gently lift the
cover to the battery box. Then, lift
out the battery guard and the
battery case. Install 4 fresh “AA”
alkaline dry cell batteries and
carefully put everything back into
the battery box (see Figure 6).
D. Turn on the transmitter power switch, located
inside the door on the back of the transmitter
(see Figure 7). Next turn on the vehicle’s power
switch and listen for the servos to move slightly.
Move the steering control wheel and the throttle
trigger on the transmitter, making sure that the
steering control operates the front wheels and
C. To install the receiver batteries, lift
up on the clasp and gently lift the
cover to the battery box. Then, lift
out the battery guard and the
battery case. Install 4 fresh “AA”
alkaline dry cell batteries and
carefully put everything back into
the battery box (see
Figure 4 - Install Antenna
Figure 6 - Vehicle Batteries
Figure 7 - Power Switch
6
Installing Antenna & Batteries
Installing the Antenna
Installing the Batteries


