


J8472a-0920
9
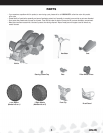
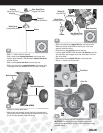
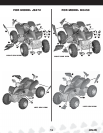
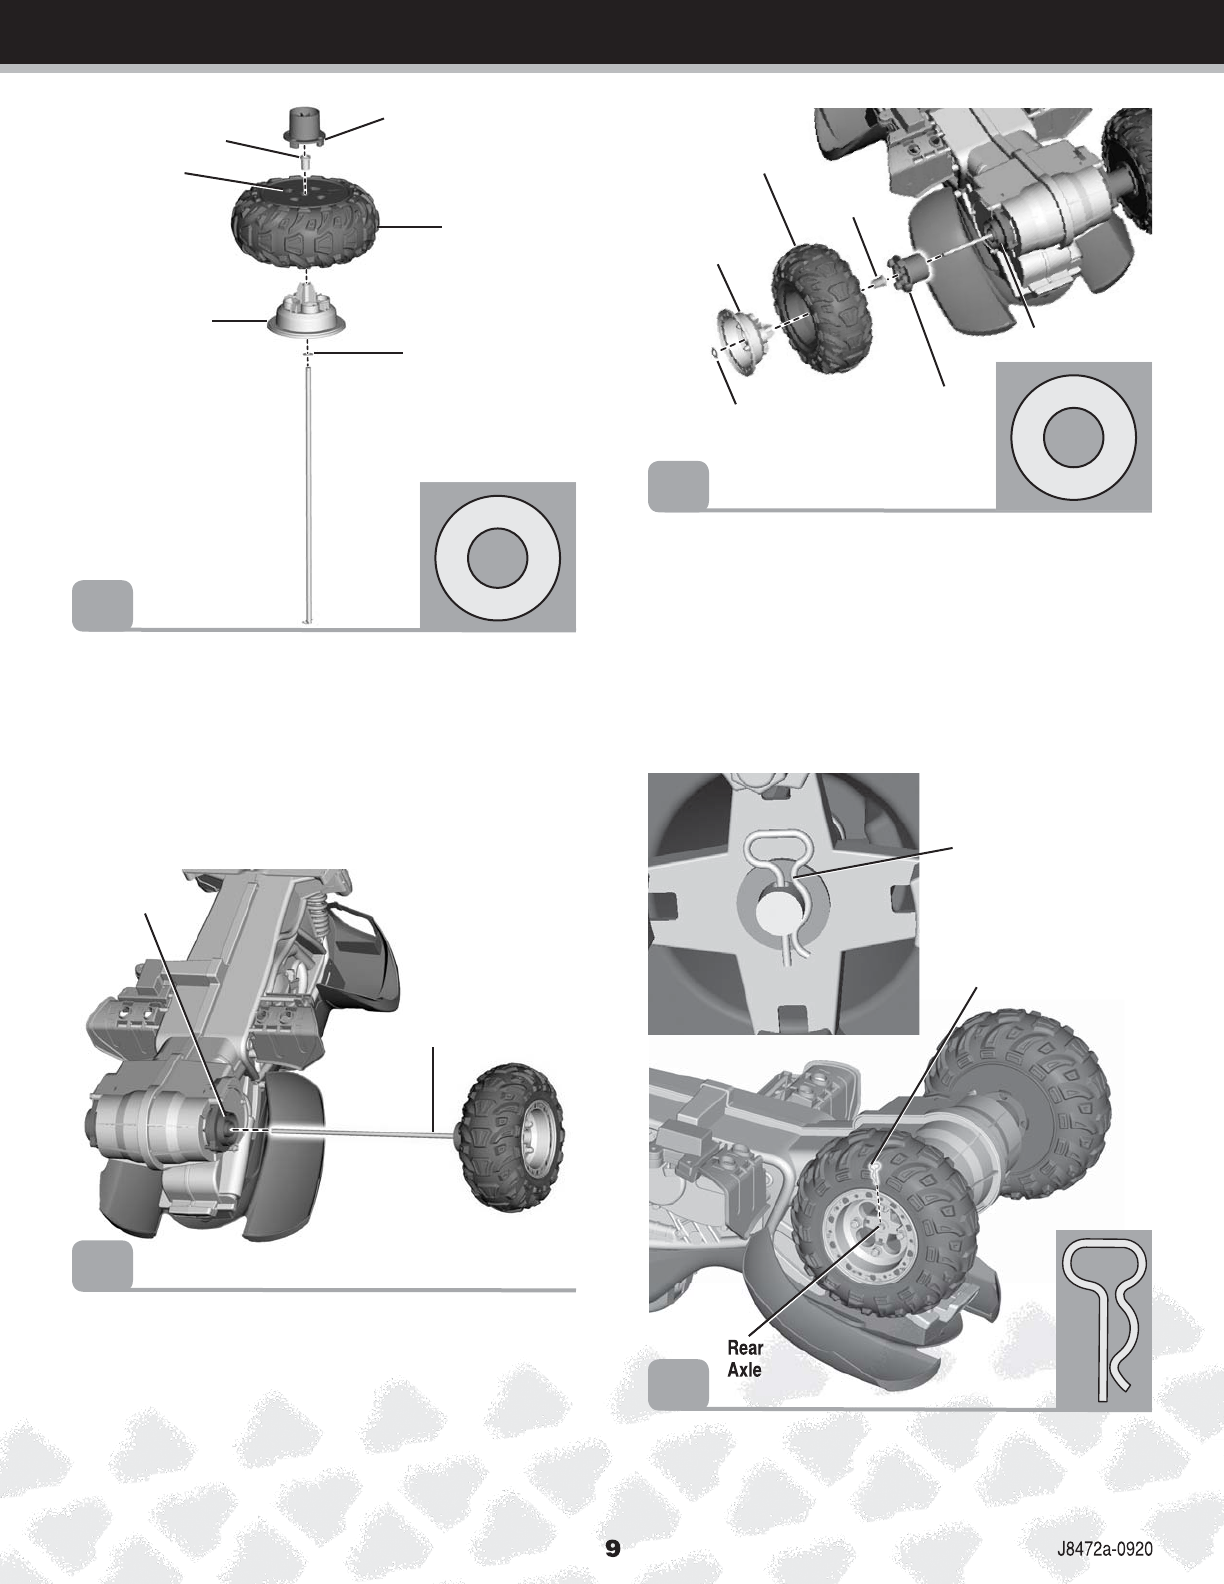
Cotter Pin
Rear
Axle
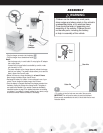
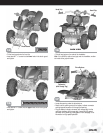
• Slide a
7
/16" washer onto the rear axle.
• Slide a wheel cover, indented side down, onto the rear axle.
• Locate a wheel marked L. Slide the wheel, indented side down,
onto the rear axle.
• Slide a bushing, barrel side down, onto the rear axle.
• Slide a rear wheel driver, pegged side down, onto the rear axle.
Fit the pegs on the rear wheel driver into the slots in the wheel.
2
Rear Wheel Driver
(Pegged Side Down)
Wheel Cover
(Indented Side Down)
Wheel (L)
(Indented Side Down)
Slots Up
Washer
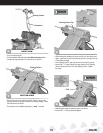
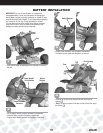
• Position the vehicle upside down.
• Slide the rear axle assembly through the hole in the back end of
the vehicle, as shown. Make sure the rear wheel driver fits into the
pins in the motor assembly inside the vehicle.
3
Rear Axle Assembly
• Slide a rear wheel driver, pegged side out, onto the rear axle.
Make sure the rear wheel driver fits into the pins in the motor
assembly inside the vehicle.
• Slide a bushing, ring end first, onto the rear axle.
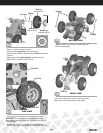
• Locate a wheel marked R. Slide the wheel, flat side first, onto the
rear axle. Make sure the pegs on the rear wheel driver fit into the
slots in the wheel.
• Slide a wheel cover, indented side out, onto the rear axle.
• Slide a
7
/16" washer onto the rear axle.
4
Wheel (R)
(Flat Side First)
BOTTOM VIEW
Rear Wheel Driver
(Pegged Side Out)
Wheel Cover
(Indented Side Out)
Washer
Bushing
(Barrel Side Down)
Motor Assembly
Bushing
(Ring End First)
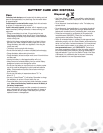
• Fit a cotter pin into the hole near one end of the rear axle.
IMPORTANT! Do not force the cotter pin past the third bend.
When correctly assembled to the axle, it should look like the inset
illustration above.
5
Motor Assembly
Third Bend