


ML6194, ML6294 NON-SPRING RETURN DIRECT COUPLED ACTUATORS
5 63-2511—1
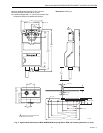
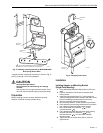
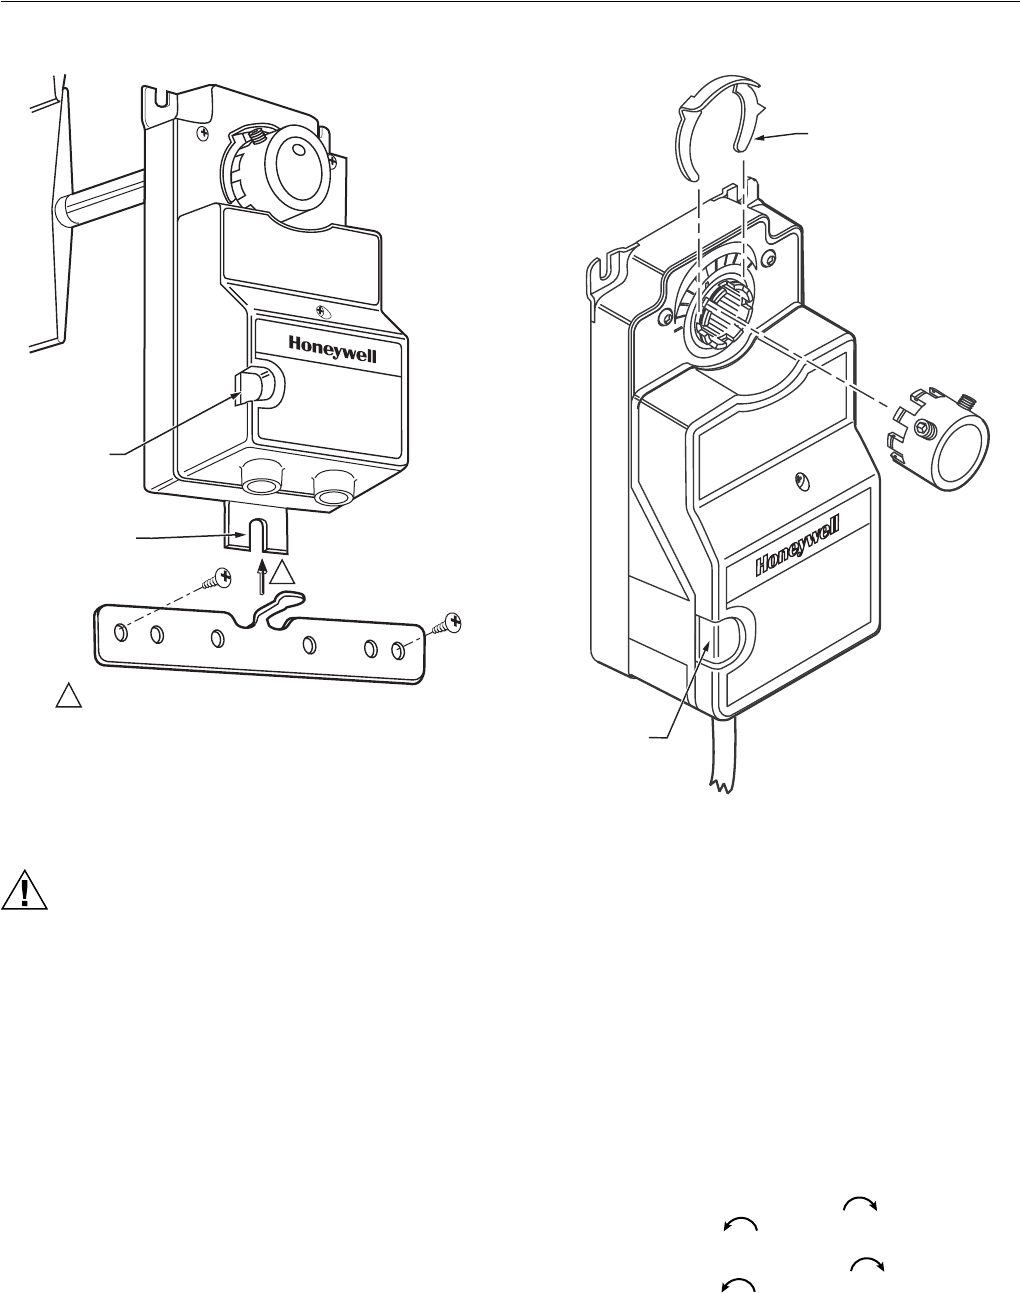
Fig. 3. Installing mounting bracket on ML6194/ML6294
Non-Spring Return DCA.
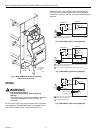
A typical actuator mechanical connection is shown in Fig. 5;
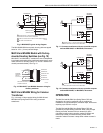
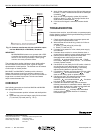
see Fig. 6 through 13 for wiring diagrams.
CAUTION
Actuator Damage Hazard.
Using actuator as shaft bearing can damage
actuator.
Use actuator only to supply rotational torque. Avoid
any side loads to actuator output coupling bearings.
Preparation
Before installing actuator on shaft, determine opening
direction of shaft to correctly connect wiring.
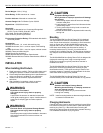
Fig. 4. Changing hub inserts.
Installation
Installing Actuator and Mounting Bracket
(Single-Point Mounting)
1. Place ML6194/ML6294 Non-Spring Return DCA over
shaft.
2. Position actuator for best access to actuator shaft
locking screw.
3. Install mounting bracket (see Fig. 2) and adjust it to
center mounting bracket tab in actuator slot. Mark screw
holes for installing mounting bracket on housing.
4. Remove mounting bracket and actuator.
5. Drill mounting holes for screws (screws not provided).
6. Place actuator and mounting bracket back into position
over shaft and install mounting bracket screws.
7. Move shaft either fully clockwise or fully
counterclockwise .
8. Fully depress and hold declutch button while moving
actuator hub either fully clockwise or fully
counterclockwise to match shaft. Release
declutch button.
9. Tighten the two set screws firmly (80 to 100 lb-in.)
against shaft.
M11271
A
ACTUATOR
SLOT
DECLUTCH
BUTTON
INSTALL MOUNTING BRACKET SO THAT MOUNTING
BRACKET TAB IS CENTERED IN ACTUATOR SLOT.
1
1
30
30
0
60
6
0
90
M11272A
DECLUTCH
BUTTON
HUB
INSERTS
RETAINING
RING