


6 XL-FW232-02
REBUILDING PROCEDURES continued
Release Arm and Release Lever Installation
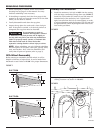
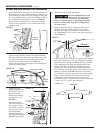
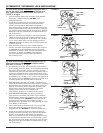
1. Check the fit of the release lever (15) inside the slot in
the plunger (
17). The rounded end of the release lever
must fit freely into the slot in the plunger. If the parts
do not fit together freely, it will be necessary to deburr
the rounded end of the release lever (see
FIGURE 9).
Once you have checked the fit, remove the release
lever in order to attach it to the release arm in the
following step.
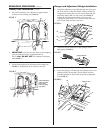
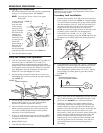
2. Install the release handle (
16) through the guide slot
in the casting. Install the end of the release handle
(
16) into the hole in the end of the release lever (15).
The open end of the release handle must face the
front of the casting, as shown in
FIGURE 10.
Guide the round end of the release lever through the
guide rib in the casting.
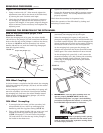
3. Install the nylon
bushing (
24) into the
release lever (
15)so
that the flange is
between the casting
and the lever (see
FIGURE 11).
Install the release
lever into the slot on
the plunger. Install
the washer (
13) onto
the cap screw (
12)
and insert them
through the release
lever (
15) and through
HOLE B in the casting.
15 RELEASE
LEVER
Slot in the
plunger
Plunger
guide rib
FIGURE 9
16
Release
handle
Guide slot in casting
15 Release lever
FRONT
Guide
rib
FIGURE 10
15
13
14
24
12
HOLE B
FIGURE 11
4. Install hex lock nut (14) and tighten.
DO NOT OVERTIGHTEN as the
release lever (
15) must move
freely. If it does not move freely, the fifth wheel
may not couple properly or completely and could
result in tractor/trailer separation causing death
or serious injury.
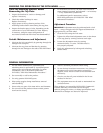
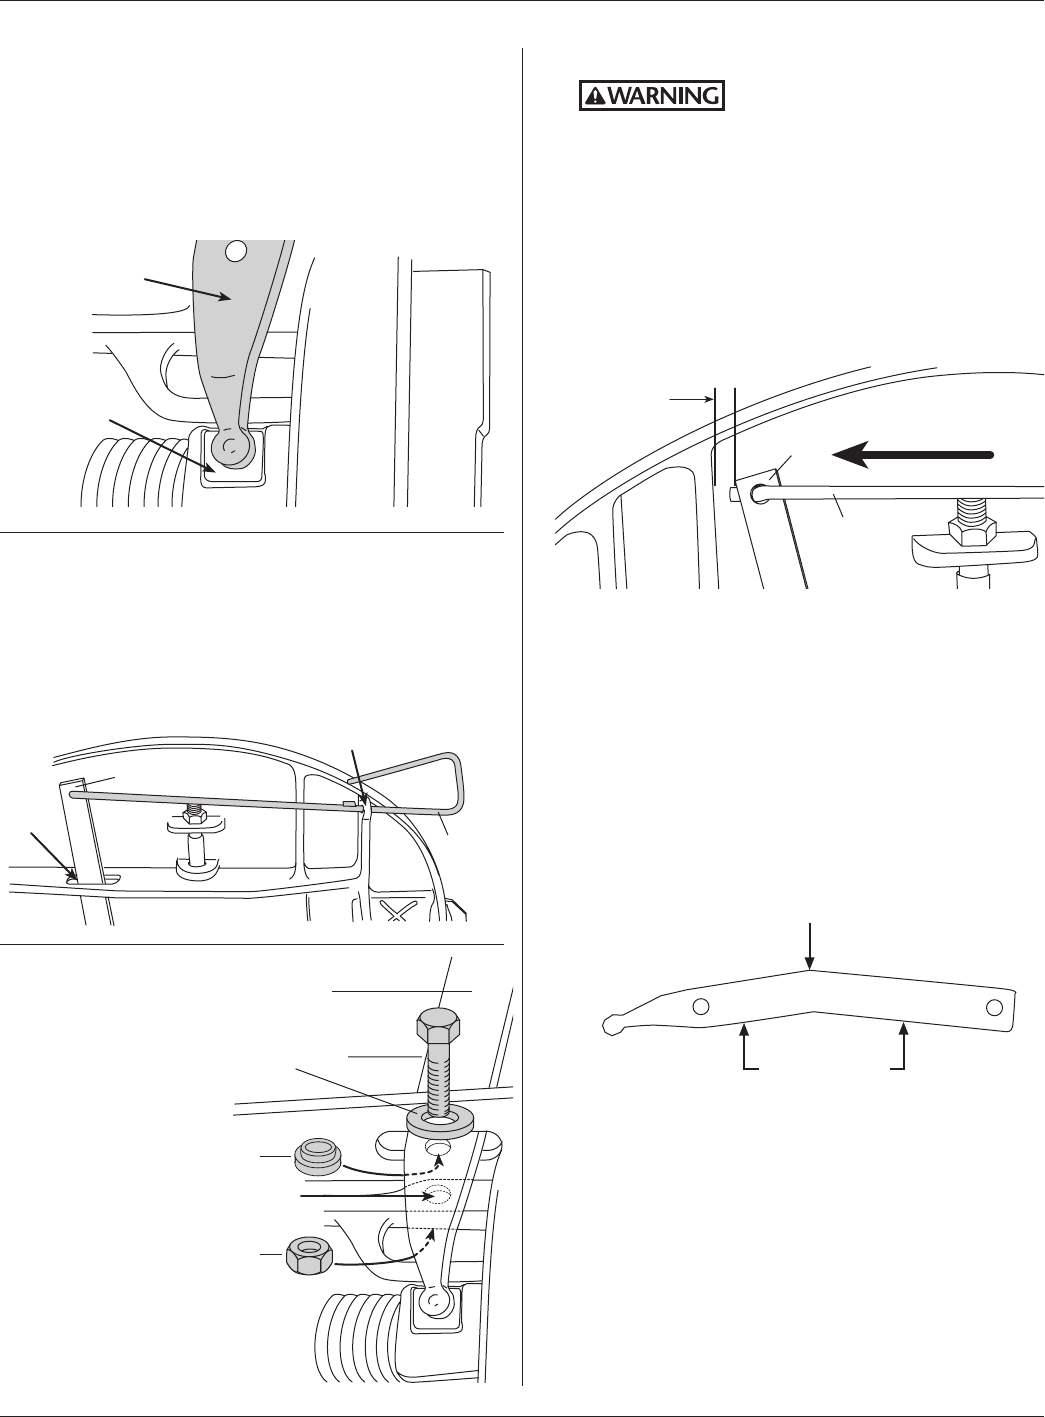
5. Remove the helper block. Check the travel of the
plunger. With the release handle in the closed
position, the edge of the release lever (15) should
be a maximum of 1/2˝ from the top plate casting rib
(see
FIGURE 12).
If this condition does not exist, check that the rounded
end of the release lever (
15) is not hitting the plunger
guide rib of the casting, see
FIGURE 9. If the rounded
end is hitting the rib, bend the rounded end of the
release lever down so that it goes deeper into the
plunger slot. If the release lever is still greater than
1/2˝ from the casting rib, remove the release lever and
bend it (as shown in
FIGURE 13) until it is less than
1/2˝ from the casting. If the square end of the release
lever — and/or the end of the release handle (
16) —
is hitting the casting rib, grind the corner of the
release lever (15) — and/or the end of the handle (
16)
— until it is 1/2˝ clear of the casting rib.
1/2˝ Max.
16
15
Closed
FIGURE 12
SUPPORT HERE
BEND HERE
FIGURE 13