


96 GPSMAP 192C Owner’s Manual
APPENDIX > MOUNTING THE GPSMAP 192C UNIT
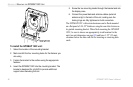
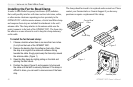
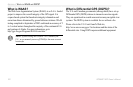
To install the GPSMAP 192C unit:
1. Select the location of the mounting bracket.
2. Mark and drill the four mounting holes for the fastener you
are using.
3. Fasten the bracket to the surface using the appropriate
fastener.
4. Insert the GPSMAP 192C into the mounting bracket. The
bracket is designed for a tight fit to provide additional
support when swiveling the unit.
5. Screw the two mounting knobs through the bracket and into
the display case.
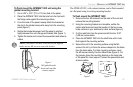
6. Connect the power/data and antenna cables (external
antenna only) to the back of the unit, making sure the
locking rings are fully tightened on both connectors.
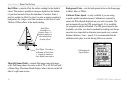
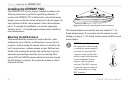
The GPSMAP 192C with external antenna can be flush mounted
on a flat panel of .08-.52" thickness using the cam lobe feature on
its gimbal mounting bracket. When flush mounting the GPSMAP
192C, be sure to choose an appropriately sized location for the
unit (see unit dimensions on page 93) and leave 1.25" (32 mm)
clearance below the data card slot for inserting or removing data
cards.