


6
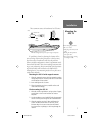
Mounting the Receiver
Please read through these instructions thoroughly before
attempting installation. Make sure you completely understand
these instructions before you begin. When in doubt, seek pro-
fessional assistance.
The following additional items are needed or optional
to complete the installation of your GPS 16:
• Receiver mount— Since mounting
locations and methods vary, you may need
to obtain a mount to install the GPS 16.
The receiver base uses either our Magnetic
Mount or may be fl ush mounted.
• On/Off switch (optional)— Power to the
receiver may be controlled by an on/off switch,
such as an accessory switch on the control
console. Check with an electric supply retailer for
this item.
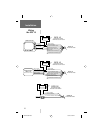
It is recommended that the system be temporarily
hooked up with the wiring and the unit placed at the
desired installation location. Then, check operation with
potential interfering equipment turned on and off. (For
example, other electronic equipment, fan motors, engine
ignition, alternators, generators, radars and VHF radio
transmissions can be sources of interference.)
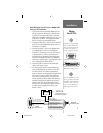
Position the receiver so that the clearest possible view
of the sky and horizon in all directions is obtained. Avoid
mounting the receiver next to large areas of conductive
material (metal, aluminum, etc.) as this may cause poor
signal reception. The GPS 16 is supplied with a 17 foot
(5 meter) power/data cable. When routing the wiring to
the GPS 16, avoid routing the cable near an alternator
or ignition system components or parallel to other power
lines.
Installation
Mounting the
GPS 16
Note: As a general rule,
mount the receiver at least
three feet from all other
antennas and electrical
system components
(alternator/ignition system).
I
GPS16 QSG.indd 1/7/02, 4:07 PM6