


1212
1313
RADIO OPERATION
Radio Mode Selection
Press the SOURCE button to select RADIO mode.
Radio - iPod - AUX
Band Selection
Push the joystick up / down to select the band
Push joystick up
FM1 - FM2 - FM3
Push joystick down
AM1 - AM2
Automatic Tuning Mode
Push the joystick left / right for automatic tuning (left = seek down, right = seek up). It will
continuously search untill the next radio station is detected.
Manual Tuning Mode
Turn the joystick encoder left / right to manually tune each radio station. Frequency changes
one step whenever joystick encoder is turned.
Preset Memory
You can store radio frequencies in the preset memory.
- Search for the radio frequencies by using the automatic or manual tuning mode.
- Press and hold the joystick untill the PRESET screen is shown.
- Turn the joystick encoder to select a PRESET memory number, confirm your selection by
pressing the joystick.
Preset Recall
To listen to a radio frequency stored in the preset memory;
- Press the joystick. The PRESET memory screen will appear.
- In the PRESET memory screen, turn the joystick encoder to select the preset number you
want. Confirm your selection by pressing the joystick.
- or Push joystick left/right to index.
TUNER SETTING
For correct operation in America, Tuner Frequency stepping needs to be changed,
Default setting is Europe, to Change:
SELECT: Menu - General - Area - America 1
iPod® OPERATION
iPod
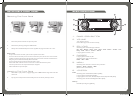
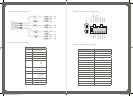
Before inserting your iPod into the CA-IP500 you must first insert the correct sleeves to match
iPod model.
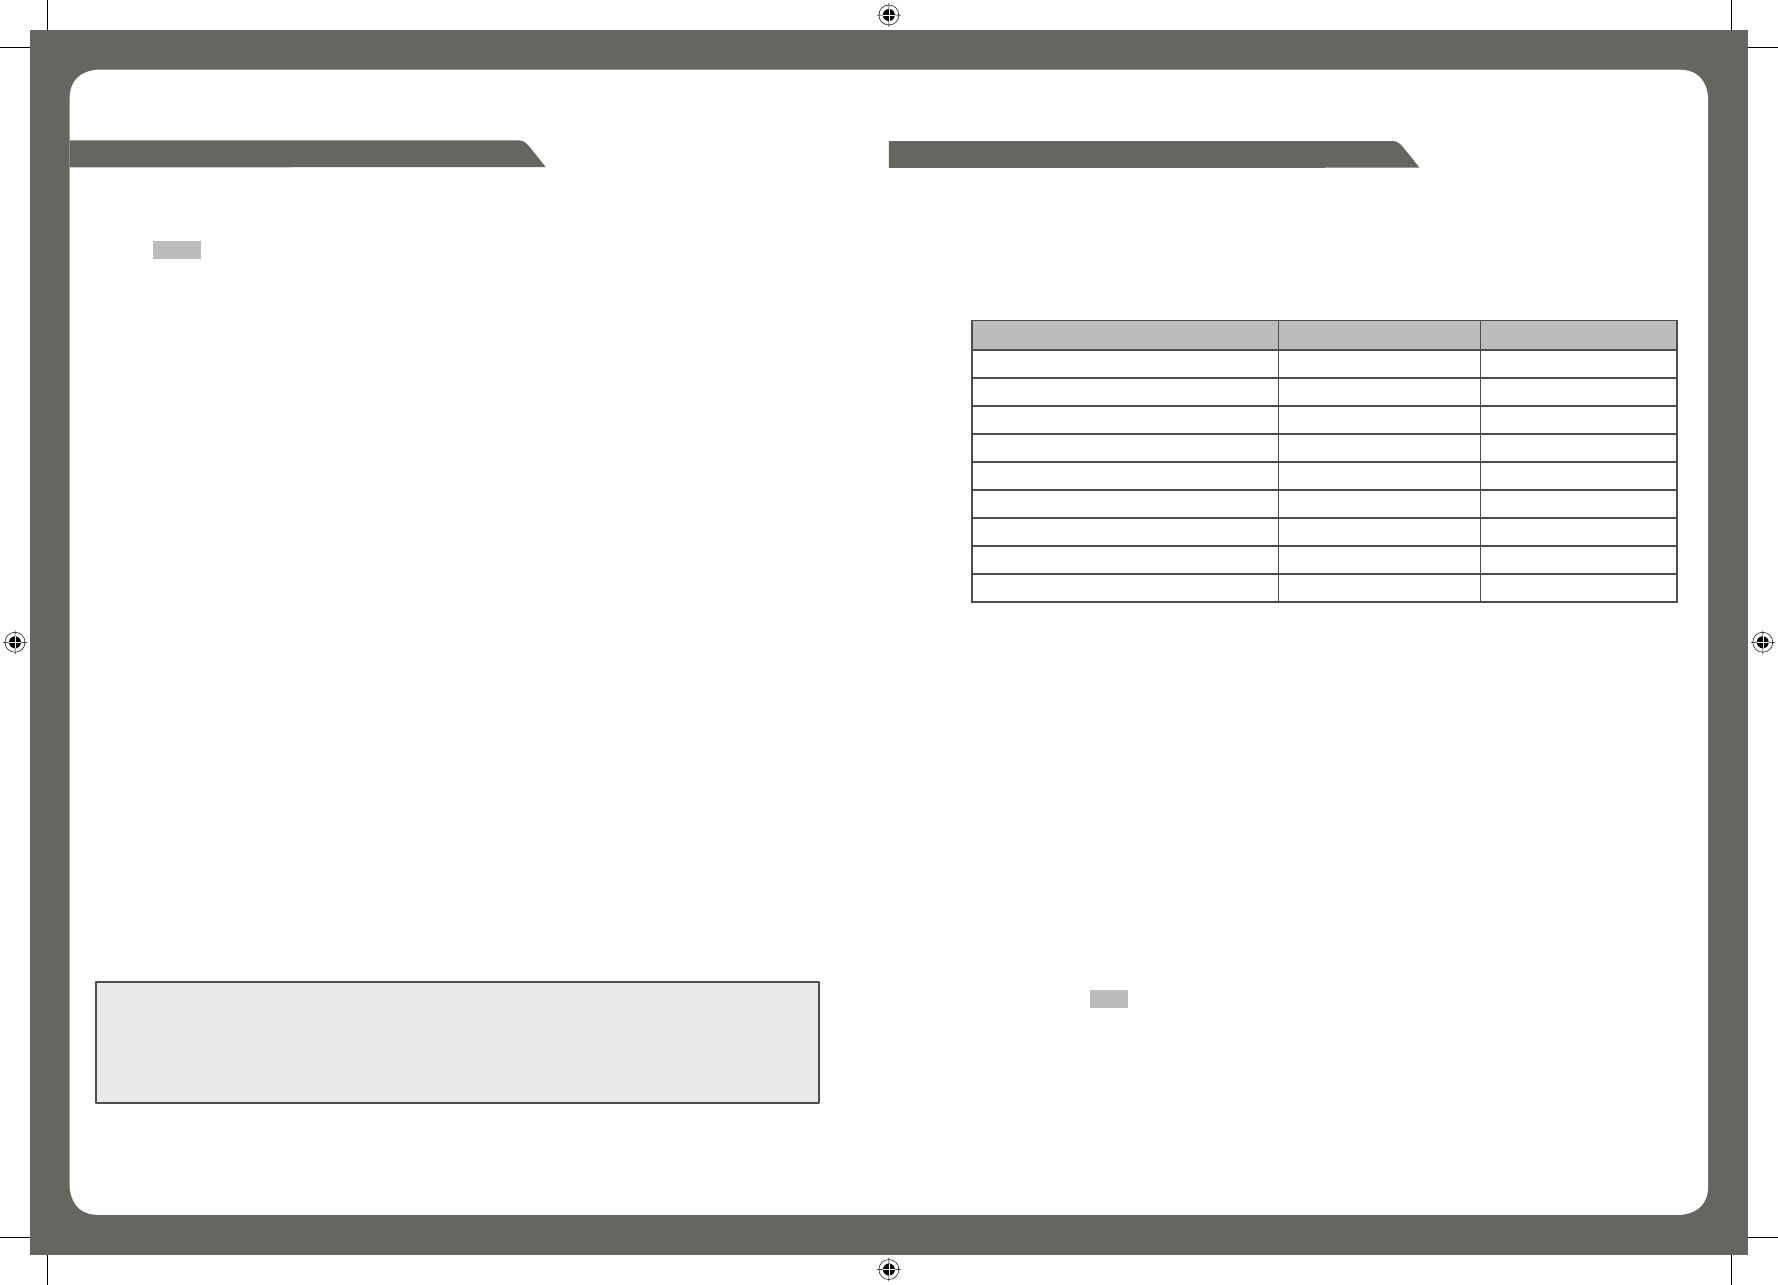
The different sleeve combinations are outlined in the chart below:
iPod Mode Selection
Press the SOURCE button to select iPOD mode.
Radio - iPod - AUX
iPod Operation
The joystick encoder operates in the same manner as the clickwheel on the iPod.
- Press joystick to enter menu
- Turn the joystick encoder to scroll through menu options
- Press the joystick to select a menu option
- Press the MENU button to return to the previous menu
iPod Top sleeve Bottom sleeve
classic, 5th Gen (30gb) A A
classic, 5th Gen (60/80gb) A B
classic, 6th Gen (80gb) B A
classic, 6th Gen (160gb) B B
classic, 7th Gen B A
touch, 1st Gen, 2nd Gen D D
nano, 2nd Gen C C
nano, 3rd Gen, + Adapter A A
nano, 4th Gen E E
Notes:
• For the iPod nano (3rd gen), the iPod must be placed inside the adaptor sleeve, and
then placed inside Dock sleeve combination A.
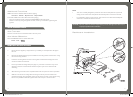
• For iPod insertion/removal we recommend that you 1st remove Front panel to
improve access. Due to iTouch design, the fit is a little tighter than the other models. Be
aware this does not affect the correct operation of either Fusion or Apple product.
• Before inserting iPod,
Please ensure iPod dock connector is clean, dry & free from damage.
Check that unit iPod dock is free from obstructions.
Insert correct sleeve combination to match your iPod
Never insert iPod without a correct sleeve.
• Ensure iPod is inserted with display facing upwards, Never force your iPod into the
dock, if the iPod does not mate with reasonable ease the sleeve/iPod combination is
CA-IP500 Manual ENGLISH v3.indd 12-13CA-IP500 Manual ENGLISH v3.indd 12-13 25/11/08 9:06:50 AM25/11/08 9:06:50 AM