8
9
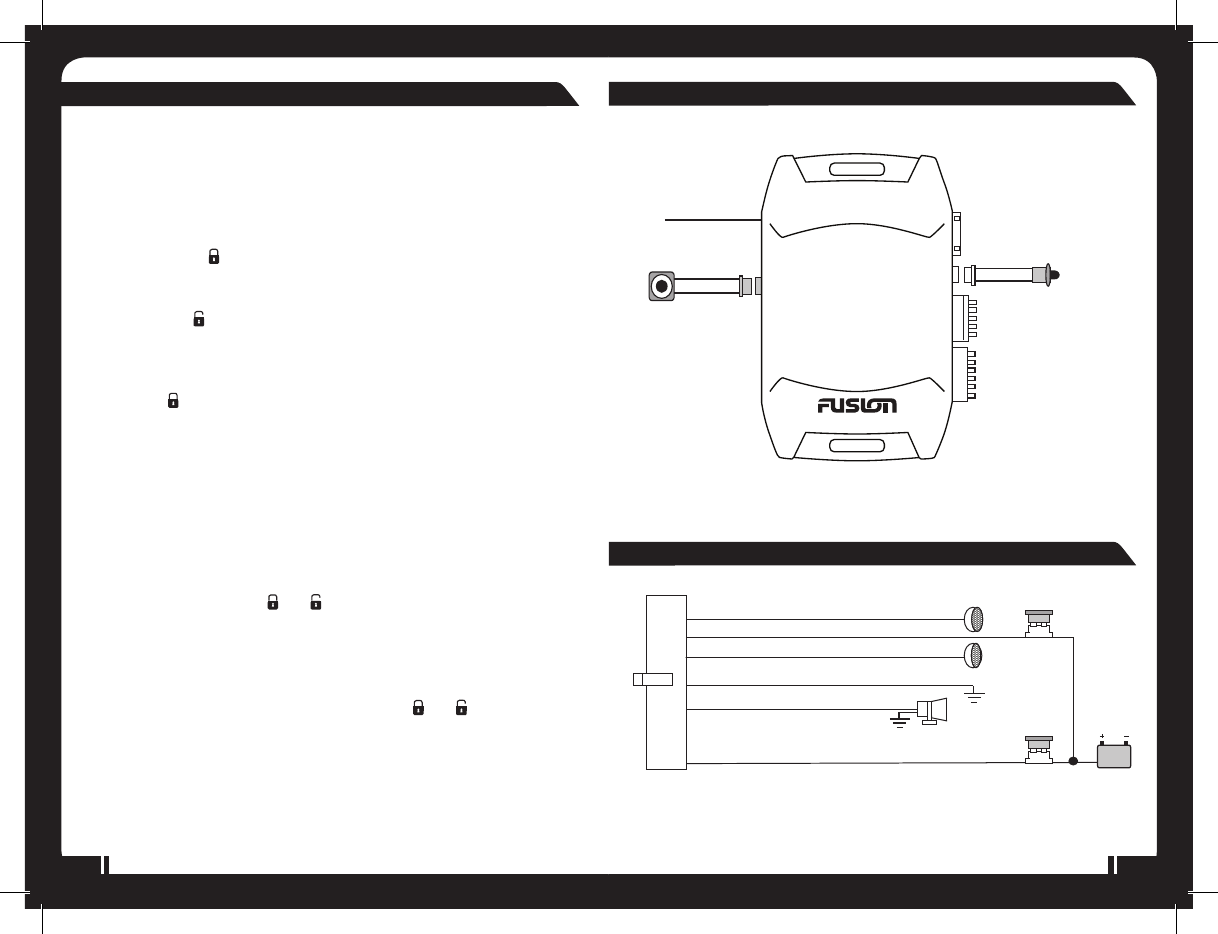
WIRING DIAGRAM
A: MAIN 6 PIN WIRE HARNESS:
6PinMiniConnector
BlackAntennaWire
LED Indicator
Valet Switch
2Pin
Blue
2Pin
White
6Pin
White
Mai n6 PinWire harness
6Pin
White
6PinDoorLock/Unlock
Wire harness
6Pin
White
6. Red Wire: +12V To Constant Battery Source
5. Brown Wire: Positive output To Siren
4. Black Wire:Ground to Vehicle FRAME
1. White Wire: Turn IndicatorRelayOutput
2. Red / Blue Wire: Turn Indicator Relay Power input
3. White Wire: Turn Indicator Relay Output
Turn Indicator
3A Fuse
10A Fuse
ADJUSTING THE SENSITIVITY LEVEL OF THE SHOCK SENSOR
1. Turn the ignition ‘switch ‘ON/OFF’ 3 times (within 15 seconds) and
leave in the OFF position.
2. Push the valet switch 6 times and hold on the 6th push until three
short chirps and one long chirp is heard, and then release the valet
switch. You are now in the alarm feature ‘Shock Sensor’
programming mode.
3. Press and hold
button for 2 seconds. One long siren chirp will
indicate the unit is ready to accept adjustments of the second stage
of the shock sensor (full alarm).
4. Pressing the button on the remote once will decrease the sensitivity
level by one, each time a decrease is made the siren will respond
with one chirp, while 2 chirp’s indicates the minimum sensitivity
setting.
5. Pressing button on the remote once will increase sensitivity level by
one, each time an increase is made the siren will respond with
one chirp, while 2 chirp’s indicates the maximum sensitivity setting.
6. Hit the bumper or strong metal part of the vehicle to test the
threshold level of the sensor.
a). Activate the warn-away (first stage of the shock sensor), the siren
will emit a short chirp.
b). Activate the full alarm (second stage of the shock sensor), the
siren will emit a long chirp.
7. When you are satisfied with the second stage of the shock sensor
settings, press and hold and buttons simultaneously for
2 seconds. Two long siren chirps will indicate the unit is ready
to accept adjustments of the first stage of the shock
sensor (warn-away).
8. Follow the steps 4, 5 and 6 to adjust the warn-away sensitivity.
9. When you are satisfied with the setting, press and buttons
simultaneously. One long siren chirp indicates the unit has confirmed
the setting.
Note: If 20 seconds of inactivity expire, or the ignition is turned on during
the above steps, the unit will exit the programing mode and return to the
disarmed mode. Three long chirps will confirm exit.


