


©2002 Edelbrock Corporation
Rev. 9/02
Brochure No. 63-0142
Catalog #71001
Page 13 of 21
2.8 Fuel Line Installation
Before performing any of these steps,
relieve the fuel pressure in the vehicles fuel system.
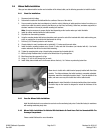
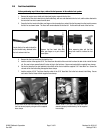
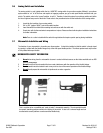
1. Remove the engine cover shield and intake boot to gain access to the fuel line.
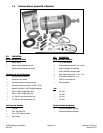
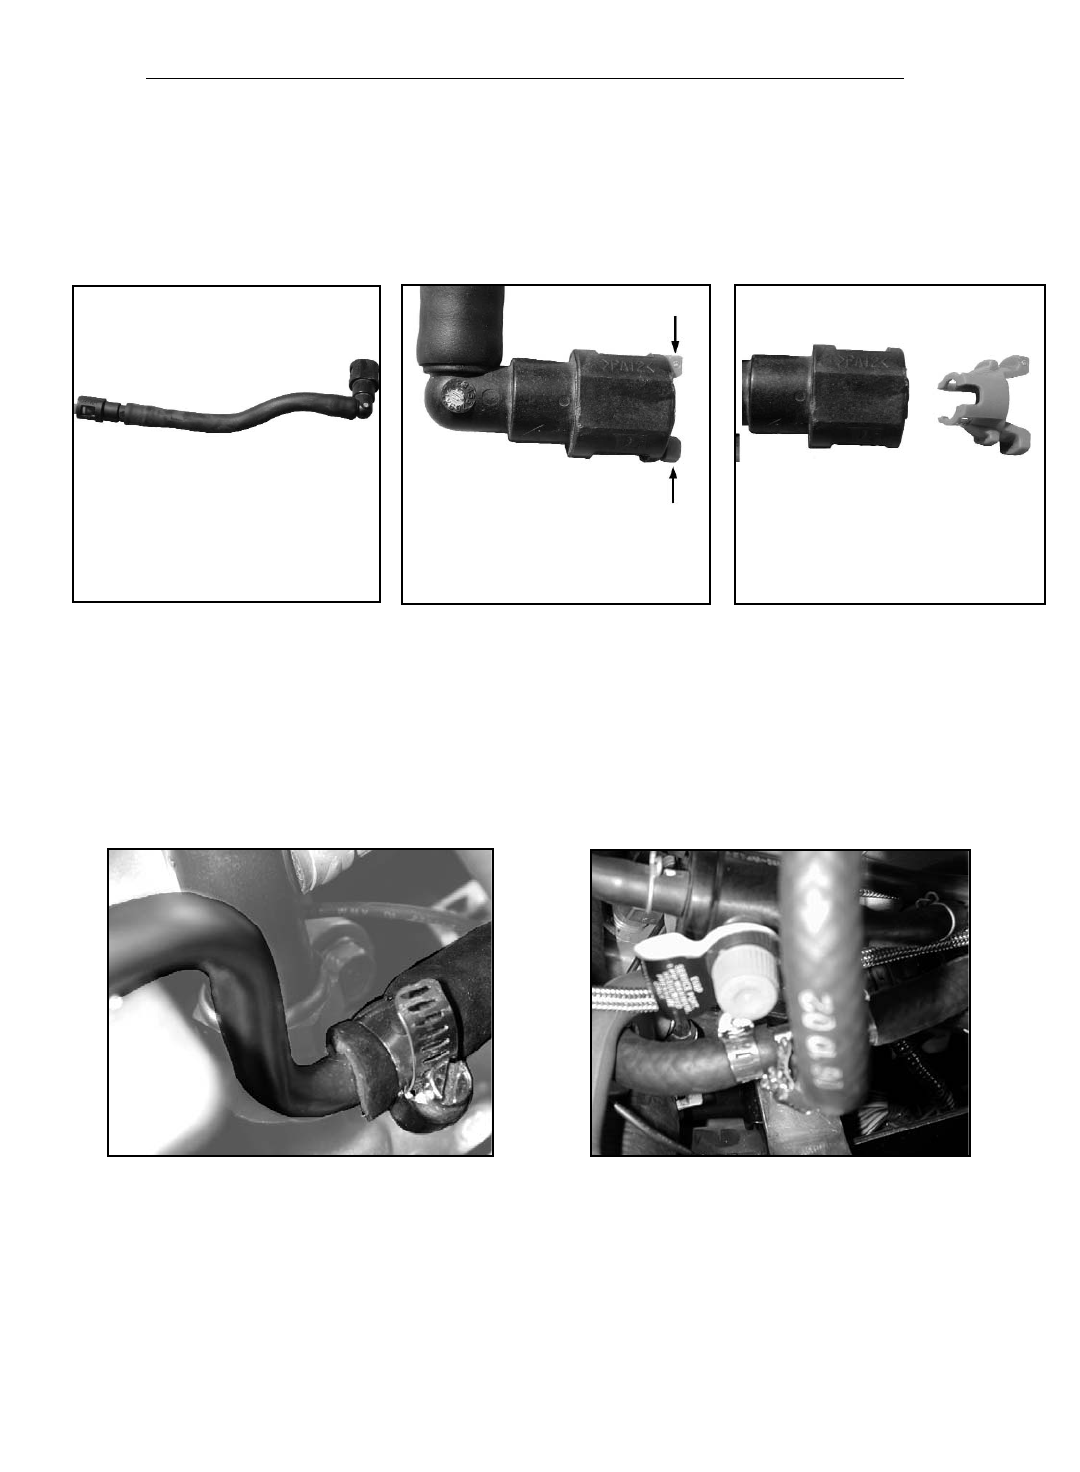
2. Locate the fuel line which should be by the throttle body, with one end attached to the fuel rail, and the other attached to
the main fuel line which comes from the tank.
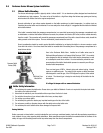
3. Grasp the fuel line insert with either your fingers or blunt nosed pliers,and pull the fuel line away from the insert to remove
the fuel line as shown below. The insert will remain attached to the fuel rail. Do this with both ends of the fuel line.
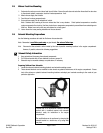
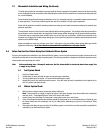
Locate the fuel line which should be
by the throttle body, attached to the
fuel rail and main fuel line.
Squeeze fuel line insert tabs with
either your fingers or a pair of blunt
nosed pliers.
While squeezing tabs, pull fuel line
away from insert to remove the fuel
line.
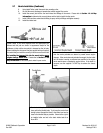
4. Remove the fuel line insert from the hard fuel line.
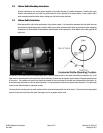
5. Install a section of the supplied 5/16” Fuel Hose from the outlet of the main fuel line from the tank to the inlet of the fuel
rail. Be sure to leave yourself about 2 inches of play in the fuel hose. Secure each end with the supplied hose clamps.
6. Cut the fuel hose that you just installed in the middle of the line to install the supplied 5/16” Hose Barb Tee. Secure the
cut ends of the fuel hose using the supplied hose clamps.
7. Install a section of 5/16” Fuel Hose from the outlet of the 5/16” Hose Barb Tee to the fuel solenoid inlet fitting. Secure
each end of the fuel hose with the supplied hose clamps.
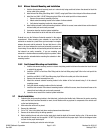
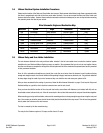
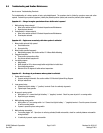
Shown above is the fuel hose attached to the hard
fuel line secured properly using one of the supplied
hose clamps.
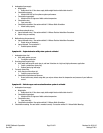
Shown above is the fuel hose and hose barb
assembly properly installed using 3 of the supplied
hose clamps.