


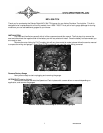

6 MAN#650336
(Tachometer Setup Continued)
gEAr
gEArgEAr
gEAr Gear indicator setup
This tachometer has a single digit display for gear position. The gauge can learn the positions based on speed and rpm
so no sensors are needed, just what you’ve already connected. It will work with 4, 5, 6 or 7 speed transmissions. To program
the gear positions, begin at a section of road where you can gradually shift through all of the gears. Press and hold the switch
while turning the key on and starting the engine. Once the engine is running, release the switch.
• Press and release the switch until “tCH” is displayed. Press and hold the switch until “ - “ is displayed.
• Press and release the switch until “gEAr” is displayed, press and hold the switch until “ - “ is displayed.
• The message will show “LO TCH” if the engine rpm is below 1500, or “LO SPD” if the vehicle speed is below 5.
• Begin driving in 1
st
gear. The display should show GEAR 1 and the “1” should be flashing. Drive at a steady speed until the
“1” stops flashing, it should only take about 20 seconds if the speed and RPMs are steady.
Optionally: If the gear does not stop flashing you can manually override and jump to the next gear by pressing and
releasing the switch to store the gear position quicker.
• Shift to 2
nd
gear and drive at a steady speed. The display will change to a flashing “2”.
• Wait until the “2” stops flashing. then “3” should start flashing, shift to the next gear and continue.
Optionally: If the gears do not stop flashing you can manually override and jump to the next gear by pressing and
releasing the switch to store the gear position quicker.
• Repeat this through each gear. When you are done, come to a complete stop or press and hold the switch until the display
shows “SETvP”.
• Turn the key off and then on again to restart the gauges in normal operation, verify the gear position by riding through each
gear and seeing if positions agree.
SIGNAL
SIGNAL SIGNAL
SIGNAL Tach signal setup
• Press and release the switch until “SIGnAL” is displayed, then press and hold the switch until “ – “ is displayed.
• Release the switch. The setting will be displayed. (12 HI or 5 LO). 12 HI is the normal setting.
• Press and release the switch until the desired setting is displayed.
• Press and hold the switch until “ - ” is displayed.
Tachometer Troubleshooting guide.
Problem Possible cause Solution
Gauge will not light up Red wire does not have power. Connect to a location that has power.
Black wire is not getting a good ground. Connect ground to a different location.
Gauge is damaged. Return gauge for repair. (see instructions)
Clock will not light up Orange wire does not have power. Connect to a location that has constant power.
Clock will not keep time Orange wire does not have constant power. Connect to a location that has constant power.
Gauge lights up, but tach Yellow wire is not connected properly. Check connection from yellow wire to tach signal wire.
will only show zero. Ignition system not grounded properly. Check engine and ignition system grounds.
Gauge is not grounded properly. Check gauge and engine grounds.
Tach signal type is not set correctly. Change the tach signal type (see instructions).
Gauge is not calibrated Gauge must be recalibrated (see instructions).
Tach reading is erratic or Tach signal wire is loose or broken. Check all wire connections and inspect wire for breaks.
jumps around. Poor ground connection. Check ground connection on tachometer, engine, and ignition
system.
Update rate is too fast. Reset display update speed slower.
Tach reading is incorrect. Gauge is not calibrated correctly. Gauge must be calibrated (see instructions).
Gear indicator is always * Gears not programmed. Program gear indicator in setup. (see instructions)
Gauge will not dim. Night dimming is turned off or too low. Change “night” setting in setup. (see instructions).
Gauge remains dim at all Night dimming is turn too high. Change “night” setting in setup. (see instructions).
times. Light sensor at bottom of gauge is covered. Make sure the lower part of the lens is not covered.
Cruise Engage indicator Loose or incorrect connection to indicator wire. Check that the appropriate indicator wire has about 12 volts
does not work. when the indicator should be off and about 0 volts when the
indicator should be on.