


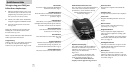
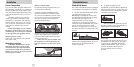


Controls and Features
98
Power
To turn the GX65 on or off, press the
power button on the top case. When you
turn the GX65 on, it will provide a double
beep tone, acknowledging it’s ready.
Volume Control (VOL)
To increase or decrease the audio volume,
press and hold the VOL•MUTE button
located on the top case. A sample alert
tone will be generated, along with a
corresponding bar-graph on the display.
Once you have reached your desired
volume level, simply release the button.
This level will be stored in memory.
Power-on Indication
After the GX65’s start-up sequence is
complete, the display will show the full
word: Highway, AutoScan or AutoNoX to
indicate which sensitivity mode it is in.
If you prefer, you can select alternate
power-on indicators. See the
Programming section for details.
Mute
The Mute button, located on the GX65’s
top panel and SmartPlug, allows you to
silence the audio alert during a radar
encounter. To mute the audio for a specific
signal, briefly press the Mute button. After
that radar encounter has passed, the mute
will automatically reset and the audio will
alert you to the next encounter.
To unlock a signal that has already
been stored, simply press and hold the
mute button while the GPS indicator is
spinning. The display will read: “Unlock?”
Press the mute button again to unlock it
from memory.
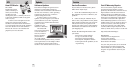
GPS Signal Indicator
The GPS signal indicator provides a visual
indication that the GX65 is receiving
satellite data.
NOTE: Satellite reception is
required to get the most out of your
GX65. To receive satellite data, the top
of the detector must have a clear view
of the sky. See Mounting Location for
more details.
The GPS indicator will flash on and off
until it receives satellite data. Once
received, the icon will stop flashing and
remain on the display.
The GPS indicator also provides a
visual acknowledgement that the detector
is rejecting a signal that has been stored in
memory using the AlertLock feature.
Once a false alarm has been stored, the
GPS indicator will rotate clockwise,
indicating that it is rejecting that signal.
Sensitivity Switch (SEN)
The “SEN” button selects the GX65’s
sensitivity mode. We recommend the
AutoScan mode for most driving.
In the AutoScan mode, the GX65
provides real-time radar performance
based on your vehicle speed. As your
vehicle speed increases, the radar
sensitivity (X and K-band) is set to
maximum range. As the vehicle speed
decreases, the radar sensitivity (X and K-
band only) is minimized to further reduce
unwanted false alarms. Full sensitivity is
maintained on all other bands.
You can also select conventional
Highway and AutoNoX modes. Highway
mode provides maximum sensitivity on all
bands. AutoNoX is the same as AutoScan
mode with X-band turned off.
Brightness (BRT)
The GX65’s BRT button selects the
brightness of its display and keypad. There
are five settings: Minimum (BRT MIN),
Medium (BRT MED), Maximum (BRT
MAX), Auto (BRT AUTO) and Full Dark
(BRT DARK).
Brightness (BRT AUTO) (default)
In this setting, the display and keypad
brightness will automatically adjust based
on the ambient light in the vehicle.
AutoMute
Your GX65’s has our patented AutoMute
feature. After the GX65 alerts you to a
radar encounter at the volume you have
selected, the AutoMute feature will
automatically reduce the volume to a lower
level. This keeps you informed without the
annoyance of a continuous full-volume
alert.
If you prefer, you can turn the
AutoMute feature off. See the Programming
section for details.
AlertLock/GPS Filter
The “GPS” filter button turns the GX65’s
GPS-powered AlertLock feature on and off.
(default is on)
To lockout a false alert, press the mute
button (on the top case or on the
SmartPlug) three (3) times during the alert.
Pressing the mute button the first time
will silence the audio. Pressing it a second
time will generate a prompt on the display
that will read: “Lockout?” Press it a third
time to confirm that you want to lock this
signal out by location and frequency. A
“Stored” message will be displayed.
Once a signal has been stored, the
detector will reject this signal the next
time you approach this area. You will see
confirmation of this by the GPS indicator
spinning clockwise on the display, which
confirms that the signal is being rejected.