


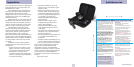
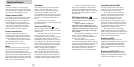


Quick Reference Card
1
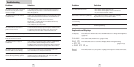
Programming Details
Restoring the Factory Default Settings
To restore your GX65 to its original
factory settings, press and hold the
“SEN” and “BRT” buttons while turning
the power on. A
Reset message will
be displayed, accompanied by an
audible alert, acknowledging the reset.
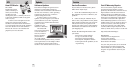
BELTRONICS Pro GX65 Quick Reference Card
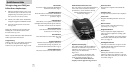
Remove card along perforations
Remove card along perforations
Congratulations
You’ve just purchased the most sophisticated
radar and laser detector in the world—the
BELTRONICS Pro GX65.
The GX65 delivers the best long-range
warning on all radar bands including X, K,
Superwide Ka, Ku and instant-on POP.
Multiple front and rear laser sensors provide
360 degree laser protection, including the
widest field of view.
For the ultimate in Laser protection, the
BELTRONICS Pro GX65 can also be used in
conjunction with our Laser Shifter product.
Visit our website at beltronics.com or call us
toll-free at 800.341.2288 for more details.
The BELTRONICS Pro GX65’s GPS-
powered technology provides permanent
relief from false alarms including automatic
door openers, motion sensors and other
radar-based sensors. And, it comes pre-
loaded with thousands of red light and fixed
position speed camera locations throughout
North America. Data for additional countries
are also available. Call or visit our web site
for details.
In addition, the Pro GX65 introduces
the following state-of-the-art performance
and features:
• New web-ready access allows you to
update your safety camera data and
other software through our website.
• Revolutionary AutoScan mode
provides real-time radar performance
based on vehicle speed, plus Highway
and AutoNoX settings.
• SpeedCheck feature provides an
instant view of your vehicle’s speed
during an alert.
• Mark Location feature allows you to
instantly “Mark” known speed traps,
cameras and other places of interest.
• Easy-to-use Programming allows you
to customize up to 8 features.
• Ultra-bright alphanumeric display
with 280 LEDs.
• Exclusive Threat Display tracks
multiple radar signals and their
relative signal strength.
• Exclusive Tech Display provides
actual numeric frequency for any
radar signal.
• Selectable radar and laser bands (on/
off) allow you to customize which
bands are monitored.
• Selectable Markers (on/off) allow you
to customize which Markers are
monitored.
• Includes exclusive SmartPlug for easy
access to Mute and AlertLock features.
If you’ve used a radar detector before, a
review of the Quick Reference Guide on
pages 4 and 5, and the Programming
information on pages 14-18 will briefly
explain the new features. If this is your first
detector, please read the manual in detail to
get the most out of your BELTRONICS’
revolutionary performance and innovative
features.
Please drive safely.
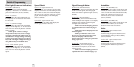
There are 8 user-selectable options so you
can customize your Pro GX65 for your own
Programming.
The buttons labeled “MRK” and “BRT”
are also used to enter the Programming
Mode, REVIEW your current Programming
settings, and to CHANGE any settings as
desired. The words “PGM,” “MRK” and “BRT”
are located on the top of the detector.
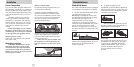
How to use EZ-Programming
1 To enter Programming, press and
hold the “MRK” and “BRT” buttons
down for 2 seconds. The unit will beep
twice, and display the word
Program.
2 Then press the “BRT” button to
review the categories. You can either
tap the button to change categories, or
simply hold the button down to scroll
through the categories.
3 Press the “MRK” button to change
any setting. You can either tap the
button to change from setting to setting,
or hold the button down to scroll through
all the options.
4 To exit Programming, simply wait 8
seconds without pressing any button,
or press the power button. The unit will
display
Complete, beep and return to
normal operation.
An example:
Here is how you would turn GX65’s
AutoMute feature off:
1 Enter Programming by holding both
the “MRK” and “BRT” buttons down for 2
seconds. GX65 will beep and display
Program.
2 Then hold the “BRT” button down.
The GX65 will scroll through the categories,
starting with Pilot (
Pilot), then
SpeedCheck (
spdck), then Signal Strength
Meter (
Meter), then AutoMute (aMute).
3 Release the “BRT ” button when the
GX65 displays the AutoMute item.
Since the factory setting is for AutoMute to
be on, GX65will display aMute ON.
Note: If you accidentally don’t release the
“MRK” button in time, and the GX65 goes to
the next category, simply hold the “MRK”
button down again, the GX65 will scroll
through all of the categories. Once you’re
back to your desired category, release the
“MRK” button.
4 Press the MRK ” button to change from
aMute ON to aMute OFF.
5 To exit Programming, simply wait 8
seconds without pressing any buttons, or
press the power button. The GX65 will
display Complete, beep and return to
normal operation.