


RF-302
3
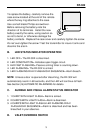
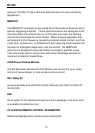
To replace the battery, carefully remove the
case screw located at the end of the remote
where the key ring attaches to the case.
Use a small blade Phillips screwdriver.
Before removing the battery note the
direction of its terminals. Install the new
battery exactly the same, using caution so
as not to bend, or otherwise damage the
battery contacts. Replace the case cover and carefully tighten the screw.
Do not over-tighten the screw! Test the transmitter to insure it arms and
disarms the alarm.
B. LED STATUS INDICATOR OPERATION
1. LED OFF= The RF-302 is disarmed.
2. LED CONSTANT ON= Indicates open trigger circuit.
3. LED FAST FLASHING= Passive arming timer is counting down.
4. LED FLASHING= The RF-302 is armed.
5. LED FLASHING IN A 2 FLASH/HOLD SEQUENCE= Alarm breach.
NOTE: Unless a door is opened after disarming, the RF-302 will
automatically rearm in 60 seconds, and the LED will continue to flash.
See Section (G) AUTOMATIC RE-ARMING for details.
C. AUDIBLE AND VISUAL ALARM STATUS INDICATOR
1. 1 CHIRP WITH LIGHT FLASH= Alarm is armed.
2. 2 CHIRPS WITH LIGHT FLASH= Alarm is disarmed.
3. 4 CHIRPS WITH LIGHT FLASH & LED FLASHING IN A 2
FLASH/HOLD SEQUENCE= Alarm is disarmed and has been
breached in your absence.
D. VALET/OVERRIDE SWITCH
+
-