INCR.
SURR.
T
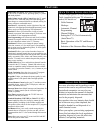
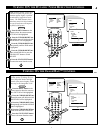
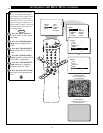
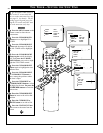
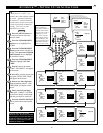
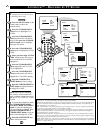
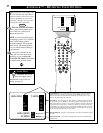
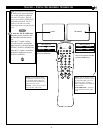
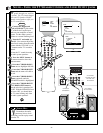
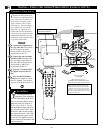
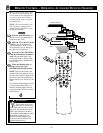
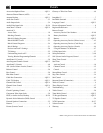
he TVÕs audio/video input
jacks are for direct picture
and sound connections between
the TV and a VCR (or similar
device) that has audio/video out-
put jacks.
Connect the VIDEO (yellow)
cable to the VIDEO AV1 jack on
the back of the TV. Then con-
nect the AUDIO (red and
white) cables to the AUDIO (left
and right) AV1 jacks on the rear
of the TV.
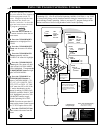
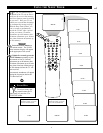
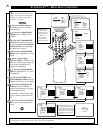
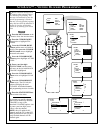
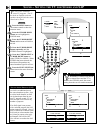
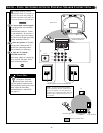
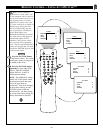
Connect the VIDEO (yellow)
cable to the VIDEO OUT jack
on the back of the VCR. Then
connect the AUDIO (red and
white) cables to the AUDIO (left
and right) OUT jacks on the rear
of the VCR.
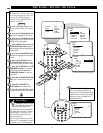
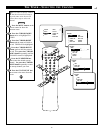
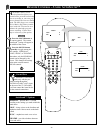
Turn the VCR and the TV
ON.
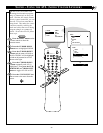
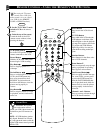
Press the MUTLIMEDIA
button on the remote control to
select the AV1 channel.
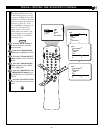
With the VCR ON and a prere-
corded tape inserted, press the
PLAY button to view the tape
on the television.
AUDIO IN
(RED/WHITE)
VCR
(EQUIPPED WITH VIDEO AND
AUDIO OUTPUT JACKS)
VIDEO IN
(YELLOW)
SOUND – USING THE AUDIO/VIDEO INPUT JACKS
BACK OF VCR
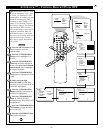
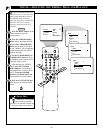
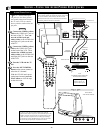
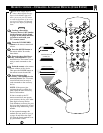
NOTE: Repeatedly pressing the MULTIMEDIA button
on the remote control will toggle the picture source from
the current channel (Tuner Aor B), the last viewed
channel, then AV1 (or CVI) connection, then the AV2
connection, and then the AV3 connection.
If you are using a
nonstereo device, use
only the Audio R jack.
AUDIO/VIDEO INPUTS
BACK OF TV
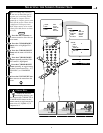
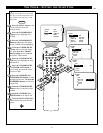
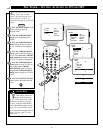
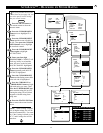
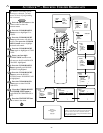
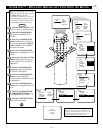
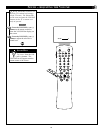
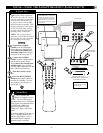
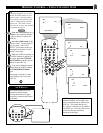
NOTE: For more convenient direct playback connections, you can
use your TV’s side video input panel, located on the right and
angled toward the front for easy access. The audio/video jacks in this
panel allow for quick connections that are especially handy for play-
ing back camcorder (composite video or S-VHS) tape recordings.
Press the remote control’s SOURCE button to select the AV3 mode.
Then use the side jack panel inputs for playback on the TV.
SIDE VIDEO
JACK PANEL INPUTS