52
4
The “Local Port Support” screen appears. Select the port driver to be
installed and then click the [Next] button. For Serial or Ethernet interface,
do not select any printer driver and click [Next] button.
5
The “Printer Configuration” screen appears. When installing the printer
driver as well as the APD, click the [Add] button.
6
The Add Printer screen appears. Configure the printer driver and port to
use, and click the [Next] button.
7
The “Parallel Port Settings” screen appears. Configure the settings of the
Parallel port and click the [Next] button. Proceed to Step 10.
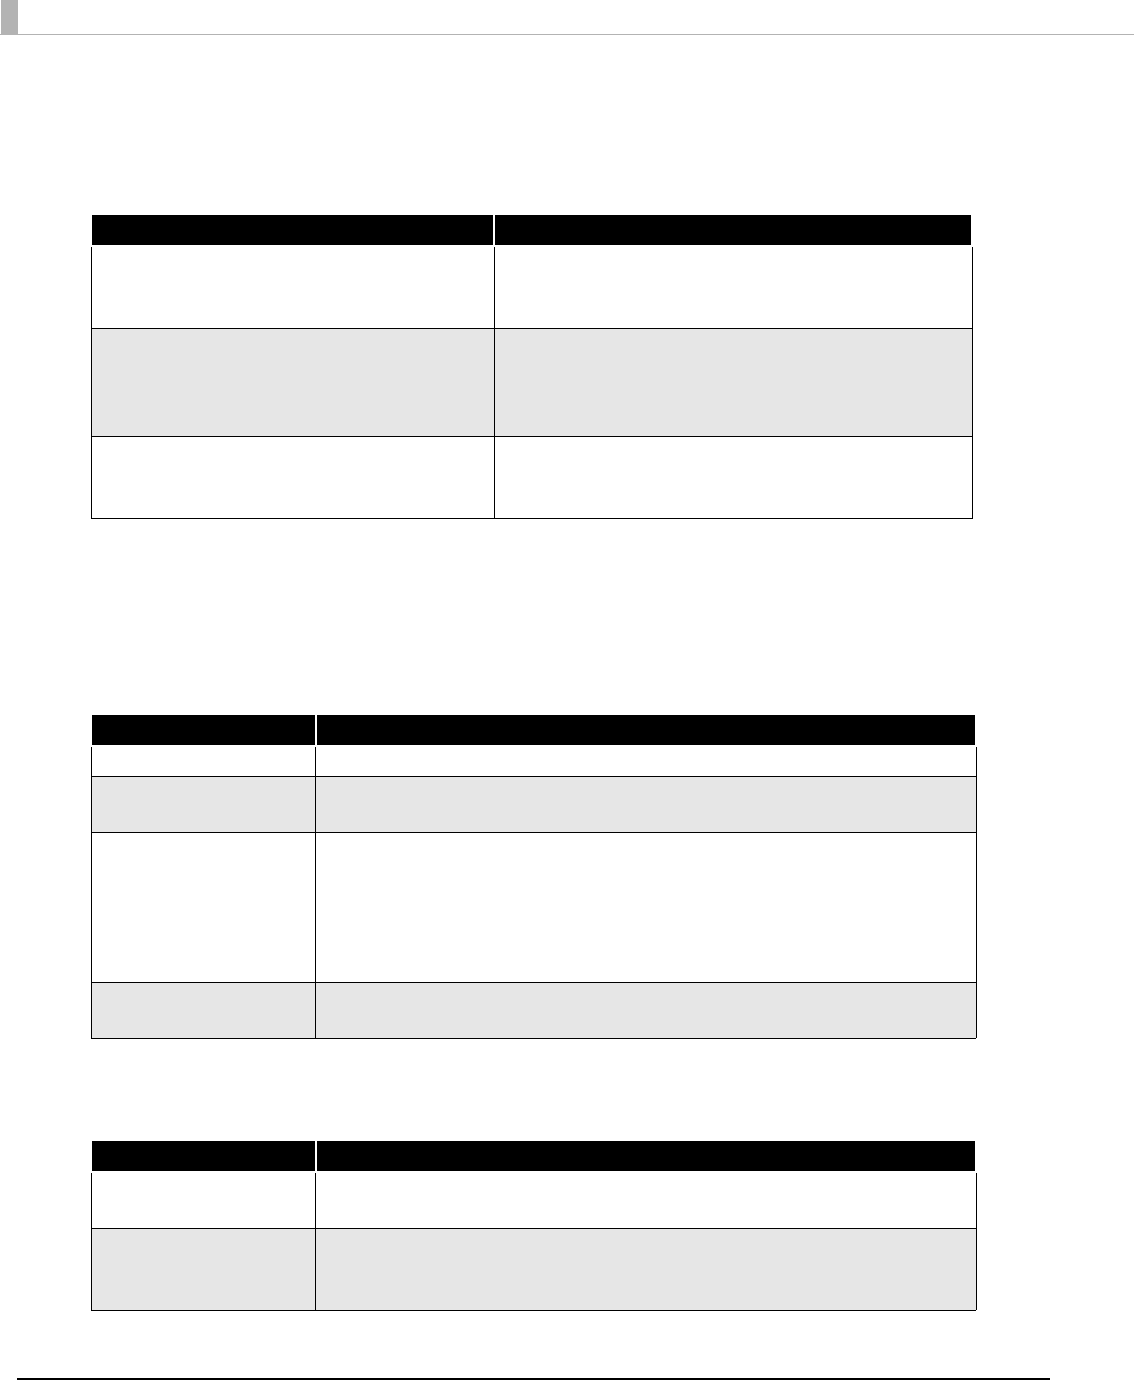
Item Description
Install EPSON parallel port driver. When this is checked, EPSON Parallel Port Driver for
the TM printer equipped with Parallel interface will
be installed.
Automatically install detected USB devices. When this is checked, the Plug and Play function will
be enabled for the TM printer equipped with the USB
interface. If this is not checked, the printer driver
cannot be installed by the Plug and Play function.
Launch StatusViewer on login.
(TM-C100 is needed)
When this is checked, the Status Viewer
automatically starts to run when you login the
computer.
Setting Description
Select driver Select the printer driver to be installed.
Printer name The printer driver name. This is changeable.
Do not use Unicode/2-byte characters for the name.
Communication Select the type of interface to connect the computer and printer.
Create a Parallel port: Proceed to Step 7.
Create a Serial port: Proceed to Step 8
Create an Ethernet port: Proceed to Step 9.
Create a USB port: Proceed to Step 10.
Set as Default Printer Check when configuring the printer as that normally used from the
Windows applications.
Setting Description
Printer name The printer name you entered at Step 6 is displayed. This cannot be
changed.
LPT Port Specify the number of parallel port used for connecting the printer.
Usually, the port number is automatically displayed and no setting is
required.


