Component Replacement: Control Actuator
InfraStruXure InRow RC Service 39
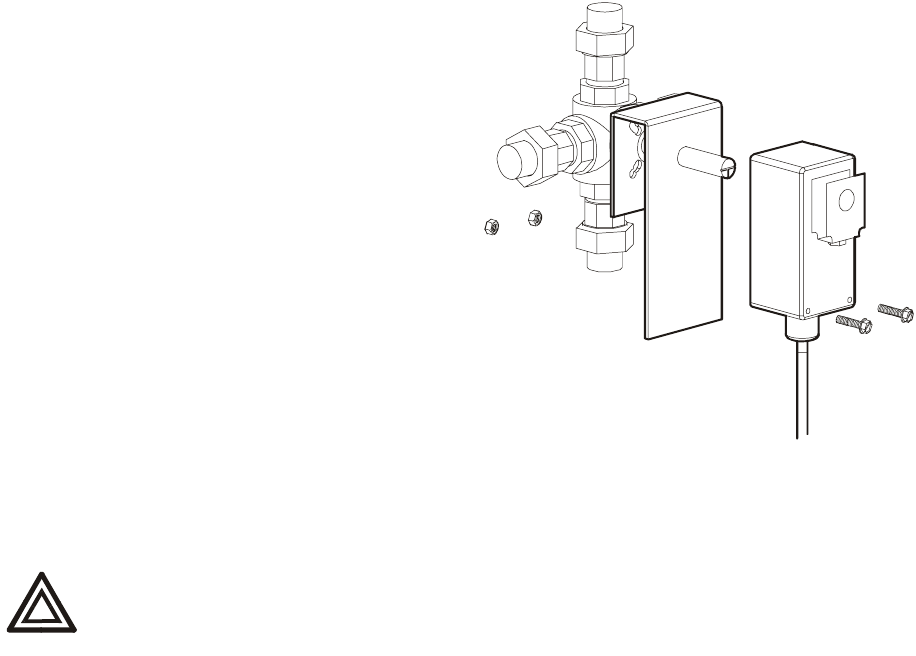
6. Remove the two lower Phillips head screws
secured with 1/4 inch (6 mm) nuts securing
the actuator to the bracket. Save the screws,
nuts, and washers for the new actuator.
7. Slide the actuator off of the shaft and remove
it from the unit.
8. Ensure the new actuator clamp is in the same
position as the old actuator.
9. Reverse this procedure to install the new
actuator. Tighten the set screw to 60 in·lb (6.7
N·m) of torque.
10. Check the three position switch at the bottom-
right of the actuator. Make sure that the
position matches that of the switch on the
actuator being replaced in step b of step 4.
11. Verify proper operation of the new actuator
and return the unit to service.
12. Replace filters, and doors and return the unit to service.
Warning
Doors and panels are equipped with locks. Locks must be engaged while the
unit is operating.
na2020a


