


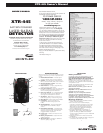

XTR-445 Owner’s Manual
Auto Shut Off Mode
Auto Shut Off Mode automatically shuts off the
detector. The timer is reset:
1. Each time the detector is turned off
2. The optional power cord is unplugged
3. Any button is pressed before the timer has expired.
The detector will alert you with an audible and
visual warning before it shuts off. This auto off
function can be programmed for the following:
Off, 1, 2, or 3 hours. During this warning you can
reset the timer by pressing any button. If the unit
has automatically turned itself off, press the Power
button to turn the unit back on. You can manually
engage the Auto Shut Off Mode by pressing and
holding the City button until one beep is heard.
Refer to “Option Select Mode” for instructions
for changing the Auto Shut Off Mode settings.
Filter Mode
There are times when a radar detector can emit
the same frequency as police radar and can
cause your detector to falsely alarm. Sometimes
a detector can display a signal when picking up
another radar detector in vehicle close by. The
Whistler Filter Mode option provide a method
to study the signal which will verify if the signal
is a legitimate police radar or a false alert from
another detector.
Filter: Allows for normal filtering.
Filter 1: Provides an extra step to analyze the signals
that may come from other detectors.
Filter is the factory default and should provide adequate
filtering for most conditions. If you experience excessive
alerts due to radar detectors in other vehicles, try the
Filter 1 option. Filter Mode functions in both Highway
and City Modes. See Option Select Mode to change
Filter settings.
OPERATION OPERATION
12
Option Select Mode
Entering Option Select Mode allows you to customize
options such as Tone Select, Abbreviated Power Up
Sequence, and VG-2 Mode. Press the Menu button to
enter Option Select Mode. When selecting options,
the Power/BL or Quiet/VOL buttons must be pressed
within 20 seconds or Option Mode will automatically be
exited. To enter:
SWS
Stay Alert Feature
The Stay Alert Feature is designed to test a driver’s
alertness. To engage (when unit is not alarming) :
•PressandholdtheCitybuttonfor
approximately 2 seconds. Release button during
or immediately after the alert is given. Display
shows:
Within 30-60 seconds an alert is sounded; to
show alertness, the driver must press either the
City, Volume, or Quiet buttons within 3-5 seconds. If
a button is pressed within 3-5 seconds, the cycle is
repeated.
If a button is not pressed within 3-5 seconds alarm
sounds and the display shows:
•PressPowertoexit.
WARNING!!! Stay Alert is NOT intended as
a substitute for adequate rest. You should NOT
operate a vehicle if you are drowsy. During
extended periods of vehicle operation, you should
take frequent breaks. Improper reliance on the
Stay Alert feature may result in vehicle damage,
personal injury or death. NEVER OPERATE A
VEHICLE IF YOU ARE DROWSY.
Safety Warning System
™
In communities where transmitters are located,
the Safety Warning System
™
displays over 60
text messages. When Safety Radar is detected,
a unique audio alert sounds.
Safety Warning System Text
Example: Poor - Road - Surface.
Note: Not all areas have Safety Warning System
™
transmitters.
OPERATION
13
POP™ Mode Alerts
Because POP
™
Mode radar utilizes the same
K or Ka band frequencies, POP
™
Mode Alerts will be
displayed as regular radar alerts.
LASER/RADAR ALERTS
Speed Radar Audio/Visual Alerts
When X, K, or Ka is detected, the band ID and
signal strength are displayed. The audio alert
is continuous and has a pattern like a geiger
counter. The faster the beep, the closer or
stronger the radar source.
Laser Audio/Visual Alerts
When a laser signal is detected, the audio alert is
continuous for a minimum of 3 seconds.
•TheDisplayShows:
Pulse Protection
®
Pulse (instant-on) radar is more difficult to
detect than conventional radar because it
remains ‘off’ until activated to measure the
speed of a targeted vehicle.
When a pulse type transmission is detected, the
Whistler detector sounds an urgent 3-second
audio warning and the display shows:
After the 3-second pulse alert, the standard alert
pattern continues for as long as the signal is
present.
It is important to respond promptly to a pulse
alert, since warning time may be minimal.
POP
™
MODE ALERTS
14
VG-2 Audio/Visual Alerts
Note: You must turn this feature on before it will
detect VG-2.
When a VG-2 signal is detected, the detector ‘hides’
its own radiated signal and becomes undetectable
by the VG-2.
Every 30 seconds, the detector checks for a VG-2
signal. If a VG-2 signal is still present, the unit
continues to hide and repeats the VG-2 alert. If no
signal is detected, two beeps are provided,
indicating an ‘all clear’ condition. During a VG-2
Alert X, K, and Ka band signals cannot be
received (Reference page 21 for VG-2 information).
Alert Priority
When two or more signals are received at the
same time, the alert priority is:
1. Laser
2. VG-2
3. Speed Radar
4. Safety Radar
Example:
If X band is alerting, then suddenly a VG-2
signal is detected, the VG-2 warning will
override the X band alert.
VG-2 ALERTS
15
Reset Features
All user features can be reset to factory settings.
•UnplugthePowerCordfromtheunit.
•RemovetheBatteries.
•PressandholdPower/DarkandQuiet/Vol
buttons.
•PlugthePowerCordintotheunit.
•Waitfor2beeps.
•ReleasePower/DarkandQuiet/Volbuttons.
Unit is now reset to the following features
and settings.
Default factory settings are:
1. Audio to level (4).
2. Highway Mode.
3. Auto Quiet Mode OFF.
4. VG-2 Detection Mode OFF.
5. SWS OFF.
6. Vehicle Battery Saver to 1 hour.
7. Full Power Up sequence.
8. Default TONE 3.
9. POP OFF.
10. Dim/Dark to full Brightness.
11. LED Periscopes to Flashing.
12. TFSR OFF
TROUBLESHOOTING
Your Whistler detector is expertly engineered
and designed to exacting quality standards
to provide you with reliable, trouble-free
operation. If your unit has been correctly
installed following the guidelines in this manual,
but is not operating optimally, please refer to
the troubleshooting guide below.
PROBLEM: No display or audio.
• Make sure the batteries are installed with the
correct polarity.
• Make sure the batteries are fully charged.
RESET FEATURES
16