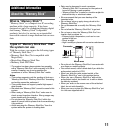
5
Location of controls
Refer to the pages listed for details.
a VOICE/POS. button 6, 7
During route guidance:
To hear the next voice guidance.
In the menu display:
To show the map.
In the map display:
To show your current car position.
b Display window/touch screen
c Built-in GPS aerial
d ?/1 (on/standby) button 5
To turn the unit on/off.
e CHG (battery charge) indicator
Lights up in red while charging, and changes
to green when fully charged.
When the adapter is disconnected, the
indicator goes off.
f Nameplate
g TMC antenna (aerial) jack*
1
h DC IN 5-5.2V jack
To connect to the car battery adapter or AC
adapter*
2
.
i RESET button 14
j Memory Stick access indicator
k Suction cup
l Speaker
Outputs guidance and warnings.
m USB jack 10
To connect to a computer with the USB
cable.
n Memory Stick Duo slot
For “Memory Stick Duo” insertion for
functional expansion.
*1 TMC models only
*2 Optional accessory
Turning the unit on/off
To turn the unit on/off
Press ?/1 (4).
Note
If you do not use the unit for a long term, the built-in
battery may be depleted, and the unit will not turn on.
In such a case, connect the car battery adapter and
charge the unit.
After you charge the unit, it may take time to receive
GPS signals when turning on the unit.
Performing initial setup
Follow the on-screen instructions to perform the
setup.
The setting can then be further configured in the
setting menu at any time (page 10).
Receiving GPS signals
After the initial installation, park your car in a
safe, open place (no high buildings, etc.) for up
to 20 minutes to allow for GPS signals to
calculate the current car position properly before
using the navigation system.
The GPS signal reception condition icon is
displayed on the screen. The indicator lights
up in red when the signal cannot be received.


