


23
SECTION 4 – ADJUSTMENTS & REPAIRS
WARNING
DO NOT attempt any adjustments, maintenance,
service or repairs with the engine running. STOP
engine. Set park brake. Shift transmission to
neutral. Remove key. Remove spark plug wire from
spark plug and secure away from plug. Engine and
components are HOT. Avoid serious burns, allow
all parts to cool before working on machine.
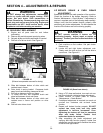
4.1 DRIVE BELT REPLACEMENT
1. Engine and all parts must be cool before
proceeding.
2. Remove key and disconnect spark plug wires.
3. Set park brake and shift transmission to neutral.
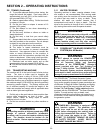
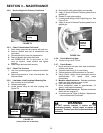
4. Roll belt off of driven clutch. See Figure 4.1.
FIGURE 4.1
(Exhaust components removed for clarity)
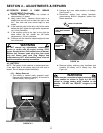
5. Slide belt between bottom of drive clutch and
notched area in frame.
6. Drive clutch is spring loaded. Compress clutch
away from frame allowing clearance for belt.
7. Pull belt up between clutch and frame.
8. To install new belt, first compress clutch and
place belt between clutch and frame.
9. Slide belt between bottom of drive clutch and
notched area in frame and position on drive
clutch.
10. Roll belt onto driven clutch.
4.2 SERVICE BRAKE & PARK BRAKE
ADJUSTMENT
Brakes are critical to the safe operation of the machine.
Check the function of the brakes frequently. Refer to
Section “Maintenance – Check Brakes”. If adjustment is
required, complete each of the following steps carefully.
Always verify that the brakes function properly after
performing any brake adjustments. Do Not operate the
machine if the brakes are not functioning properly.
WARNING
DO NOT operate machine if brakes are not
functioning properly. Adjust, repair or replace as
necessary. Contact your local authorized dealer for
assistance.
1. Park machine on flat surface. Set park brake.
Remove key.
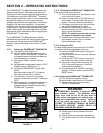
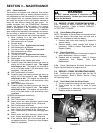
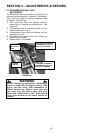
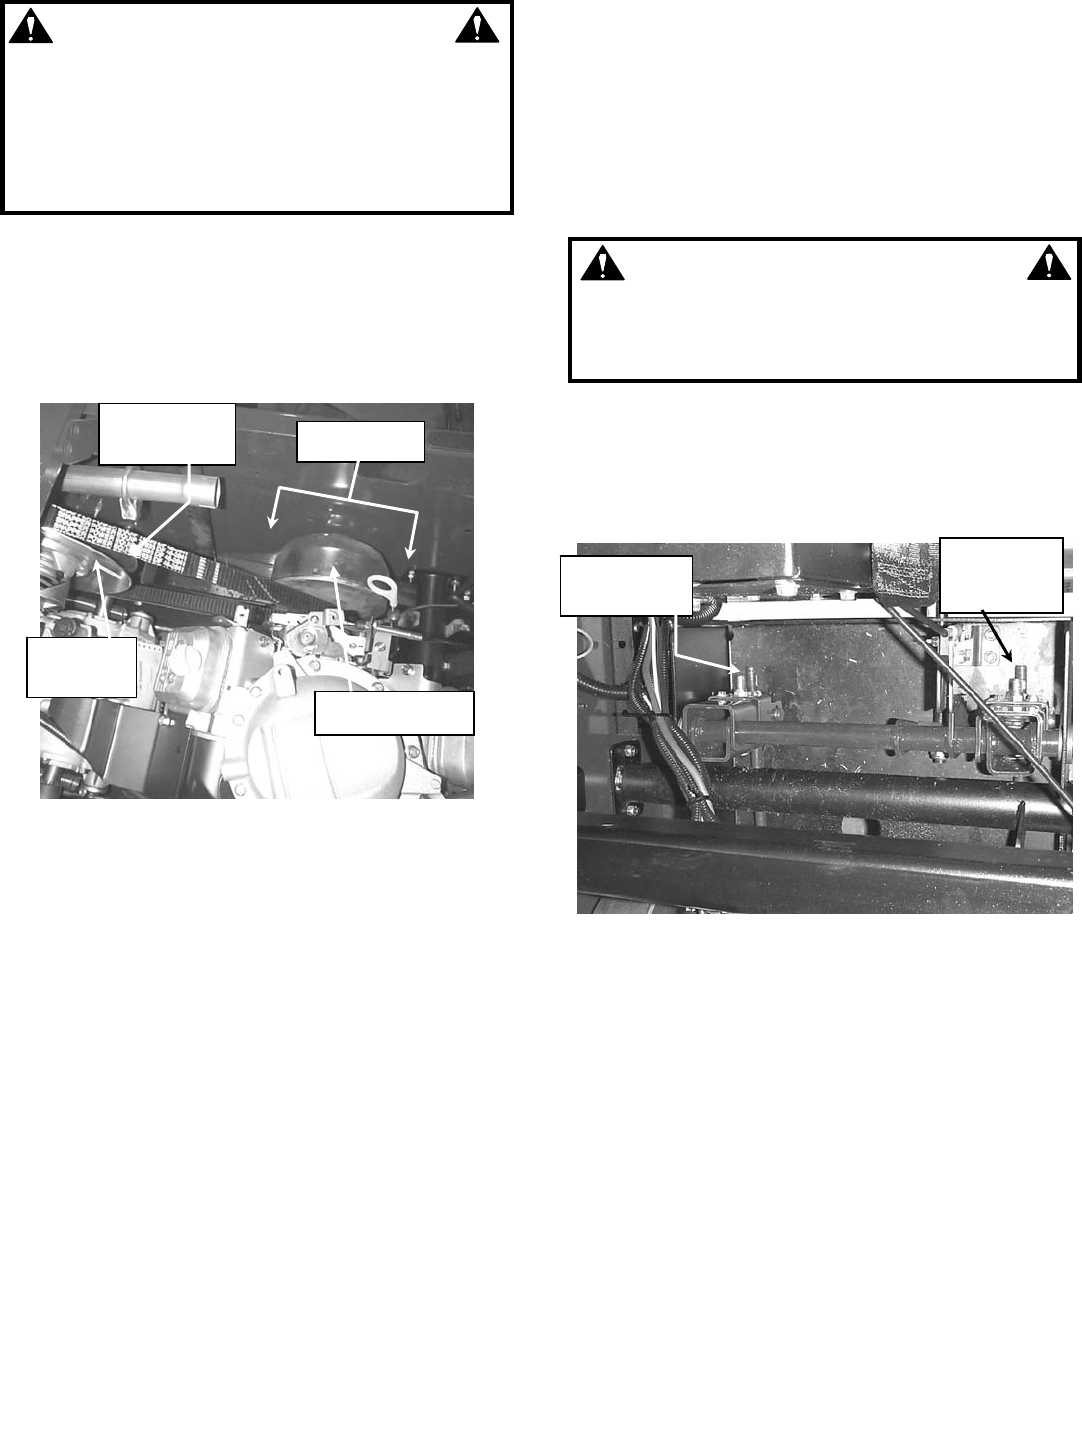
2. Locate left and right brake adjustment nuts.
Clearly mark the nuts so that you will be able to
count turns. See Figure 4.2.
FIGURE 4.2 (Seen from above)
3. Using a 7/8” deep well socket, turn each nut one-
half turn clockwise, tightening brake adjustment.
4. Check function of brake. Refer to Section
“Maintenance – Check Brakes”.
5. If additional adjustment is required, turn each nut
one-half turn clockwise and re-check brake
function.
6. Repeat until brakes function properly. DO NOT
exceed two turns total and only make
adjustment in half-turn increments. Over-
tightening the brakes will lead to premature
wear and brake failure. Contact local
authorized dealer for assistance.
7. After completing the brake adjustment and
verifying that they function properly, further fine
adjustment may be required to balance the action
of the left and right brakes.
DRIVE BELT
P/N 7-2935
DRIVEN
CLUTCH
DRIVE CLUTCH
COMPRESS
LEFT BRAKE
ADJUSTER
RIGHT
BRAKE
ADJUSTER
26