


21
SECTION 3 – MAINTENANCE
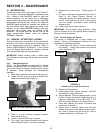
3.2.8. Check Interlocks
The machine is equipped with interlocks that prevent
the engine from cranking or starting unless the brake is
fully depressed and the transmission is in Neutral. It is
also equipped with an operator presence sensor that
will cause the engine to die if the operator attempts to
leave the seat without setting the park brake. On
models equipped with the POWERLINK Generator
System, the interlock kills the engine if the parking
brake is disengaged or the transmission is engaged
while the generator is being operated. The interlocks
were designed for the safety of the operator and others.
Do not modify or defeat the interlocks. Do not operate
the machine if interlocks are not functioning properly.
1. Move machine to a flat, open area free of
obstacles, children and others.
2. Shift transmission to Forward.
3. Set park brake.
4. Turn key to “Start”. Engine must not crank.
5. Shift transmission to Reverse.
6. Turn key to “Start”. Engine must not crank.
7. Shift transmission to neutral.
8. Release park brake.
9. Turn key to “Start”. Engine must not crank.
10. Set park brake and shift transmission to Neutral.
11. Start engine.
12. With engine at idle, release park brake.
13. Carefully grasp the steering wheel and raise up
slightly out of the operator’s seat. The engine
must begin to die. (The engine can continue to
run if you sit back down in the seat before it dies
completely.) Set park brake.
14. Shift Transmission to Forward.
15. Carefully grasp the steering wheel and raise up
slightly out of the operator’s seat. The engine
must begin to die. (The engine can continue to
run if you sit back down in the seat before it dies
completely.)
16. Shift Transmission to Reverse.
17. Carefully grasp the steering wheel and raise up
slightly out of the operator’s seat. The engine
must begin to die. (The engine can continue to
run if you sit back down in the seat before it dies
completely.)
POWERLINK-equipped models only:
18. Start engine.
19. Shift Transmission to Forward.
20. Reach down and raise generator speed control
lever. Engine should begin to die. Drop lever.
21. Shift Transmission to Reverse.
22. Reach down and raise generator speed control
lever. Engine should begin to die. Drop lever.
23. Shift Transmission to Neutral and disengage park
brake.
24. Reach down and raise generator speed control
lever. Engine should begin to die. Drop lever.
25. If the machine failed any of the above tests, do
not operate machine. Contact your local Snapper
dealer for assistance.
WARNING
DO NOT operate machine if interlocks are not
functioning properly. Contact your local authorized
dealer for assistance.
3.3 SERVICE – EVERY 25 OPERATING HOURS
3.3.1. Perform all service required after the first 5
hours of operation – Refer to Section “SERVICE –
AFTER FIRST 5 HOURS”.
3.3.2. Check Battery Charge Level.
NOTE: The battery in this machine is maintenance-free.
It has been filled to the proper level with acid and is
sealed. Do not attempt to open the battery.
1. Remove seat knobs and carefully tilt forward to
expose battery.
2. Remove battery, check voltage, and charge if
necessary. Refer to Section ‘Adjustments and
Repairs, Battery’.
3.3.3. Check Drive Belt
1. Visually inspect condition of drive belt for signs of
wear, deterioration, fraying or cracks.
2. Replace belt as necessary. Refer to Section
‘Adjustments and Repairs, Drive Belt
Replacement’.
3.3.4. Check “Maintenance Schedule” Section of the
Engine Owner’s Manual for engine service.
3.4 SERVICE – EVERY 50 OPERATING HOURS
3.4.1. Perform all service required after the first 25
hours of operation. Refer to Section “Service – Every
25 Operating Hours”.
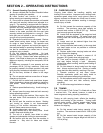
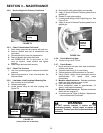
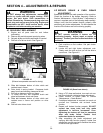
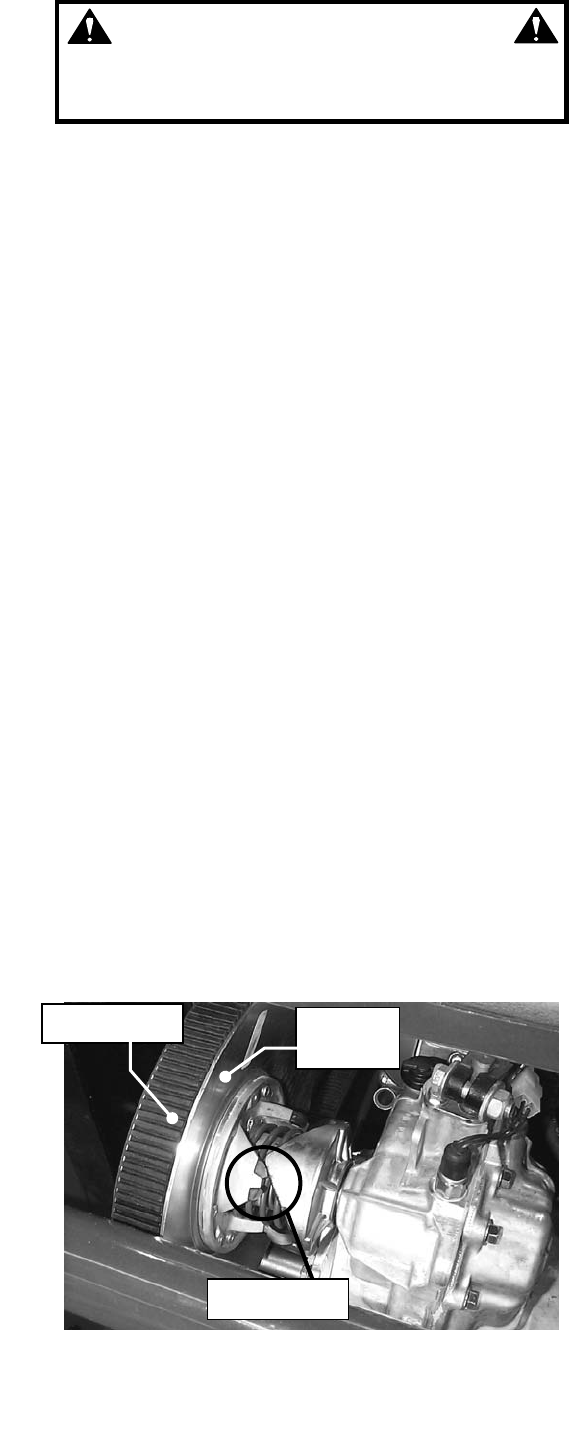
3.4.2. Check Wear Pads On Driven Clutch
1. Visually inspect for missing and worn wear pads.
2. There should be no signs of metal to metal
contact.
3. If replacement is necessary, contact your local
Snapper dealer for assistance.
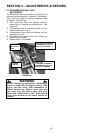
FIGURE 3.5
WEAR PADS
DRIVE BELT
DRIVEN
CLUTCH
24