


• 5 •
Determine which post of the battery is grounded (connected) to the chassis. If the 5.
negative post is grounded to the chassis (as in most vehicles), see step 6. If the
positive post is grounded to the chassis, see step 7.
For a negative-grounded vehicle, connect the POSITIVE (RED) clip from the jump 6.
starter to the POSITIVE (POS, P, +) ungrounded post of the battery. Connect the
NEGATIVE (BLACK) clip to the vehicle chassis or engine block away from the
battery. Do not connect the clip to the carburetor, fuel lines or sheet-metal body parts.
Connect to a heavy gauge metal part of the frame or engine block.
For a positive-grounded vehicle, connect the NEGATIVE (BLACK) clip from the jump 7.
starter to the NEGATIVE (NEG, N, -) ungrounded post of the battery. Connect the
POSITIVE (RED) clip to the vehicle chassis or engine block away from the battery.
Do not connect the clip to the carburetor, fuel lines or sheet-metal body parts.
Connect to a heavy gauge metal part of the frame or engine block.
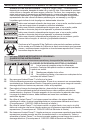
RISK OF EXPLOSION.
Models XJS5, XP500, XJS7C and XP750C: If you have connected the clips
backward, an audio alarm will sound. DO NOT turn the ON/OFF switch to the
ON position. This could cause serious damage to the Instant Power™ or the
vehicle. Reverse the connections and the audio alarm will stop.
Turn ON the Jump Start ON/OFF switch. Crank the engine. If the engine 8.
does not start within 5-8 seconds, stop cranking and wait at least 1 minute before
attempting to start the vehicle again. (This permits the battery to cool down.)
After the engine starts, make sure to turn OFF the Jump Start switch. 9.
Then, disconnect the black clip (-) and then the red clip (+), in that order.
Recharge the Instant Power™ as soon as possible after use.10.
RISK OF EXPLOSION.
To prevent sparking, NEVER allow the clips to touch together or to contact the
same piece of metal. Never attempt to jump start a frozen battery.
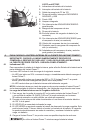
Powering a 12V DC Device:7.2
The Instant Power™ is a power source for all 12V DC accessories that are
equipped with a 12V accessory plug. Use it for power outages and shing or
camping trips.
Make sure the device to be powered is OFF before inserting the 12V DC accessory plug
into the 12V DC accessory outlet.
Ensure the battery clips are securely clipped on the storage holders.1.
Open the protective cover of the DC power outlet on the front of the Instant Power™.2.
Plug the 12V DC device into the DC power outlet, and turn the 12V DC device on 3.
(if required).
If the 12V DC device draws more than 15A or has a short circuit, the internal 4.
circuit breaker of the Instant Power™ will trip and disconnect the power to the
device. Disconnect the 12V DC device. The breaker will automatically reset after
an overload occurs.
The DC power outlet is wired directly to the internal battery. Extended operation of a 12V
DC device may result in excessive battery drain. Recharge immediately after unplugging
the 12V DC device.
Using the USB Port (Models XJS5, XP500, XJS7C and XP750C)7.3
The USB port provides up to 500mA at 5V DC.
Ensure the battery clips are securely clipped on the storage holders.1.
Turn the Instant Power™ On/Off switch to the ON (clockwise) position.2.
Plug the device into the USB port on the front panel.3.
Turn the USB device on.4.
Reverse these steps when nished using the USB port.5.
Charge the Instant Power™ as soon as possible after using the USB port.6.
Using the Built-In Light7.4
Position the Instant Power™ on a at, stable surface near the intended work area.1.
Ensure the battery clips are securely clipped on the storage holders.2.