


10 Raystar 120 & Raystar 112LP GPS Receivers - Owner’s Handbook
2 Installation
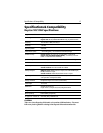
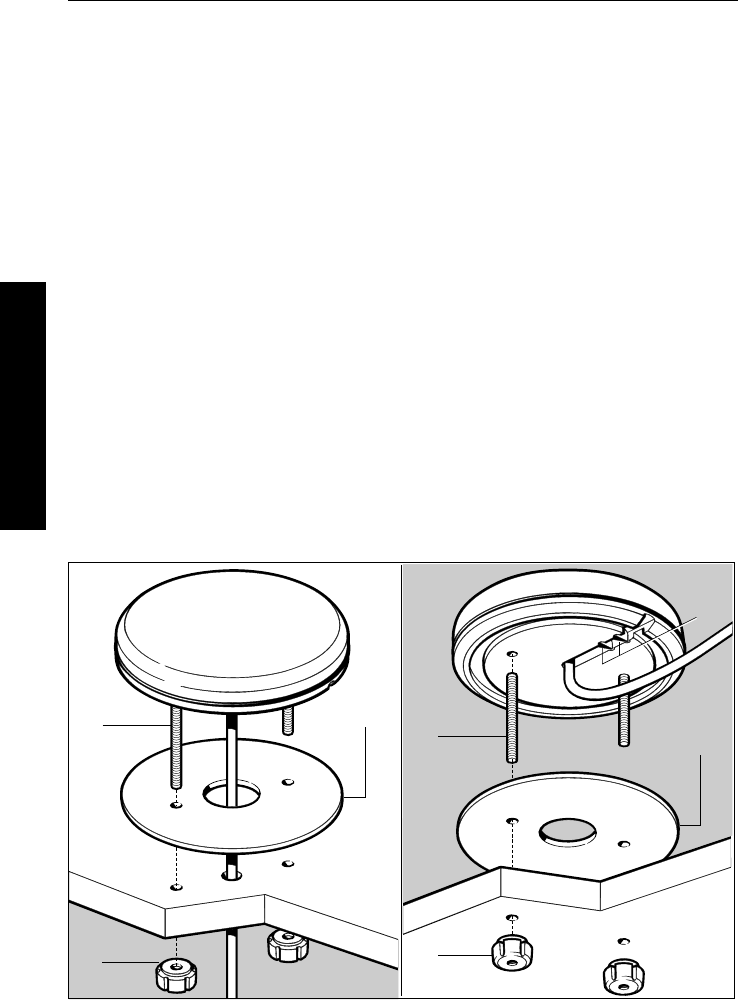
Surface mounting
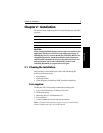
1. Use the template supplied in this handbook to mark the two 6 mm
(0.25 in) fixing holes. and then drill
2. OPTION A:
If the cable is going to pass through the mounting surface drill either:
• 6 mm (0.25 in) center hole (for bare-ended SeaTalk cables), or
• 19 mm (0.75 in) center hole (for NMEA plugged cables)
OPTION B:
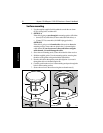
If the cable is going to exit from the side of the receiver above the
mounting surface, remove the two plastic tabs (1) obstructing the
cable channel. If you do not remove these tabs before using the
cable channel, you could damage the cable.
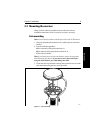
3. Screw the two mounting studs (2) into the underside of the receiver.
4. Stick the supplied gasket (3) to the mounting surface, ensuring that
the holes on the gasket correspond with the drilled holes
5. Pass the cable down through the center hole (Option A) or route it
through the cable exit channel (Option B).
6. Carefully position the receiver so the mounting studs pass through the
holes in the mounting surface.
7. Secure the receiver to the surface using the two thumb nuts (4).
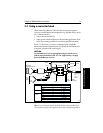
Figure 2-2: Surface mounting
D5897-1
1
2
3
4
2
3
4
Top view Underside view
AB