23 - ENG
CLEANING AIR FILTER
ELEMENT (FIG. 1, 11)
burn. Engine and surrounding parts
Surfaces identified in Figure 1 and 2).
Allow engine to cool prior to servicing.
A dirty air cleaner will restrict airflow to
the carburetor. To prevent carburetor
mal func tion, service the air filter
regularly. Service more frequently when
operating the engine in extremely dusty
areas.
Using gasoline or flam-
mable solvent to clean the filter element
can cause a fire or explosion.
Risk of fire. Do not
operate without air filter.
To Clean the elements
Risk of unsafe
operation. When using compressed air,
user always must wear eye protection
that conforms to ANSI Z87.1. (CAN/CSA
protection or a properly fit ting face
mask.
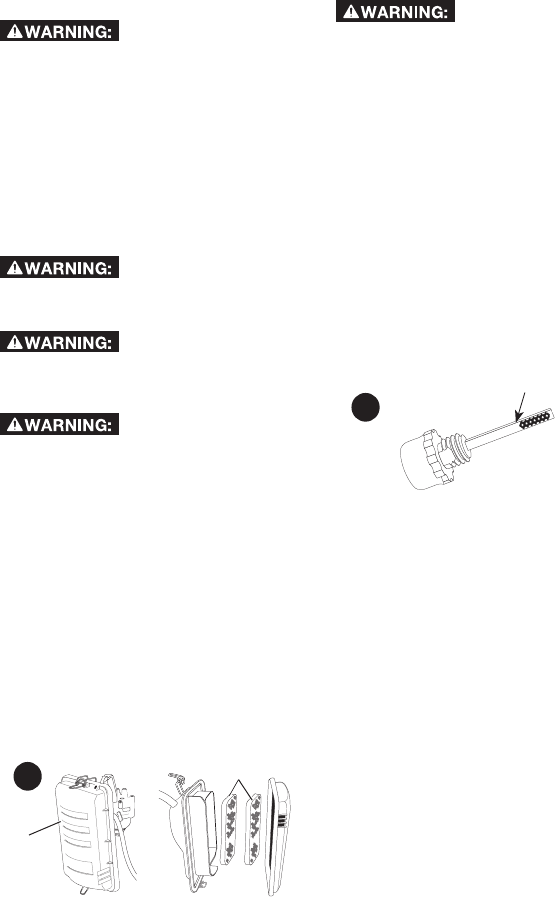
1. Unsnap the air filter cover (I) clips
and remove the air cleaner cover.
2. Remove the element from air filter.
3. Wash element(s) (RR) in a solution
of house hold detergent and warm
water, then rinse thoroughly, or
wash in non flam mable or high
flash point solvent. Allow the
element(s) to dry thoroughly.
I
RR
11
4. Soak the element in clean engine
oil and squeeze out the excess
oil. NOTE: The engine will smoke
during initial start-up if too much
oil is left in the element.
5. Reinstall the air filter element and
snap air filter cover in place.
OIL
burn. Engine and surrounding parts
Surfaces identified in Figure 1 and 2).
Allow engine to cool prior to servicing.
To Check oil (fig. 2, 12)
1. Place unit on a flat level surface.
2. Remove oil fill/dipstick (L) and wipe
clean.
3. Reinsert oil fill/dipstick fully into
oil fill port and tighten. Allow oil
to collect on the dipstick for a few
seconds.
4. Remove oil fill dipstick to read
oil level. If oil falls below top
of pattern on dipstick, add oil.
NOTE: Patterns may differ
according to engine.
12
NOTE: When filling the crankcase,
allow the oil to flow very slowly. If
the oil is added too quickly, it will
overflow and appear to be full.
5. Replace dipstick and tighten
securely.
To change oil (fig. 2)
NOTE: Engine oil contains substances
that are regulated and must be
disposed of in accordance with local,
state, provincial and federal laws and
regulations.
1. Disconnect spark plug cap.
2. Locate a suitable container under
3. Remove the oil fill/dipstick (L) from
crank case.
5. Allow ample time for all oil to drain
out.
6. Install the oil drain plug.
7. Fill with recommended oil, refer
to Oil Recommendations under
Assembly.


