


Installation 7
2 Installation
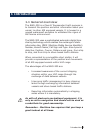
2.1 General
The NAIS-300 is designed to be mounted on a flat surface
somewhere out of sight, but easily accessible. However,
to determine the best possible location, you need to
consider how and where, you are going to run the cabling
from the sides of the unit.
The NAIS-300 is very simple to install, however, the
performance of the equipment is directly affected by the
quality of the installation. Please read these instructions
carefully before attempting installation. If in any doubt,
consult a qualied marine electronics engineer.
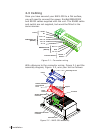
2.2 Mounting
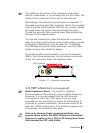
The transceiver requires a at surface with a minimum
area of at least 210mm x 130mm (8.3in x 5.1in) for
mounting, with an overall area of 210mm x 250mm (8.6in
x 9.8in) to allow for cables.
The surface should be rigid and sturdy enough to be able
to support the weight of the unit, taking into account the
shock loads likely to be encountered when the vessel is
under way in heavy seas.
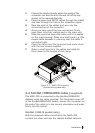
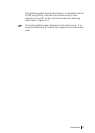
Hold the unit against the surface where it is to be
mounted, and mark the position of the four holes
with a pencil.
Drill a 3.7mm (.145in) hole on each corner mark.
Align the holes on the NAIS-300 with those you
have just drilled, and fasten with the 4 - No.8 x 3/4
self tapping screws supplied.
1
2
3