


(1)
(2)
(3)
(4)
(5)
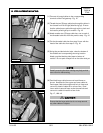
(6) Temporarily put the glove box back into place.
(7)
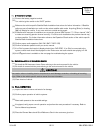
Cut one (1) piece of foam tape in half width-wise. Cut
slit in middle of foam tape piece 1/3 of the length.
Position the iPod cable 25mm (1") to the left measuring
from the center of the left most hole in the upper frame.
Place piece of foam tape over iPod cable and secure to
upper frame of glove box cavity with the slit facing the
front of the vehicle. Fig 14-1 & 14-2
With glove box in place, and the slack pulled into the
box, the distance from the grommet in the glove box to
the iPod end of the cable should be 560mm +/- 25mm
(22in +/- 1in).
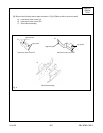
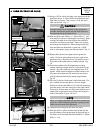
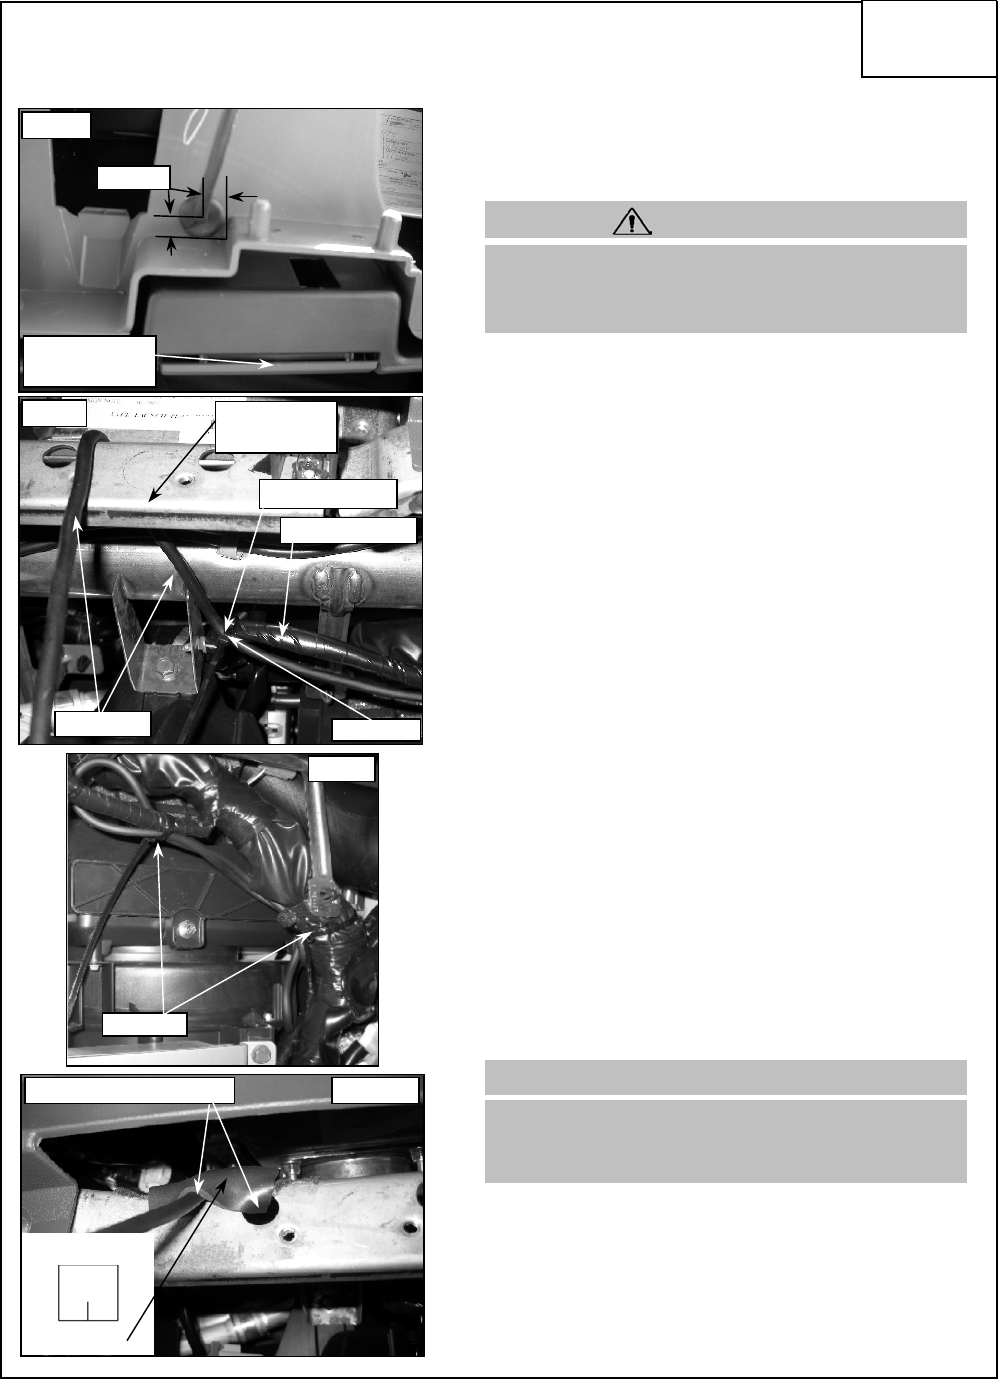
Follow bus cables to the iPod gateway mounting
location allowing enough room for a connection to the
module. Any extra cable can be wrapped into a 8"-9"
bundle. Wrap electrical tape around the bundle in two
(2) places for at least two (2) revolutions and secure
with (2) cable ties behind the nearby large harness.
Fig. 13
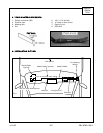
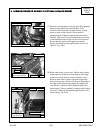
Using a 1/8" bit, drill a pilot hole in the upper part of the
glove box 14mm +/-1mm (0.55in) from both front and
right walls of the box. Then use an 11/16" drill bit to
open up the hole. Fig. 11
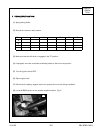
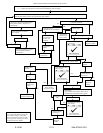
Route cable up and over upper frame of glove box
cavity. Continue routing down and to the right of the
glove box cavity. Secure with one (1) cable tie on the
iPod cable mark made earlier to nearby harness. Fig.
12
Mark the iPod cable 762mm +/- 25mm (30in +/- 1in)
from the iPod connector (rectangular connector). Start
routing iPod cable from inside of glove box with DIN
connector end (round connector). Route out of glove
box through the drilled hole. Place split grommet over
wire and feed into drilled hole in glove box. A PGF
stick or other plastic prying tool may be helpful. Fig. 11
9. CABLE ROUTING (iPOD CABLE):
Fig. 11
14 mm
Fig. 12
cable ties
Fig. 13
cable ties
Fig. 14-2
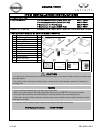
ARMADA,
QX56 &
TITAN
Accurate measuring is important in this step due to
possible interference issues with the iPod cable and
the opening/closing of the glove box.
CAUTION
When re-installing the glove box any slack needs to be
pulled out. When lifting the glove box in place pull the
cable from the inside of the glove box.
NOTE
iPod cable
frame of glove
box cavity
iPod cable mark
nearby harness
position 1" to left of hole
foam ta
p
e
Fig. 14-1
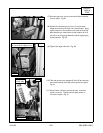
glove box latch
release handle
3.14.06 7/11 284-9798-100-I1