


【Note】 The device has a built-in, irreplaceable lithium battery. To avoid the
risk of fire or burning, please do not open, perforate, hit the battery or discard it
in fire or water. The battery will burst, blast or release dangerous chemicals.
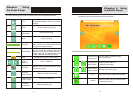
When the charge indicator switches on (blue light), it indicates that the
navigation device is in a charging state. Charging requires a few hours, please
be patient and do not cut off power until the blue light is off. When the charge is
completed, remove the adaptor plug from the mains supply.
For later use, when the battery power decreases or is exhausted, please
charge it promptly.
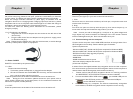
1.2.2 Charging by car adapter:
1. Plug one end of the car adapter into the socket on the left side of the
device body;
2. Plug the other end of the car adapter into the ignition to supply power
for S3 while charging.
【Note】Please plug the adapter only after the vehicle starts, to avoid damage
caused by instant power impact on equipment.
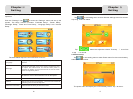
1.3 Power ON/OFF
ON/OFF is controlled by the power button.
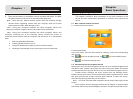
1.3.1 ON:
Please check the following:
1.The battery power is adequate, or plugged into the adapter,
2.SD card is inserted into the SD/MMC slot correctly, and the inserted SD
card has the system operating program.
Press the power button at the back of the machine to turn the device on.
【 Note】 During the first orientation please choose an open space with no
upper shelter; Please stay at the same place, for the orientation needs a few
minutes to complete, so wait patiently.
1.3.2 OFF:
Press the power button at the back of the machine to turn the device off.
Chapter Ⅰ
8
1.4 Using the touch pen
The touch pen (stylus) is your tool to communicate with S3.
1. Click:
Click on a menu on the screen with the tip of touch pen, to open the menu and
use the menu functions.
2. Drag:
First click one point on the map with the pen tip, then move the pen tip, to
move within the map and locate the map position you wish.
【Note】A touch pen with a damaged tip, a ball pen or any other edged and
rough object may cause scratches and damage of the LCD screen. Please
use an undamaged touch pen. Don't use a broken touch pen
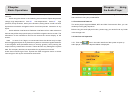
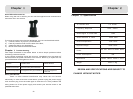
1.5 Communicating with the computer
Connect to the computer via the MINI USB interface at the right side of the
GPS navigation device body. See the below figure for details:
System requirements:
-Windows 98SE, ME, 20000 and XP(Driver required for Windows 98SE)
-Windows 98SE, ME, 20000 and XP(Driver required for Windows 98SE)
-DVD Rom Drive(for map upgrade purposes)
-Intel PentiumII 233Mhz
-64MB RAM
-50MB available hard drive space
-256-color display adapter and monitor
(16 bit color required)
It allows files to be copied between the navigation device and the computer.
You can also back-up files from the GPS navigation device io the computer to
restore data to the GPS navigation device when necessary.
1. Please confirm that the GPS navigation device is in working condition
and MICROSOFT ACTIVESYENC software has been installed.
2. Connect the MINI USB of USB cable [ ] to the MINI USB port on
the left side of the GPS body, and the connect standard USB port
[ ] to the USB Host of computer;
3. After connecting to a computer, the device automatically recognizes
new hardware; the GPS navigation device suspends current running
Chapter Ⅰ
9