


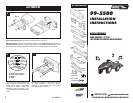
3
4
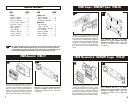
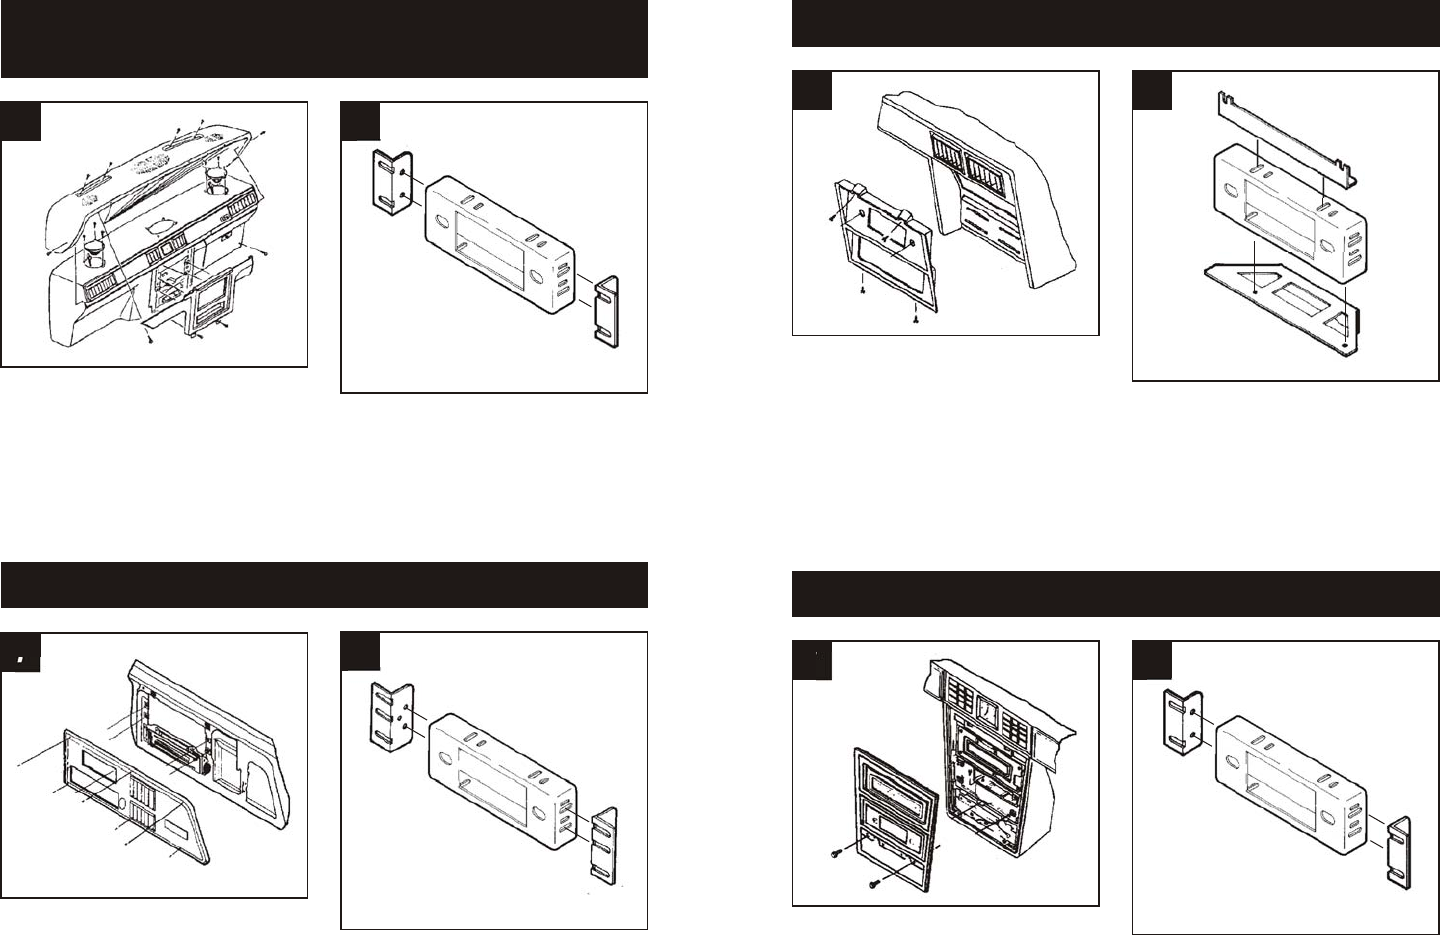
Disconnect the negative battery terminal to
prevent an accidental short circuit. Open
the ashtray and remove (2) screws exposed.
Unclip the dash trim bezel and remove the
radio dummy plate. Place (4) U-nuts over
the mounting positions in the sub-dash.
1
FORD Crown Victoria 1984-90
MERCURY Grand Marquis 1984-90
2
Disconnect the negative battery terminal to
prevent an accidental short circuit. Remove
(3) screws from the lower edge of the dash
trim bezel. Remove (2) screws above the
radio opening. Unsnap the right corner of
the dash trim bezel, disconnect the cigarette
lighter wiring and remove the bezel.
Remove the screws securing the factory
head unit and disconnect the wiring.
1
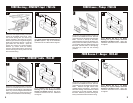
FORD Econoline 1975-91
2
Disconnect the negative battery terminal to
prevent an accidental short circuit. Remove
(4) screws from the top edge of the radio trim
bezel. Remove (2) screws from the bottom
edge of the radio trim bezel. Remove the
climate control knobs and unclip the bezel.
Remove (4) screws securing the factory
head unit and disconnect the wiring.
FORD Escort / MERCURY Lynx 1985-90
21
Disconnect the negative battery terminal to
prevent an accidental short circuit. Remove
the ashtray and climate control knobs.
Remove (2) screws from the bottom of the
dash trim bezel. Lift up on the bottom of the
bezel and remove. Remove the screws
securing the factory head unit and
disconnect the wiring.
1
FORD LTD / MERCURY Marquis 1983-86
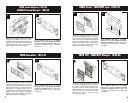
2
Mount Bracket Set #1 to the Radio
Housing with (4) 3/8" Phillips Flat-head
Screws and (4) Nuts supplied. Skip to the
Installation Instructions for ALL VEHICLES
on Page #7.
Mount Bracket Set #2 to the Radio
Housing with (4) 3/8" Phillips Flat-head
Screws and (4) Nuts supplied. Skip to the
Installation Instructions for ALL VEHICLES
on Page #7.
Mount Bracket Set #4 to the Radio
Housing with (4) 3/8" Phillips Flat-head
Screws and (4) Nuts supplied. Skip to the
Installation Instructions for ALL VEHICLES
on Page #7.
Mount Bracket Set #1 to the Radio
Housing with (4) 3/8" Phillips Flat-head
Screws and (4) Nuts supplied. Skip to the
Installation Instructions for ALL VEHICLES
on Page #7.