


®®
WARNING
• Gasket installs only one way and must be properly aligned to the
tank and sensor for proper operation
• Use only supplied gasket – other gaskets may obstruct and
render device inoperative – do not use silicone sealant around
the gasket
• Use only Maretron adapters – others may have wrong diameter,
rendering device inoperative
• Tank must have no obstructions within 6° beam angle (for
example baffles, clean outs, fill or vent pipes
Revision 1.2 Page 5
• Tighten the bolts mounting the TLM150 to a torque of 10-15 in-l
(1.1-1.7 N·m). Over torquing the mounting bolts can result in
erratic or inaccurate depth readings
bs
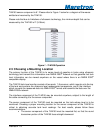
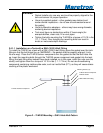
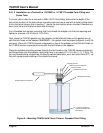
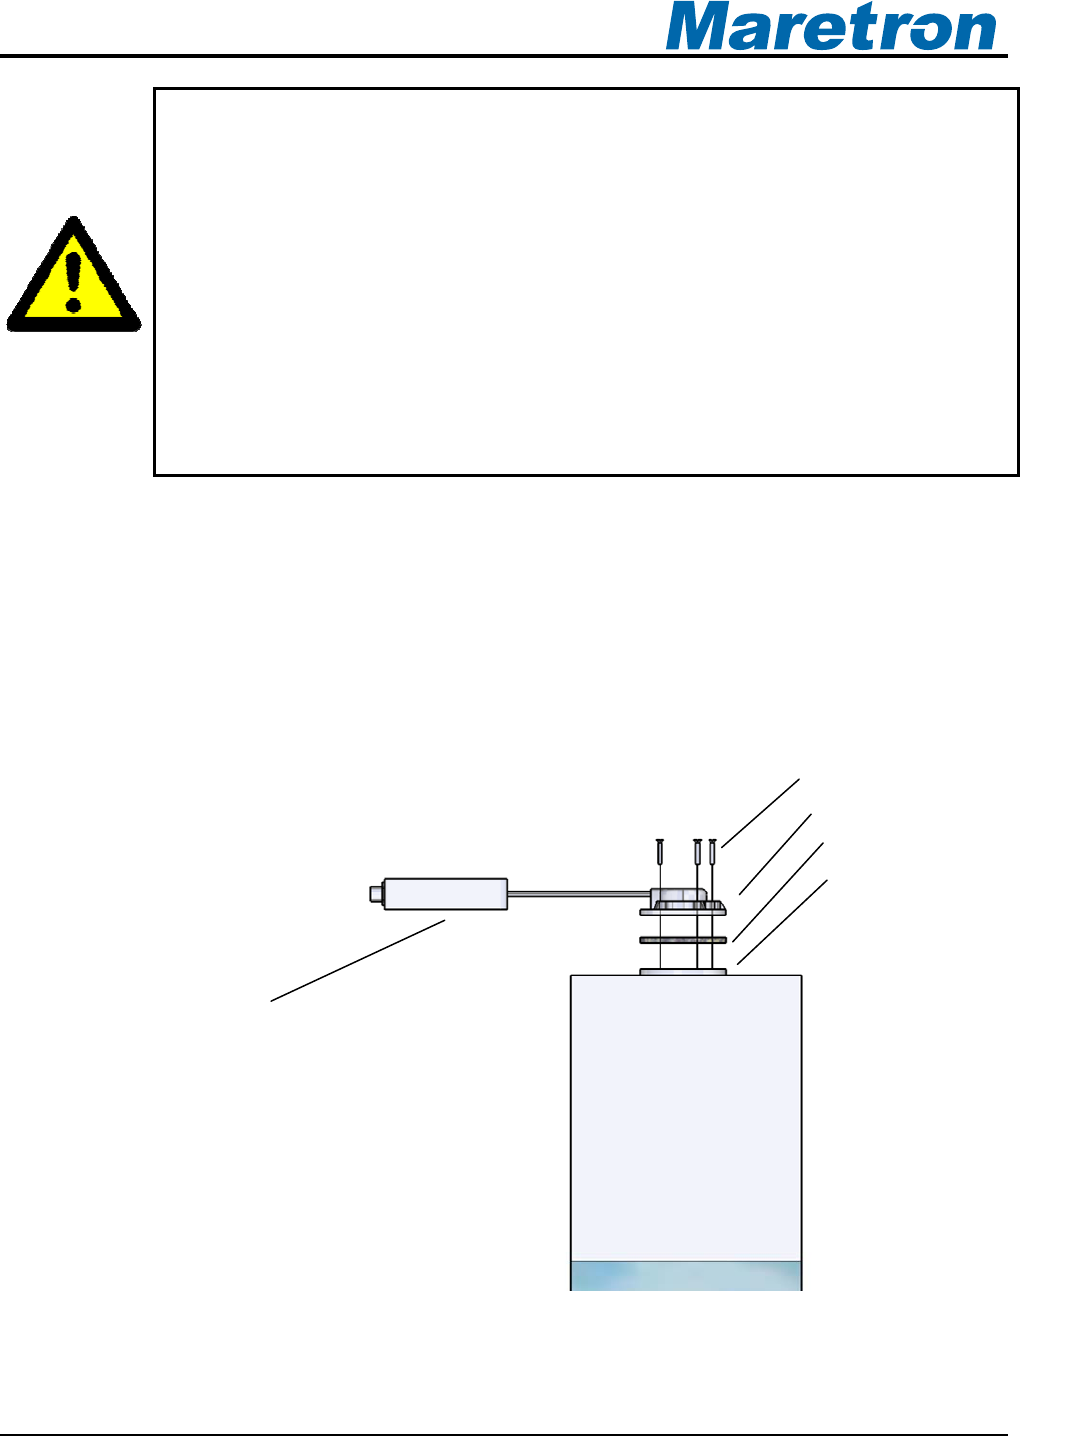
2.4.1.1 Installation on a Tank with a SAE J1810 5-Bolt Fitting
To install the TLM150 on a tank with a SAE J1850 5-bolt fitting, place the gasket over the tank
fitting so that the bolt holes line up (WARNING – the gasket must be properly aligned; it only
fits one way). Place the TLM150 sensor component over the gasket so that the bolt holes line
up. Insert the mounting bolts through the TLM150 sensor component and gasket into the tank
fitting (the tank fitting may instead have studs installed, so in this case, install the nuts over the
studs), and tighten them to a torque of 10-15 in-lbs (1.1-1.7 N·m). Do not use threadlocking
compounds containing methacrylate ester, such as Loctite Red (271), as they will cause stress
cracking of the plastic enclosure.
Mounting Screws (x5)
TLM150 Sensor Component
TLM150 Interface Component
TLM150 Gasket
SAE 5-Bolt Tank Fitting
Figure 2 – TLM150 Mounting – SAE 5-Hole Bolt Pattern