


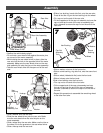
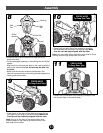
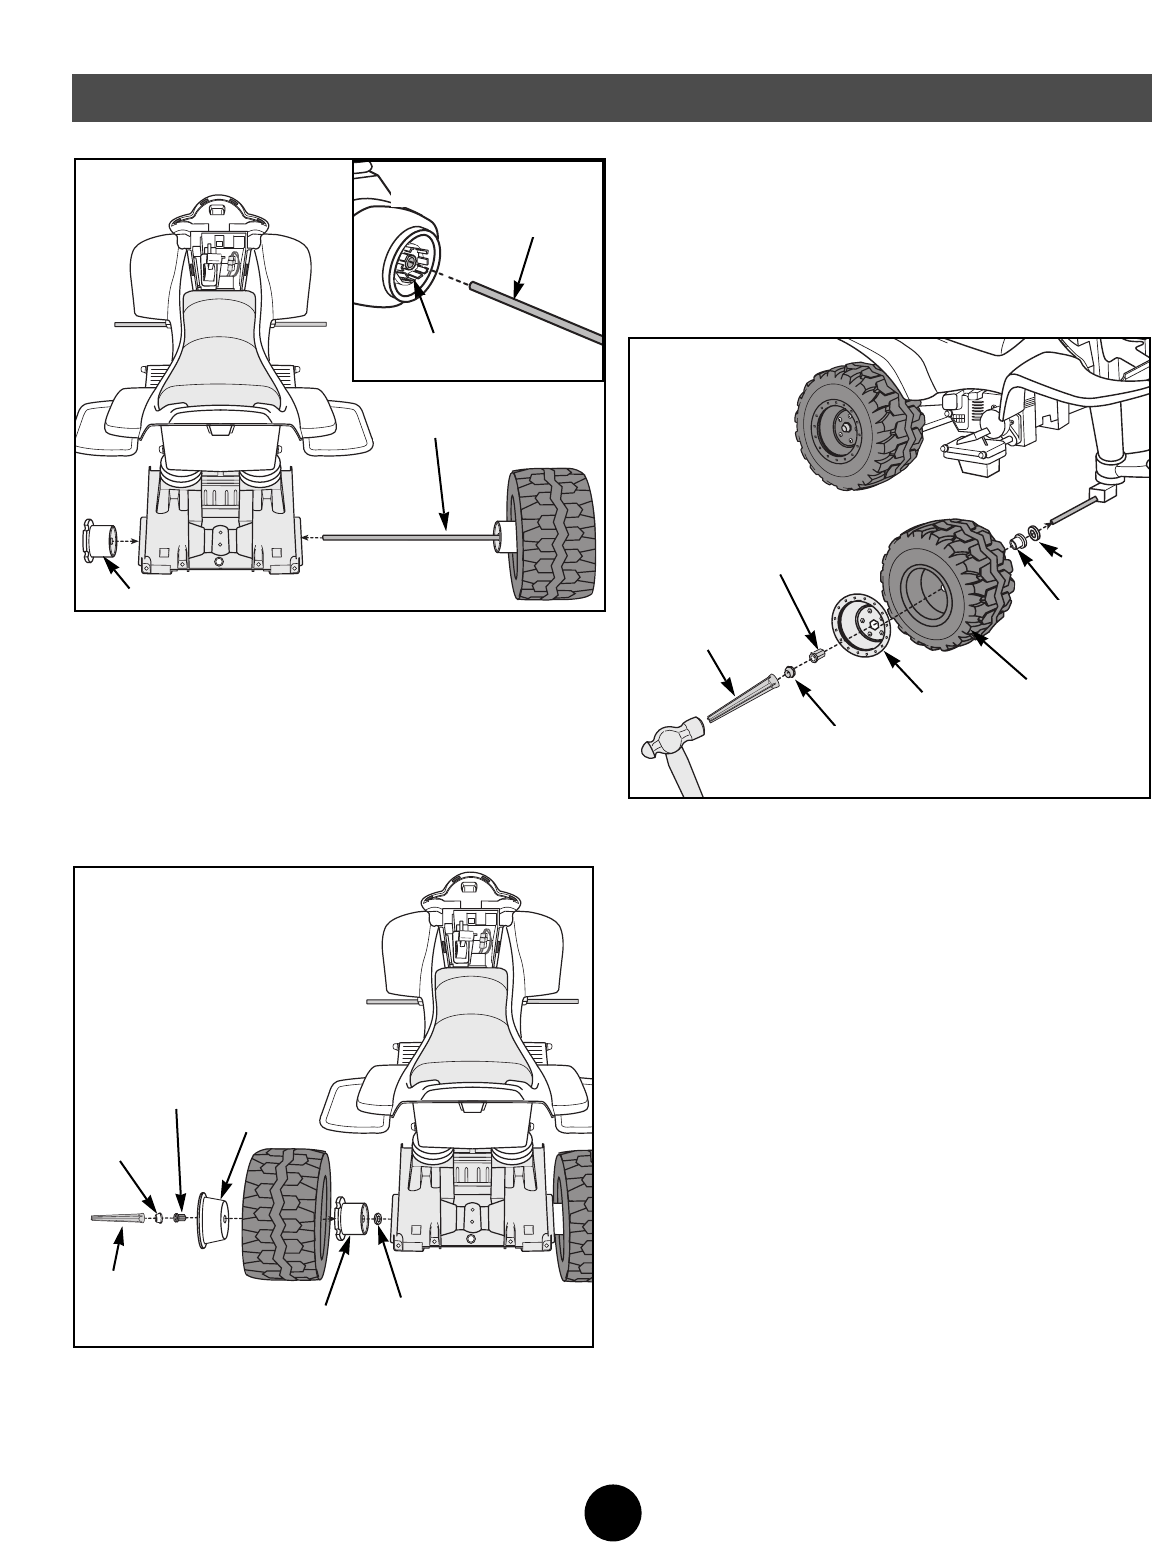
• Slide a washer onto one of the front axles.
• Slide a round bushing, ring side first, onto the same front
axle.
• Slide a wheel (ribbed side first) onto the front axle.
• Slide a hubcap onto the front axle.
•Slide a hex bushing onto the front axle.
• Fit a cap nut on the end of the front axle.
• Fit the cupped end of the cap nut assemby tool over
the cap nut and tap the end of the cap nut assembly
tool with a hammer to secure the cap nut on the end of
the axle.
• Repeat this procedure to assemble the remaining wheel
to the other front axle.
7
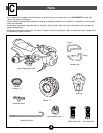
Wheel
Round
Bushing
Washer
Hubcap
Hex Bushing
Cap Nut
Assembly
Tool
Cap Nut
10
Assembly
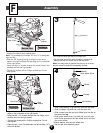
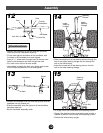
• Position the vehicle body upright.
• Fit and hold a rear wheel driver against the motor pins
on one end of the motor assembly.
• While holding the rear wheel driver in place, slide the
rear axle into the hole in the opposite side of the motor
assembly. Make sure the rear wheel driver on the rear
axle assembly fits onto the pins on the motor assembly.
• Take the rear wheel driver off the open end of the rear
axle.
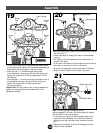
• Slide a hex bushing, barrel side first, onto the rear axle.
Press all but the ring on the hex bushing into the wheel.
• Fit a cap nut on the end of the rear axle.
• Fit the cupped end of the cap nut assembly tool over the
cap nut and tap the end of the cap nut assembly tool
with a hammer to secure the cap nut on the end of the
rear axle.
5
6
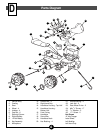
Rear Axle Assembly
Washer
Rear
Wheel Driver
Hex
Bushing
Cap Nut
Cap Nut
Assembly Tool
Hubcap
Rear Axle
Motor Assembly Pins
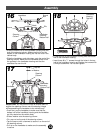
• Slide a washer onto the rear axle.
• Slide the rear wheel driver onto the rear axle. Make
sure the rear wheel driver fits onto the pins on the
motor assembly.
• Slide a wheel onto the rear axle. Make sure the ribs on
the wheel fit into the grooves on the rear wheel driver.
• Slide a hubcap onto the rear axle.
Rear Wheel Driver